Can Silvestre - Girona, Spain
While not specifically a ceramics residency, I intended to spend an entire month working to ground myself in the functionality and historicity of ceramics.
I would embark on harvesting resources from nature and processing them using the most fundamental techniques to create functional pottery.
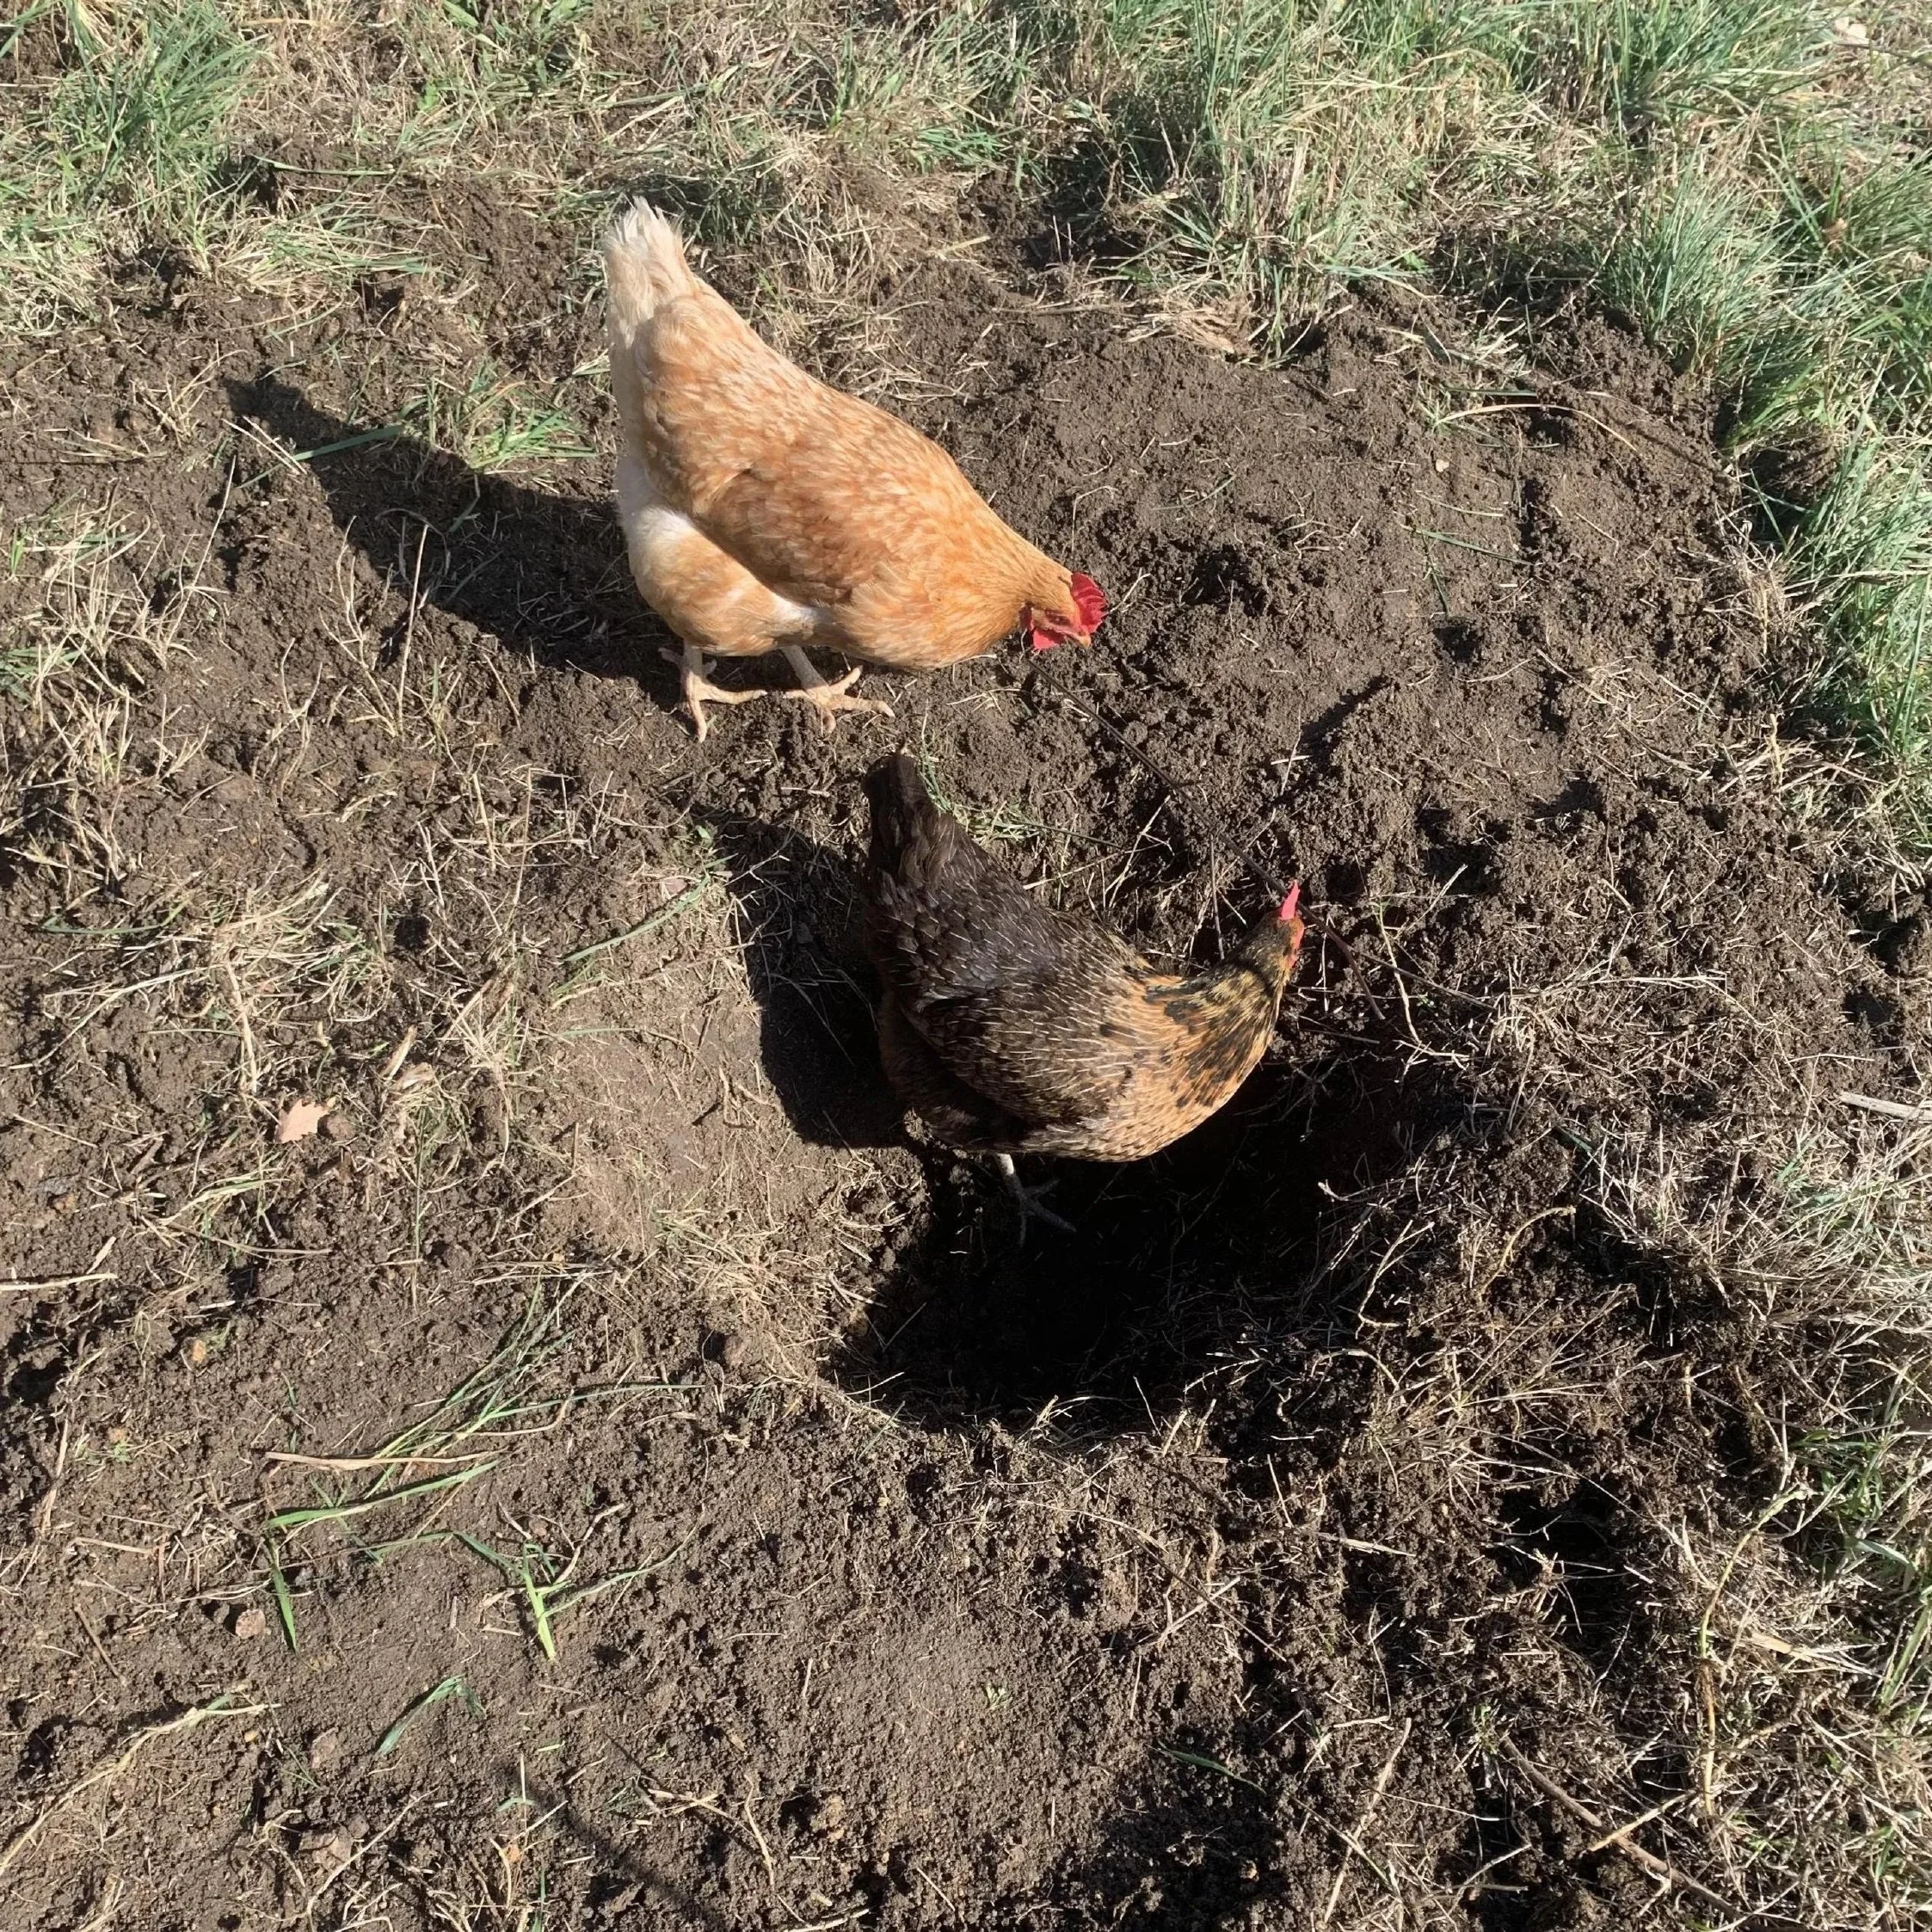
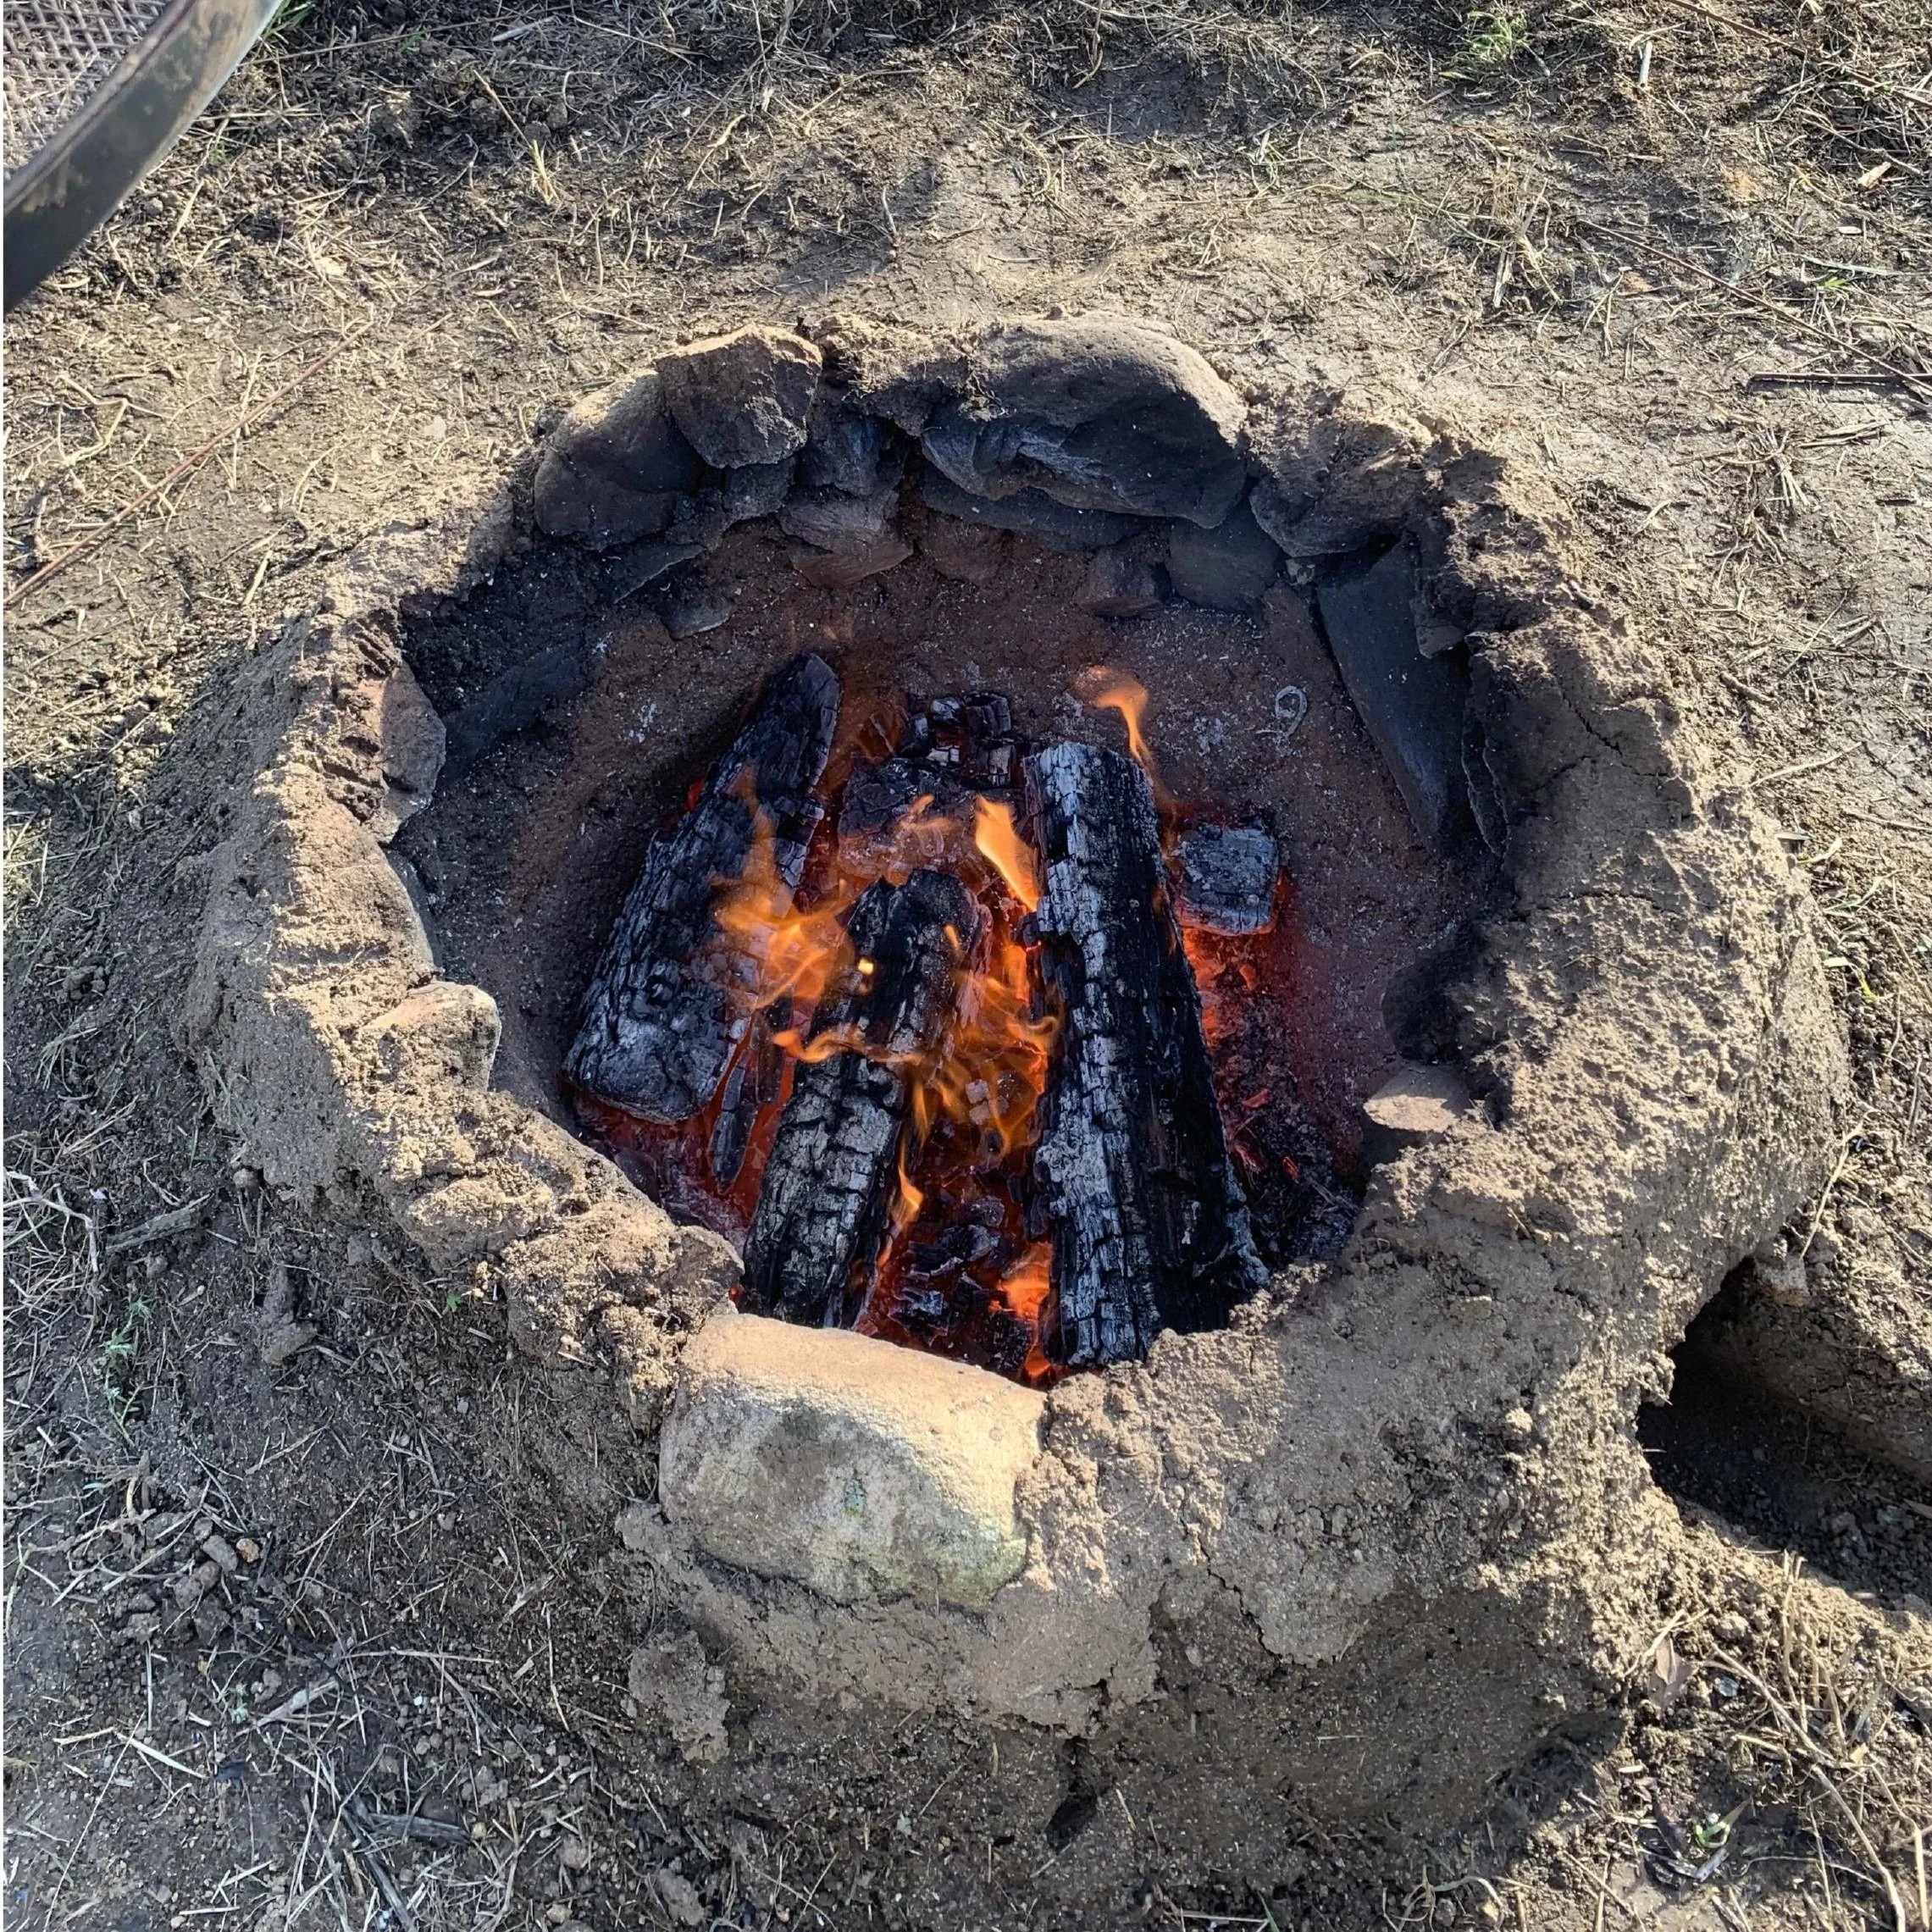
Working under constant guidance from the on-site supervisors pictured here, I began digging a pit kiln.
Pit fires are famously tough on clay, often leading to cracks and explosions from the rapidly shifting temperature range. Much can be controlled by preheating pieces and adding temper (sand) to a clay body to help strengthen the piece.
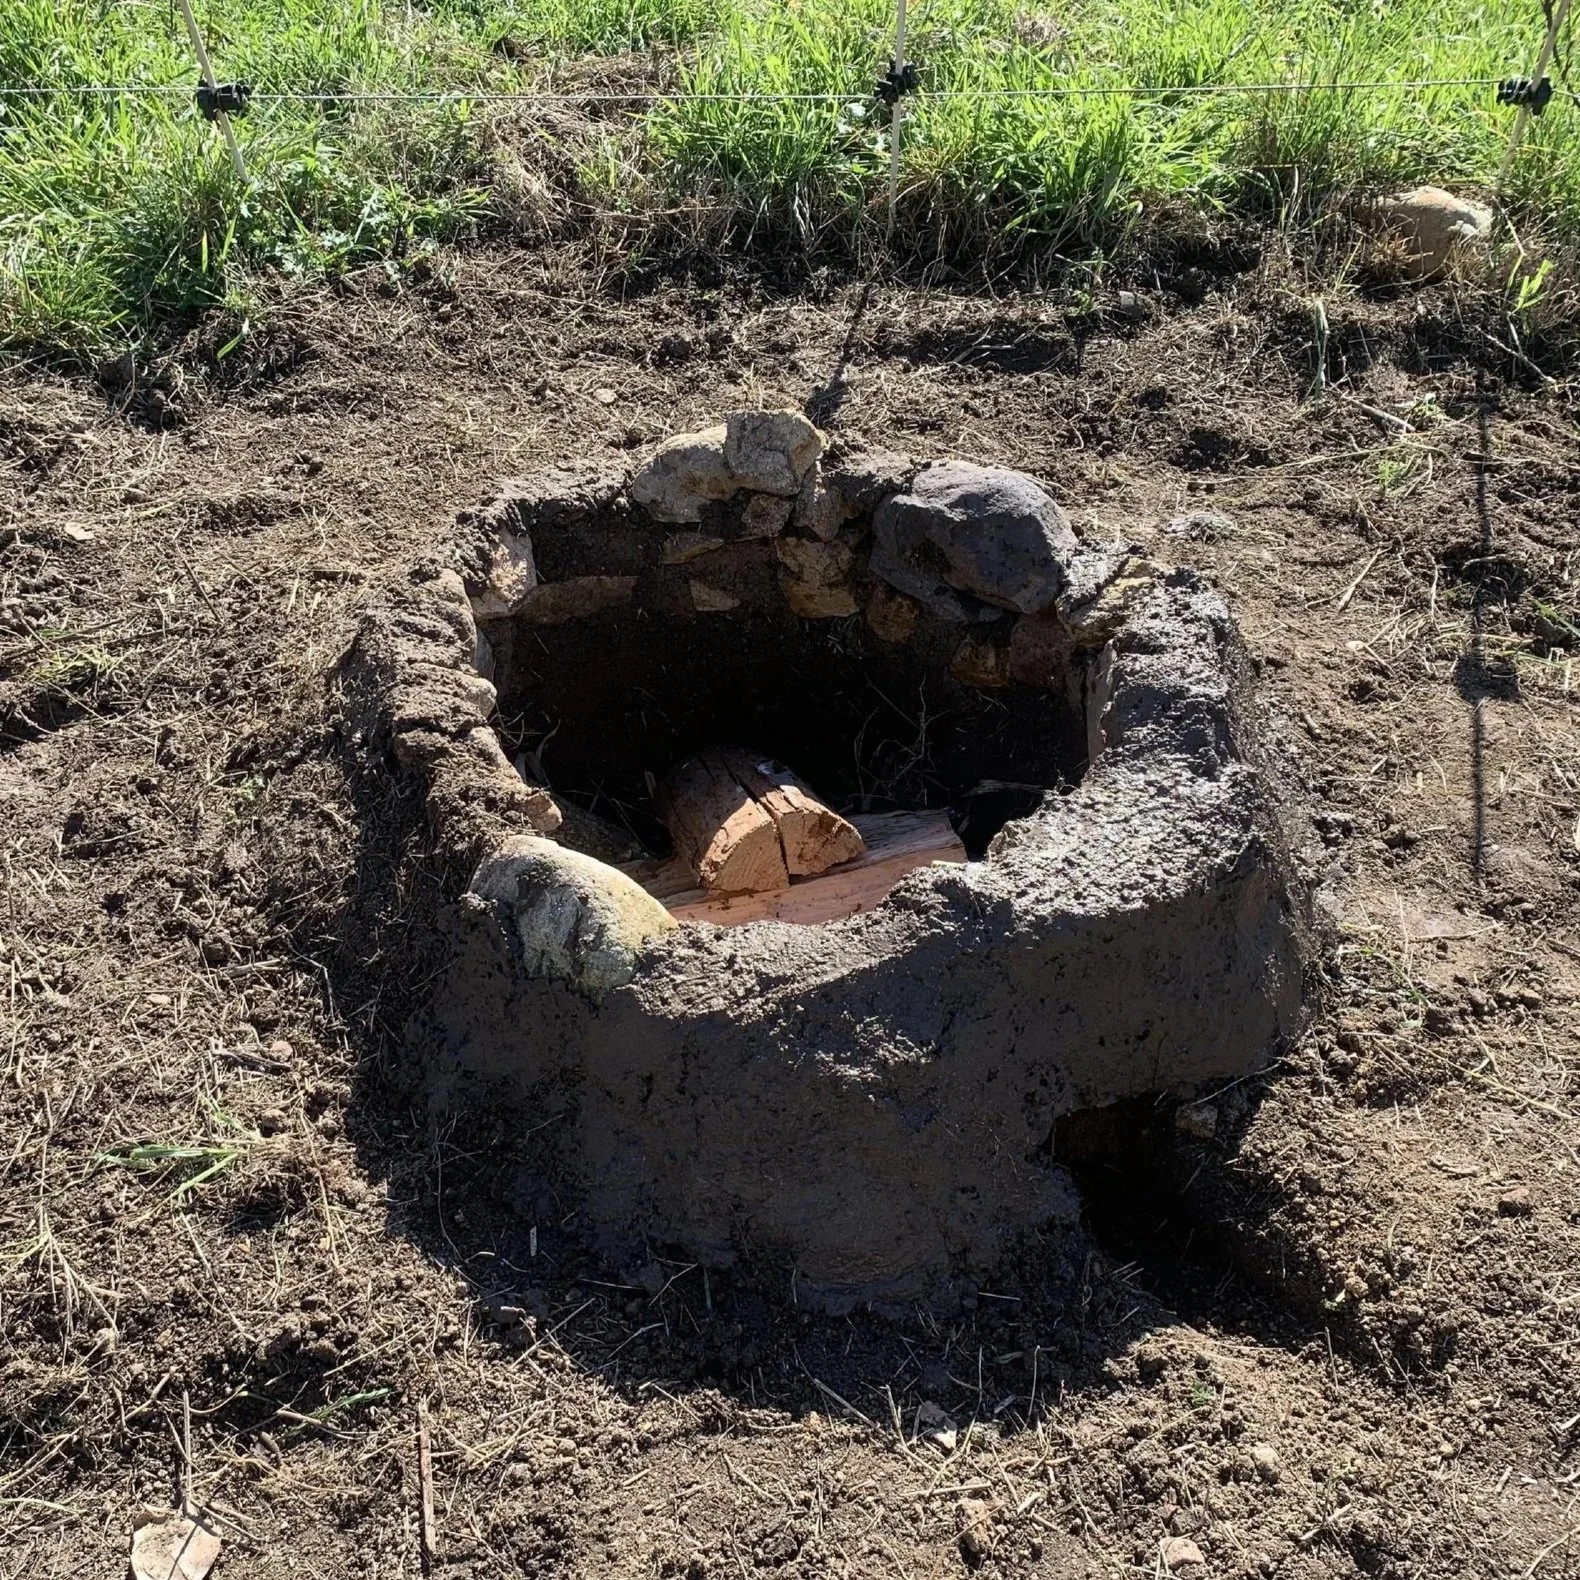
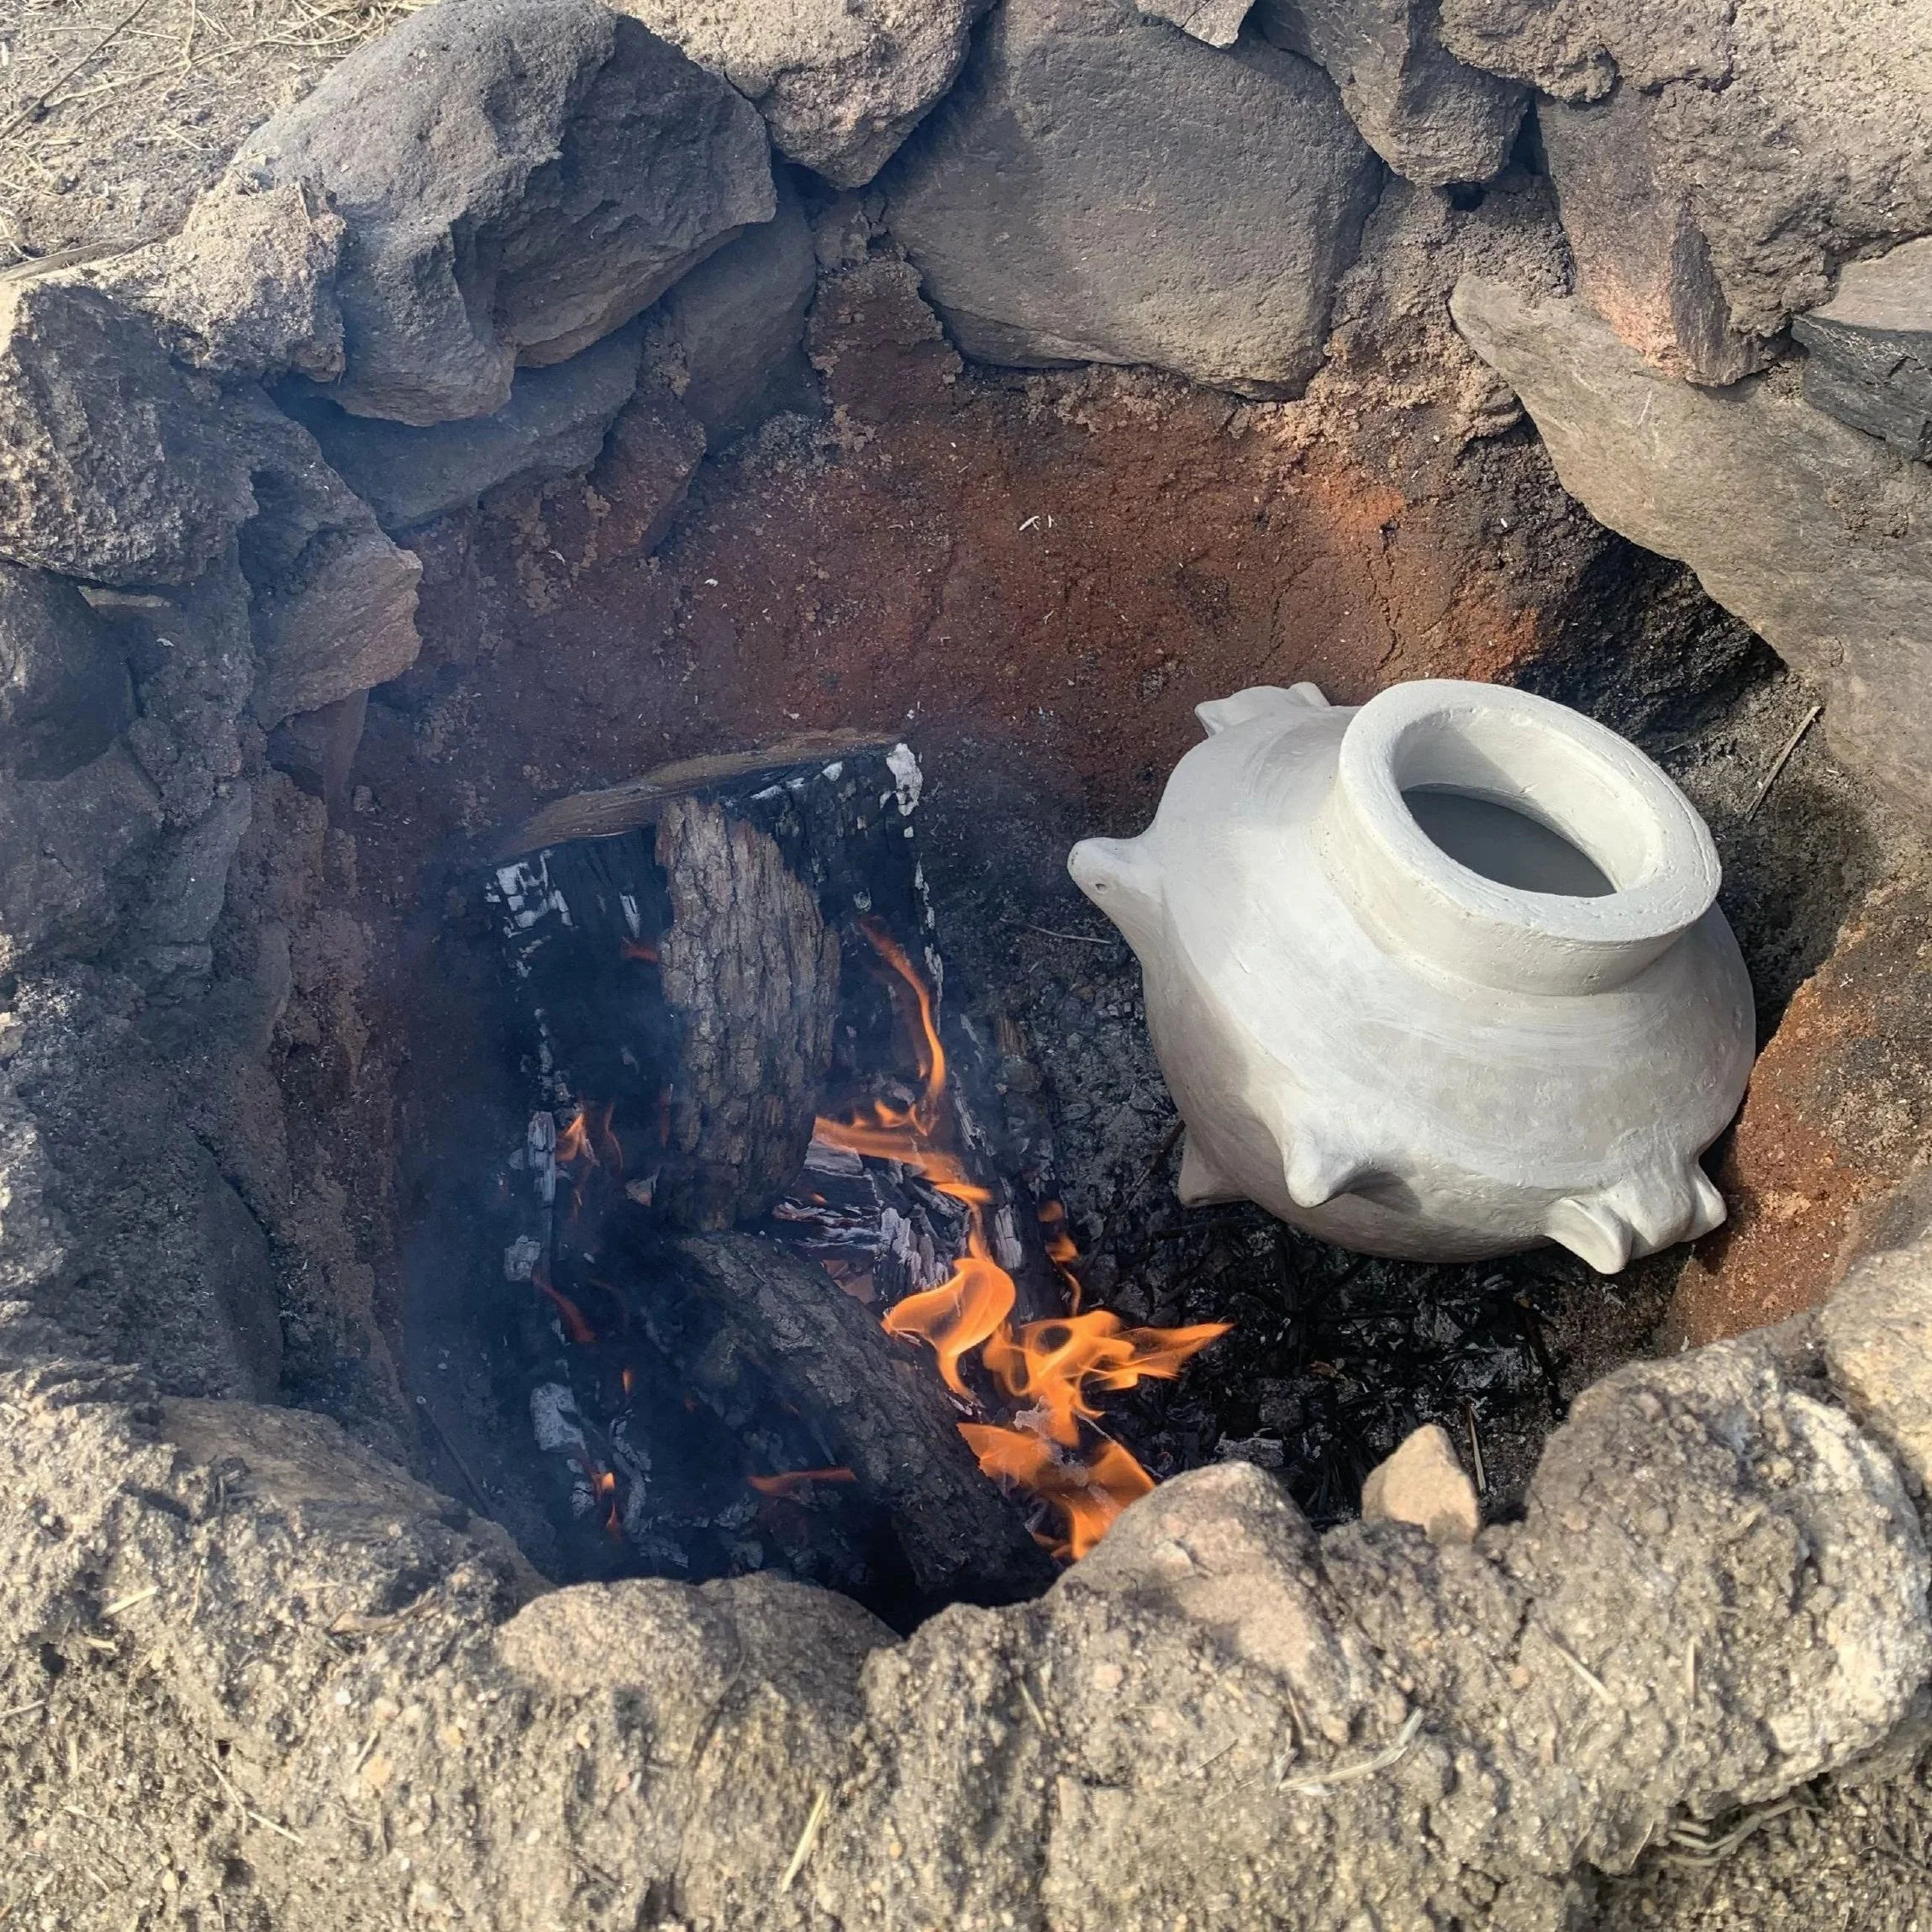
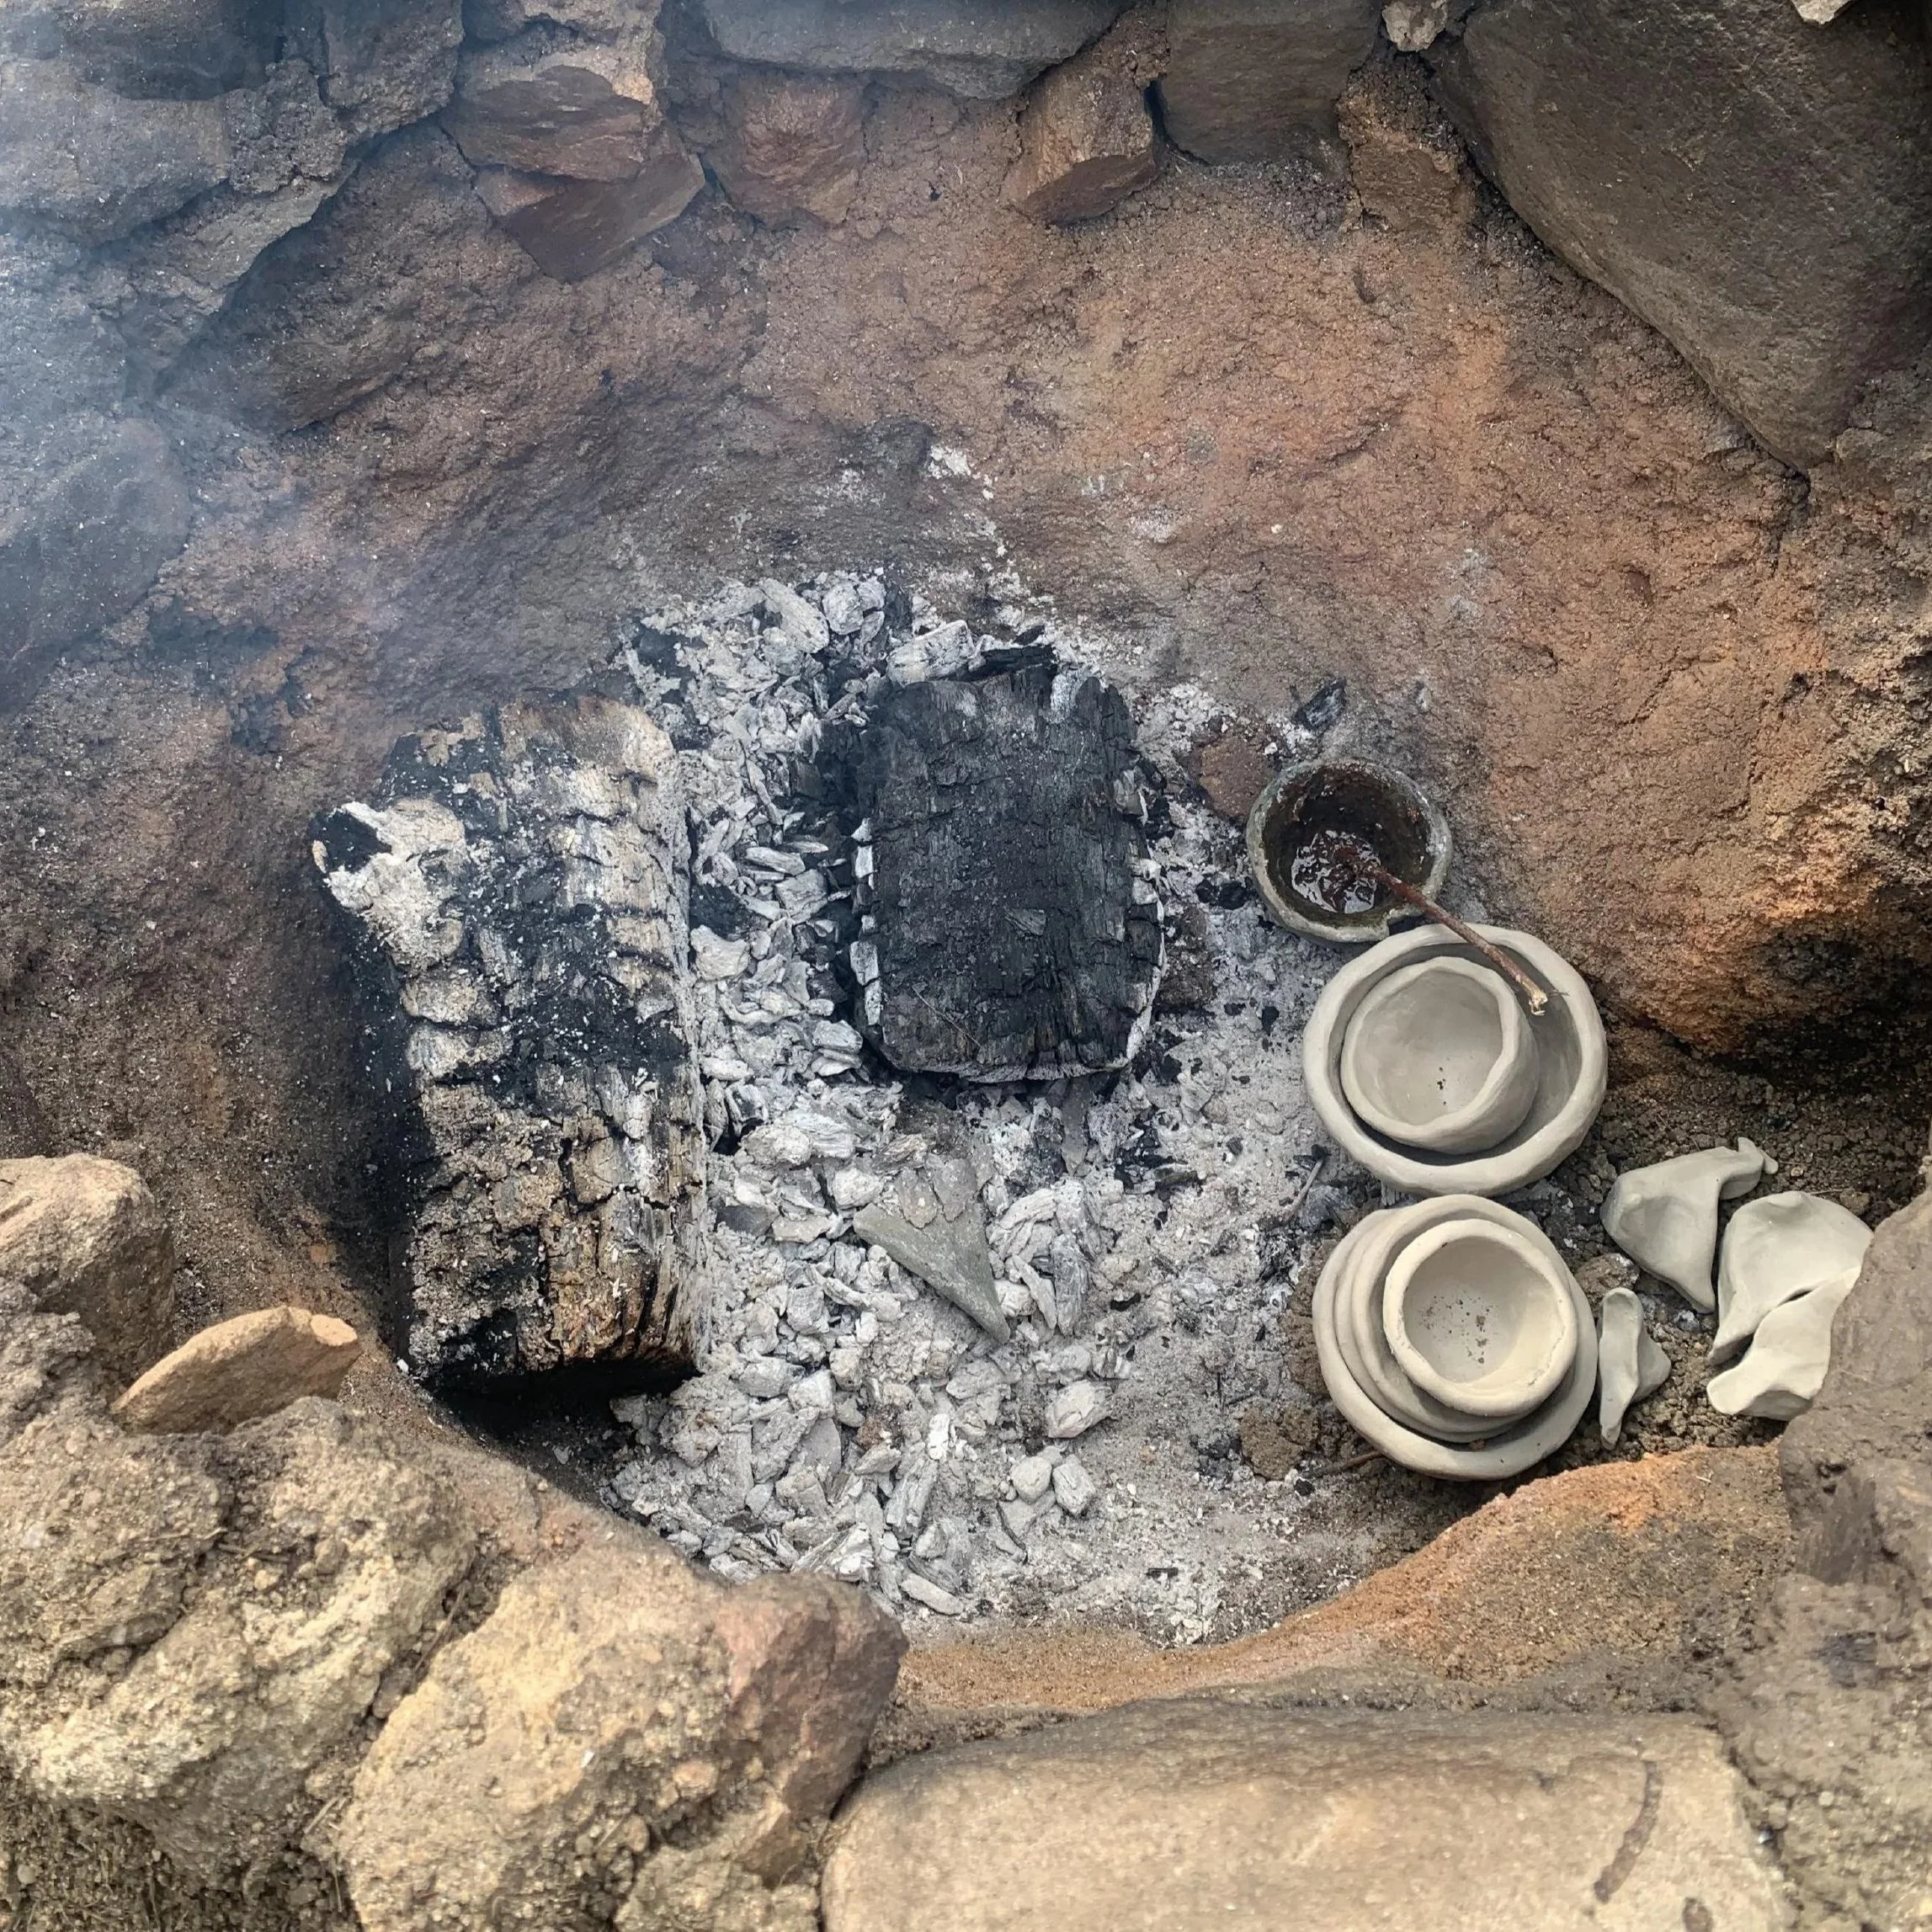
After coating the outside of the exposed stone of the kiln with mud to improve insulation, I started the preheating process. Burning a few logs so I could have a bed of warm coals and a low fire on one side of the kiln. I then laid dried and unfired pottery on the other side and slowly pushed it towards the center.
After taking a temperature reading near the center and seeing it was ~1600 F (900 C) I held it for some time, hoping it would allow for the pottery inside to be heated to a roughly uniform temperature. I then let the fire ebb and covered the ashes for an overnight cool.

The Experience
While many of my attempts were unsuccessful, the fact that I was able to create some functional pottery in a crude kiln amazes me. It was a wonderful hands-on way of learning why certain processes are done in specific ways in the world of ceramics. An example of which is why kilns only heat up so fast as rule I’ve known for some time, but watching my pieces pop because of thermal shock, trapped water vapor, and differential shrinkage really drives homes the point.
The beauty I can derive from the process itself is not without import. The stocking a pit-kiln with logs as I watch my cups sink deep into red hot ash. Scraping chunks of hardened pine-resin into a cup I made to be heated for application. Cleaning sand to remove rocks and organic debris so my clay was just a little bit stronger for rough firings. Picking up and breaking chunks of cork bark from the ground so I could see the familiar spongy material inside.
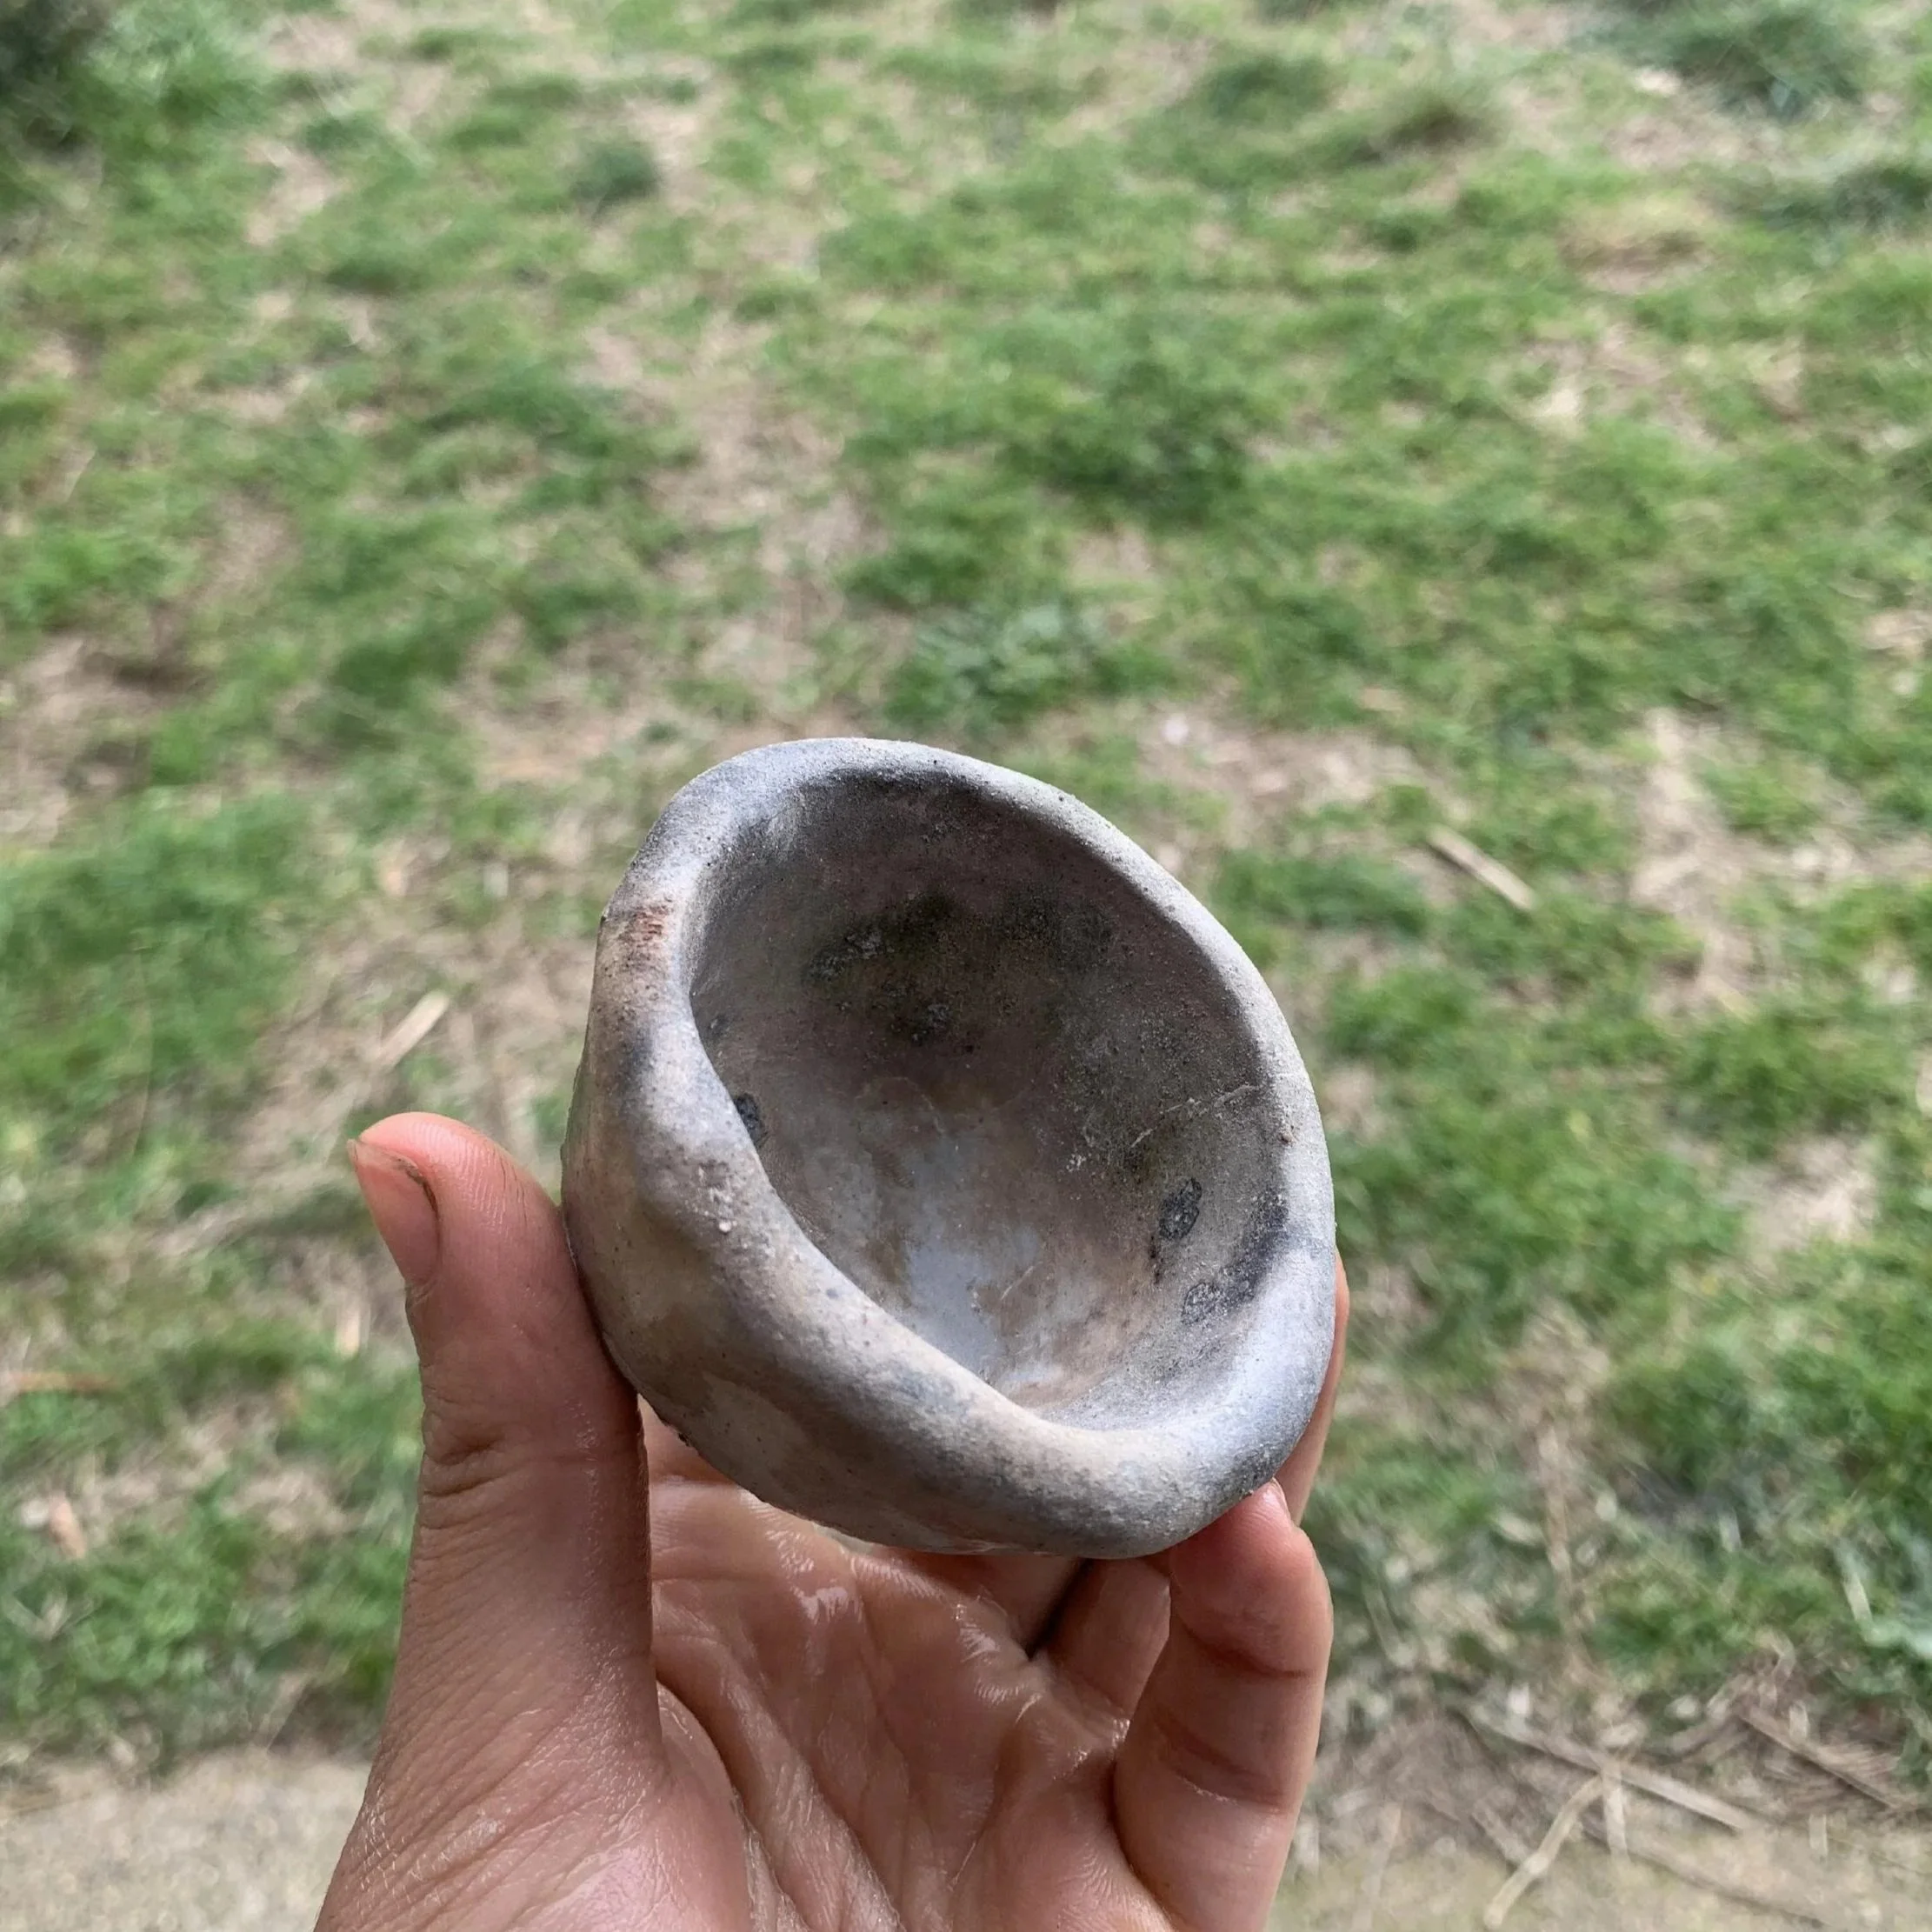
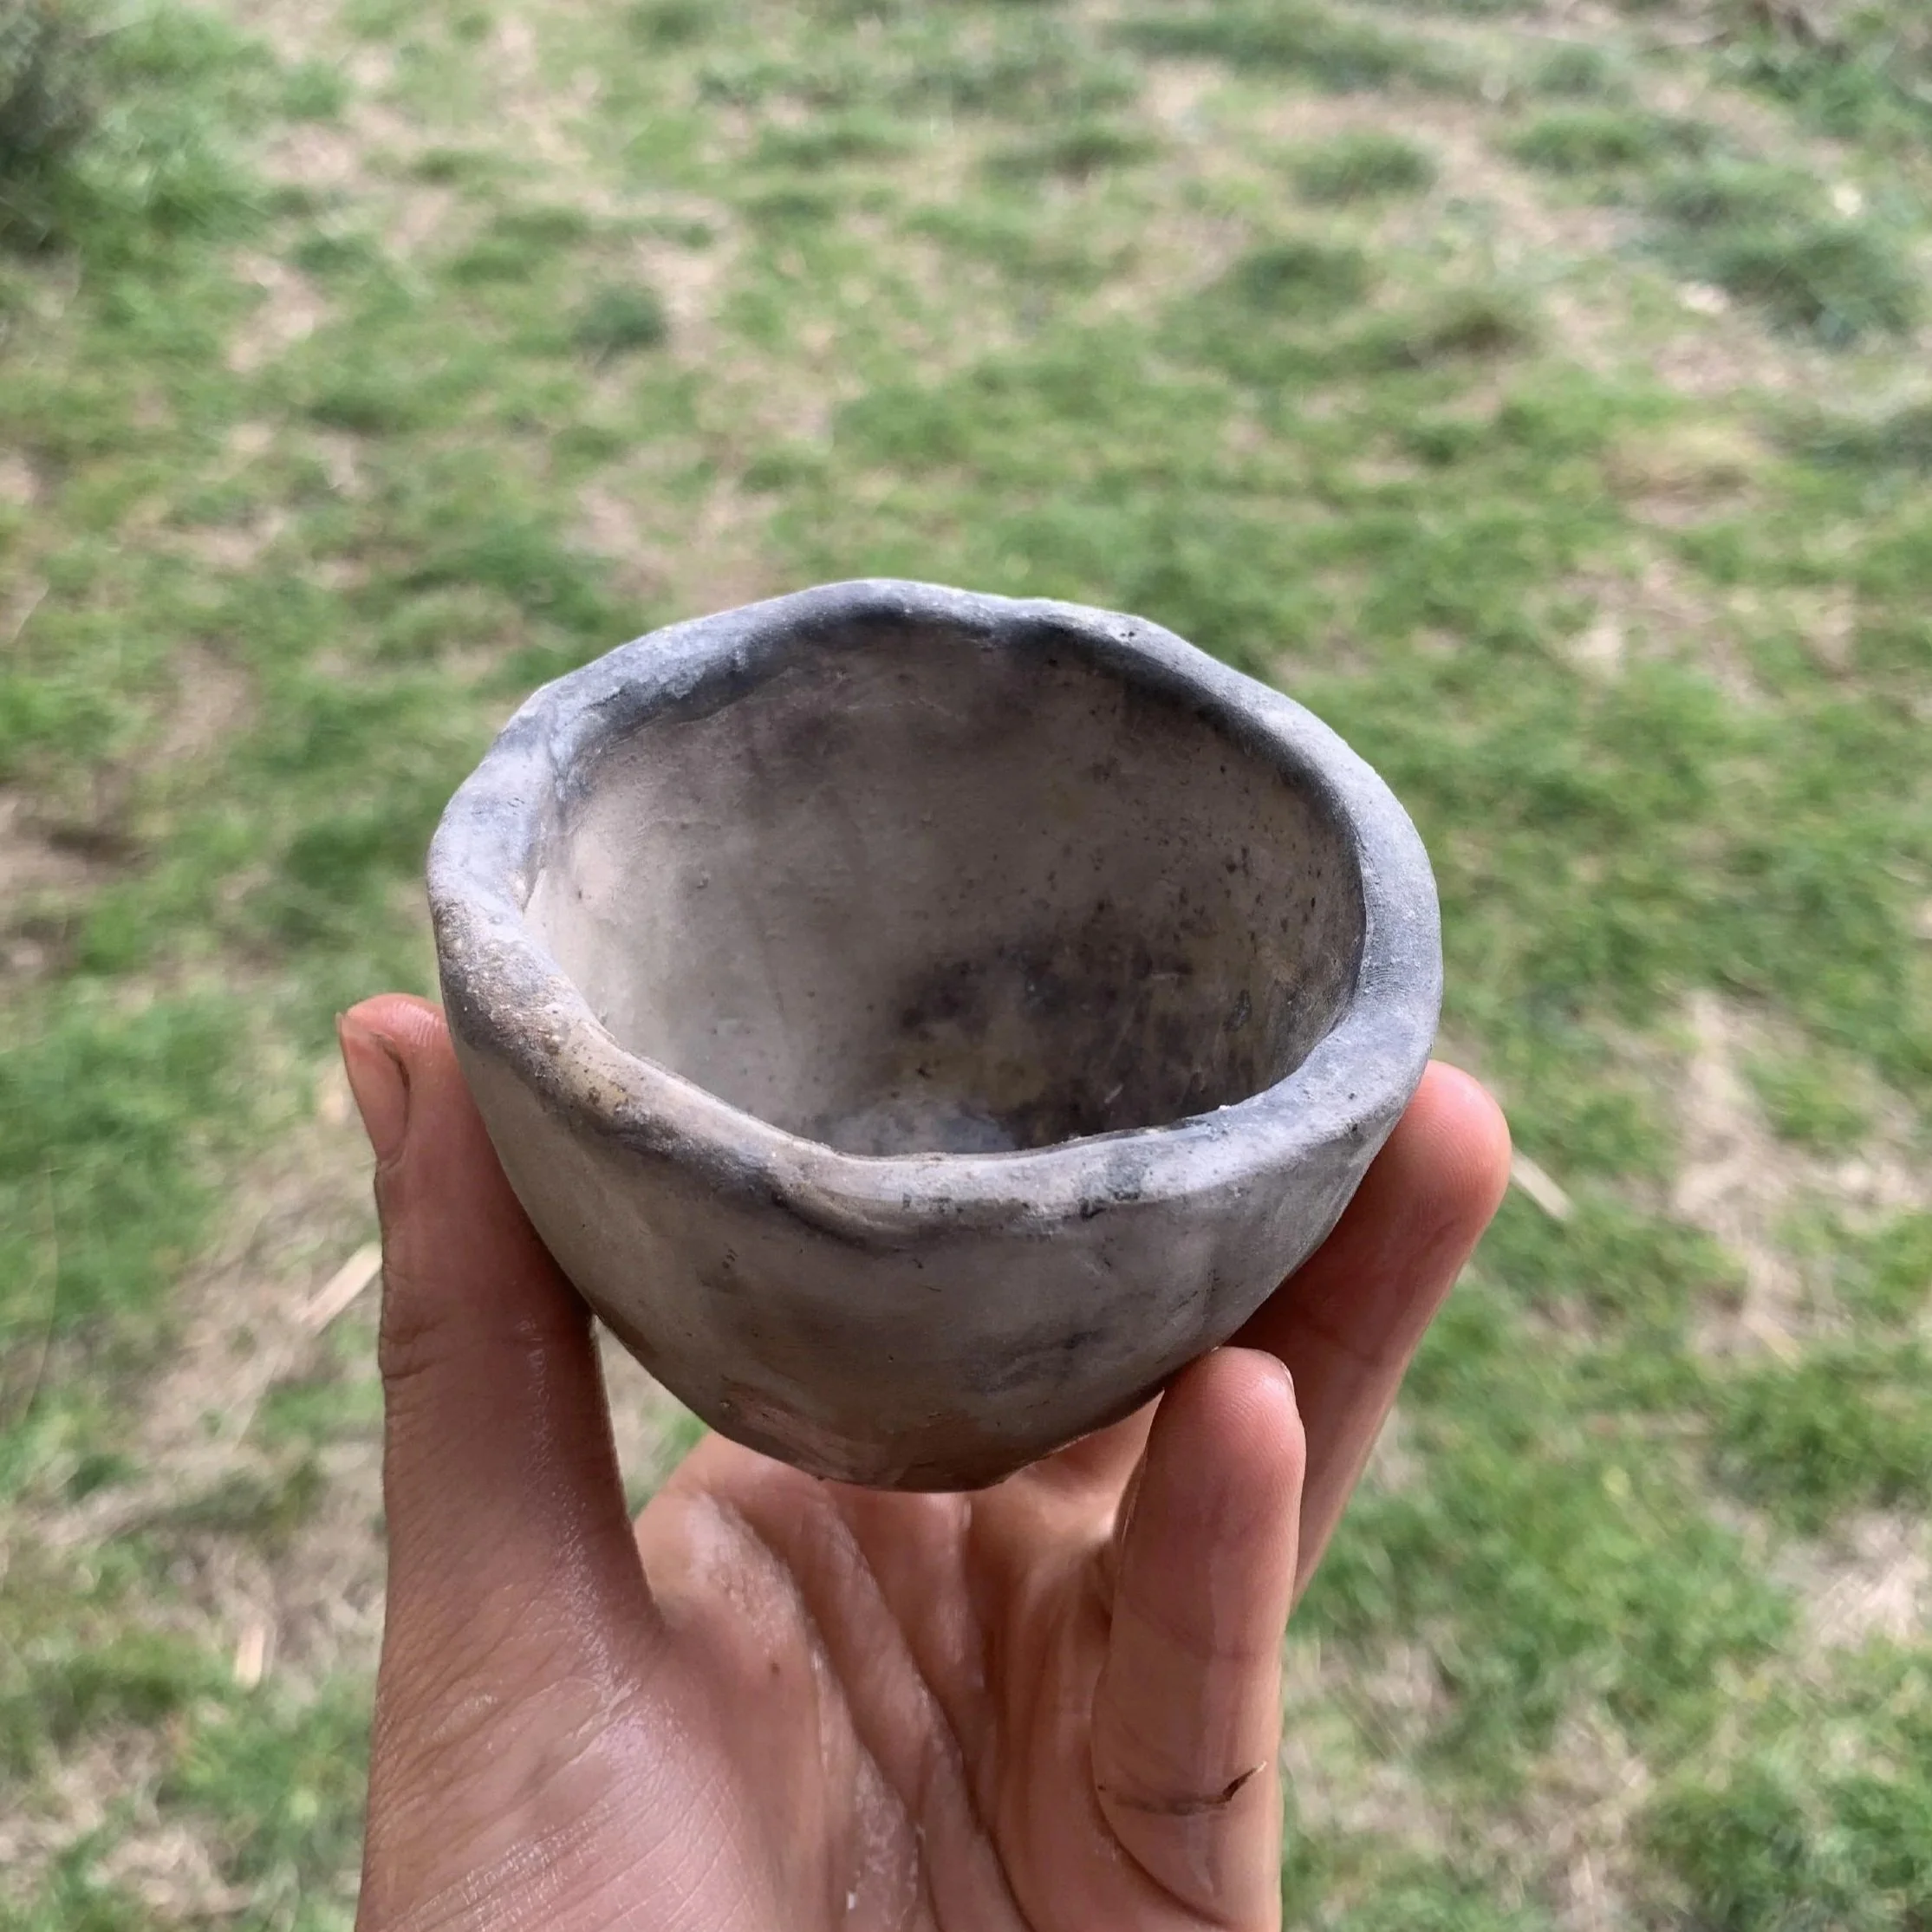
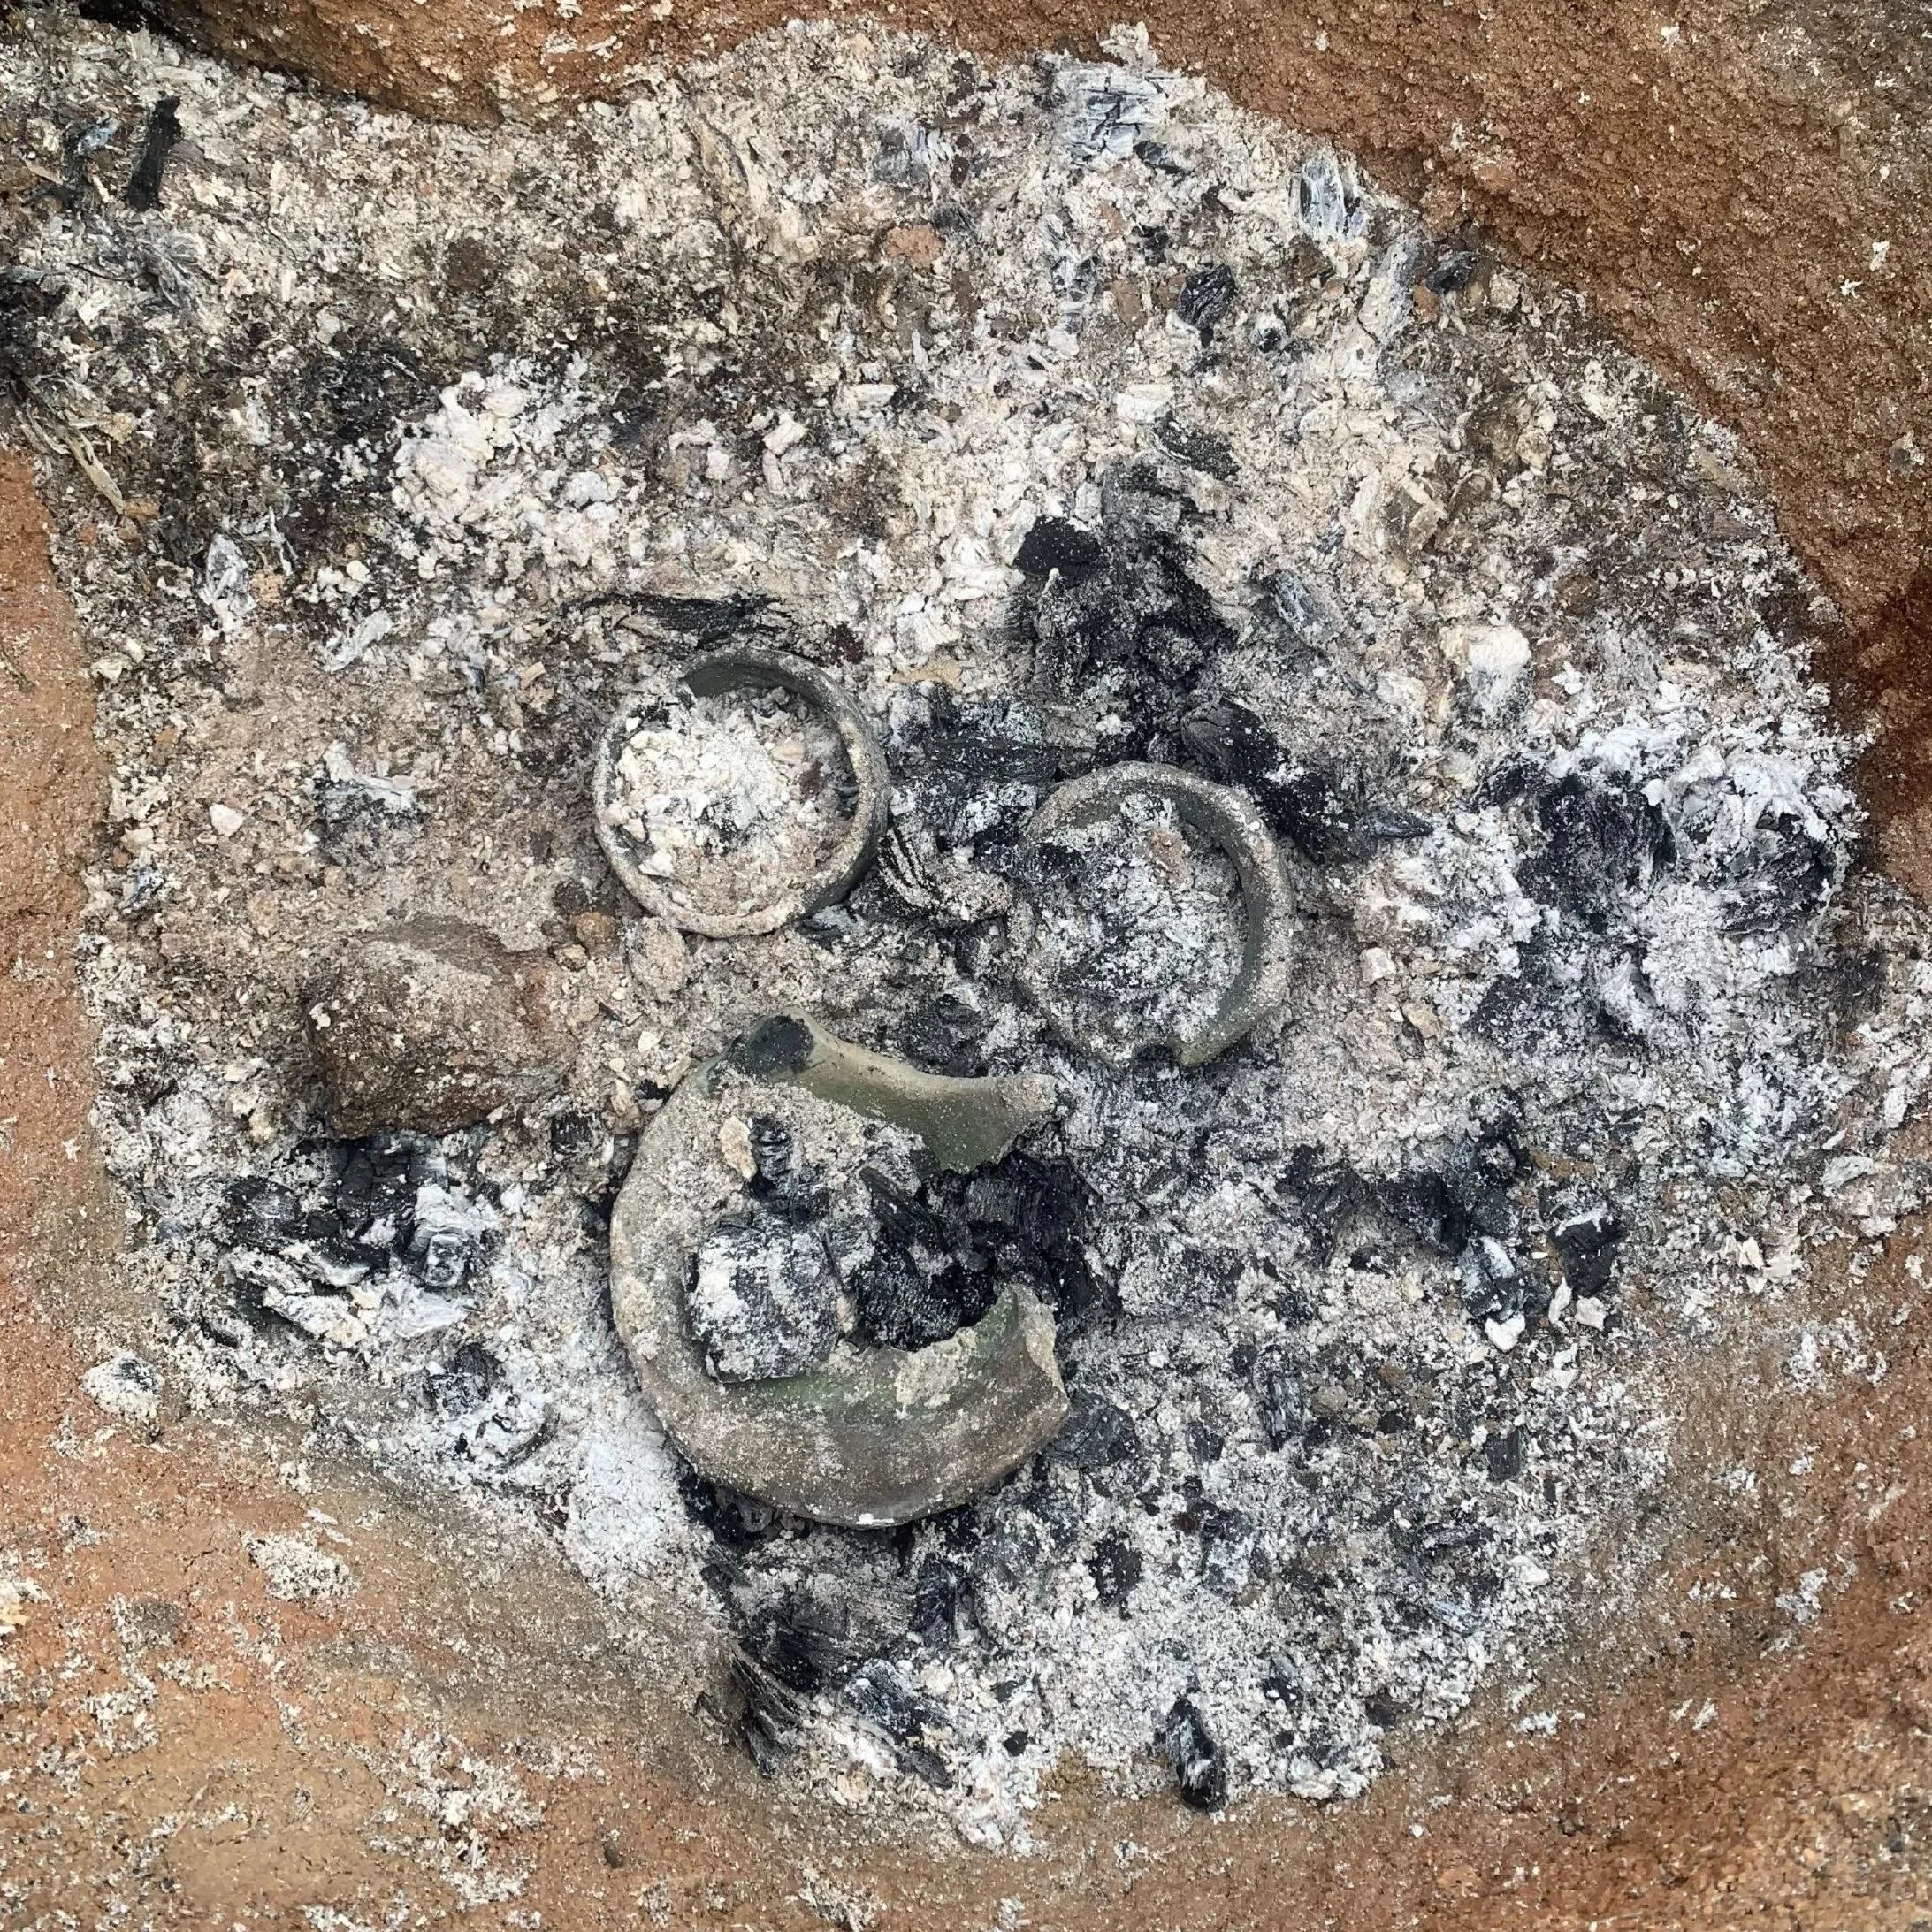
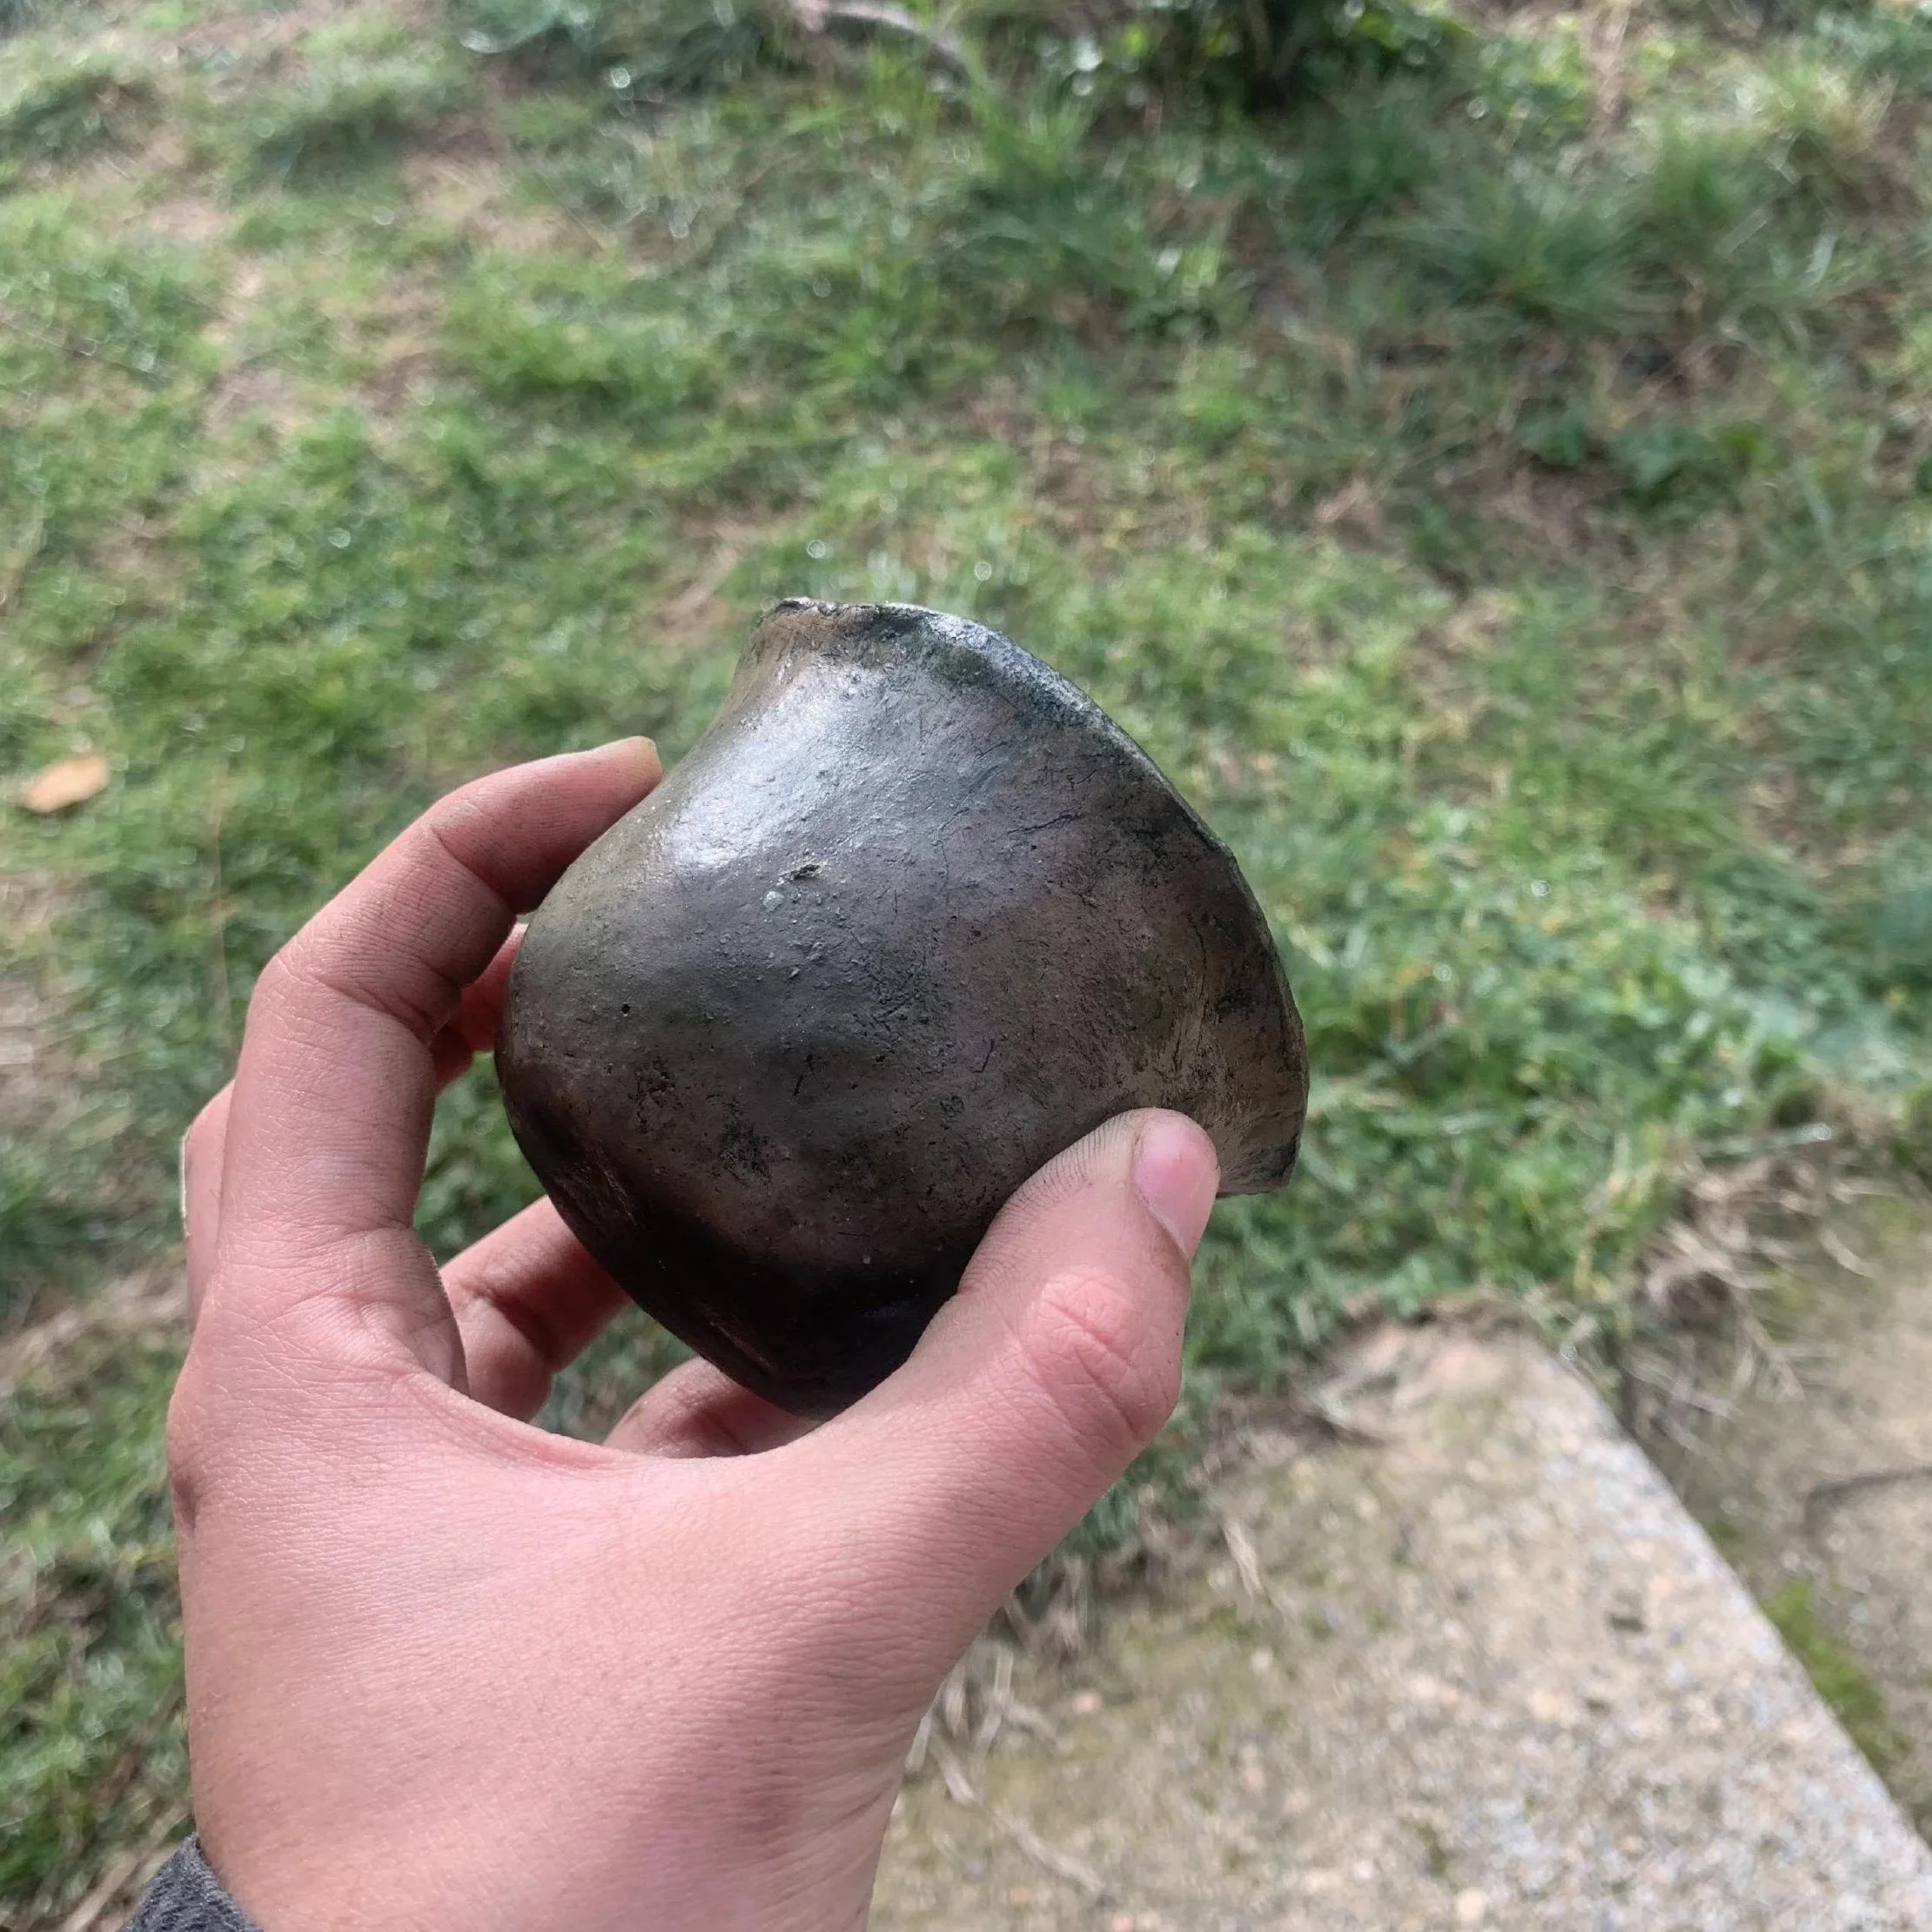
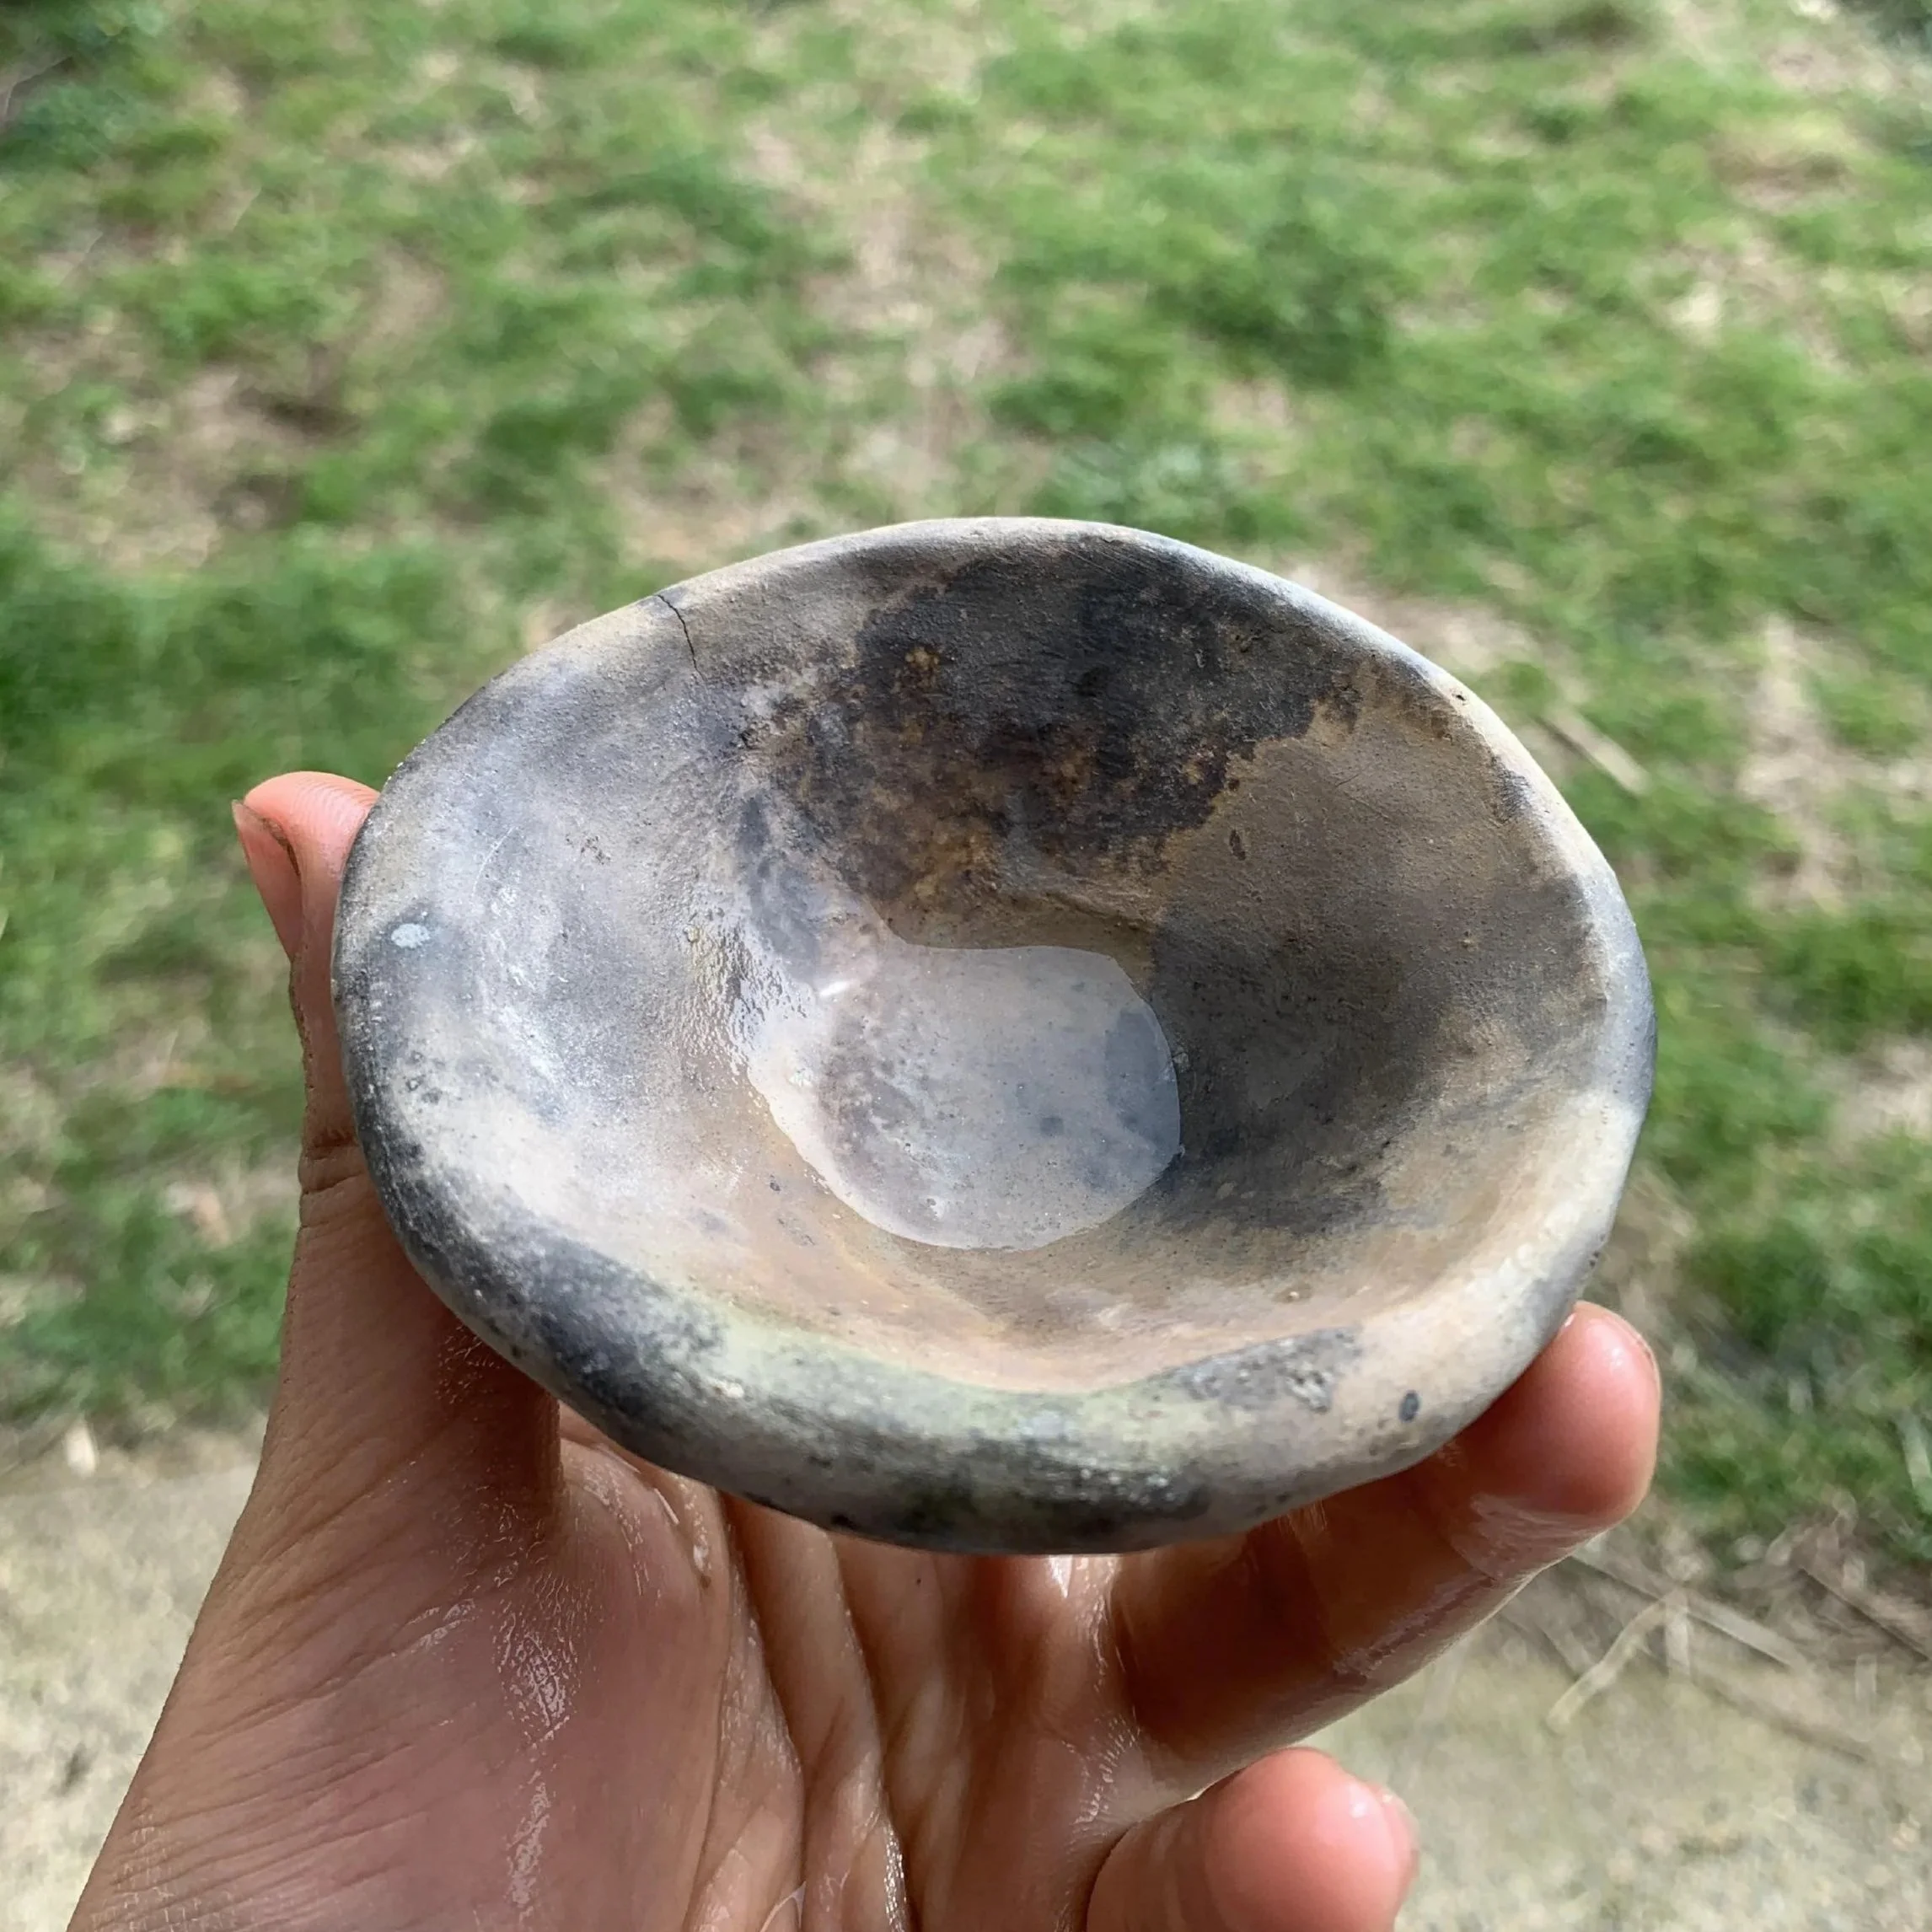
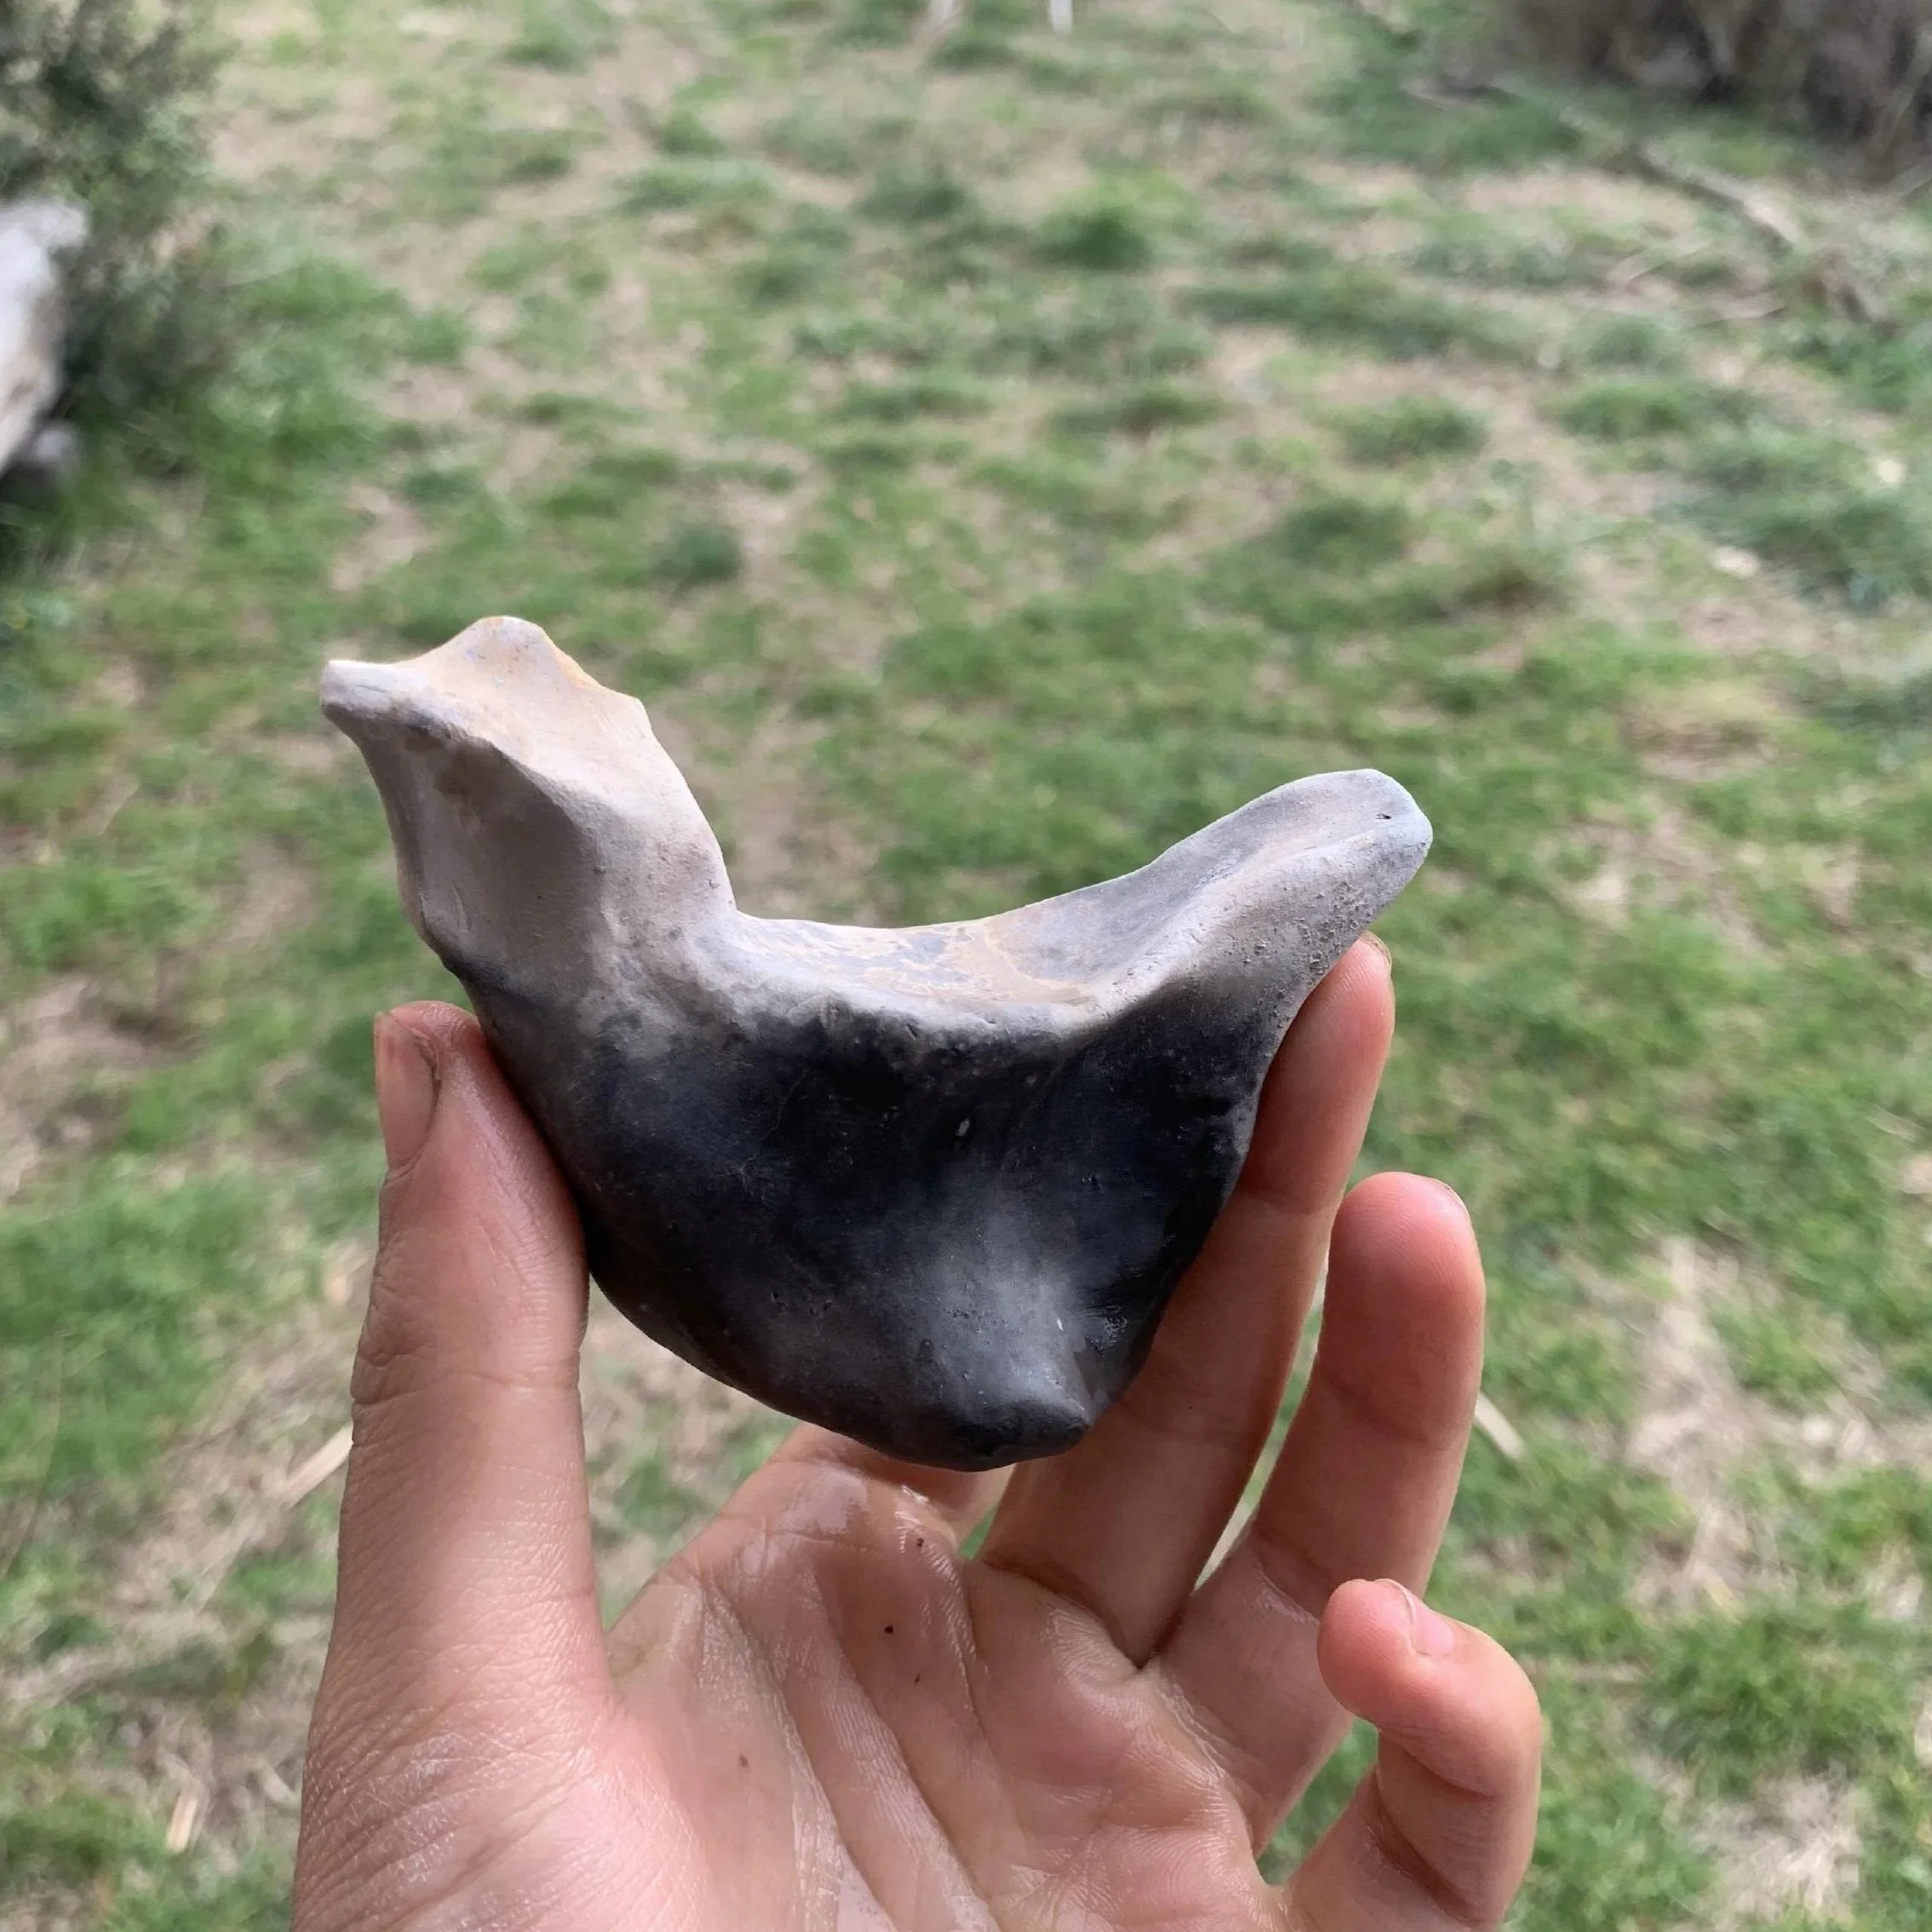
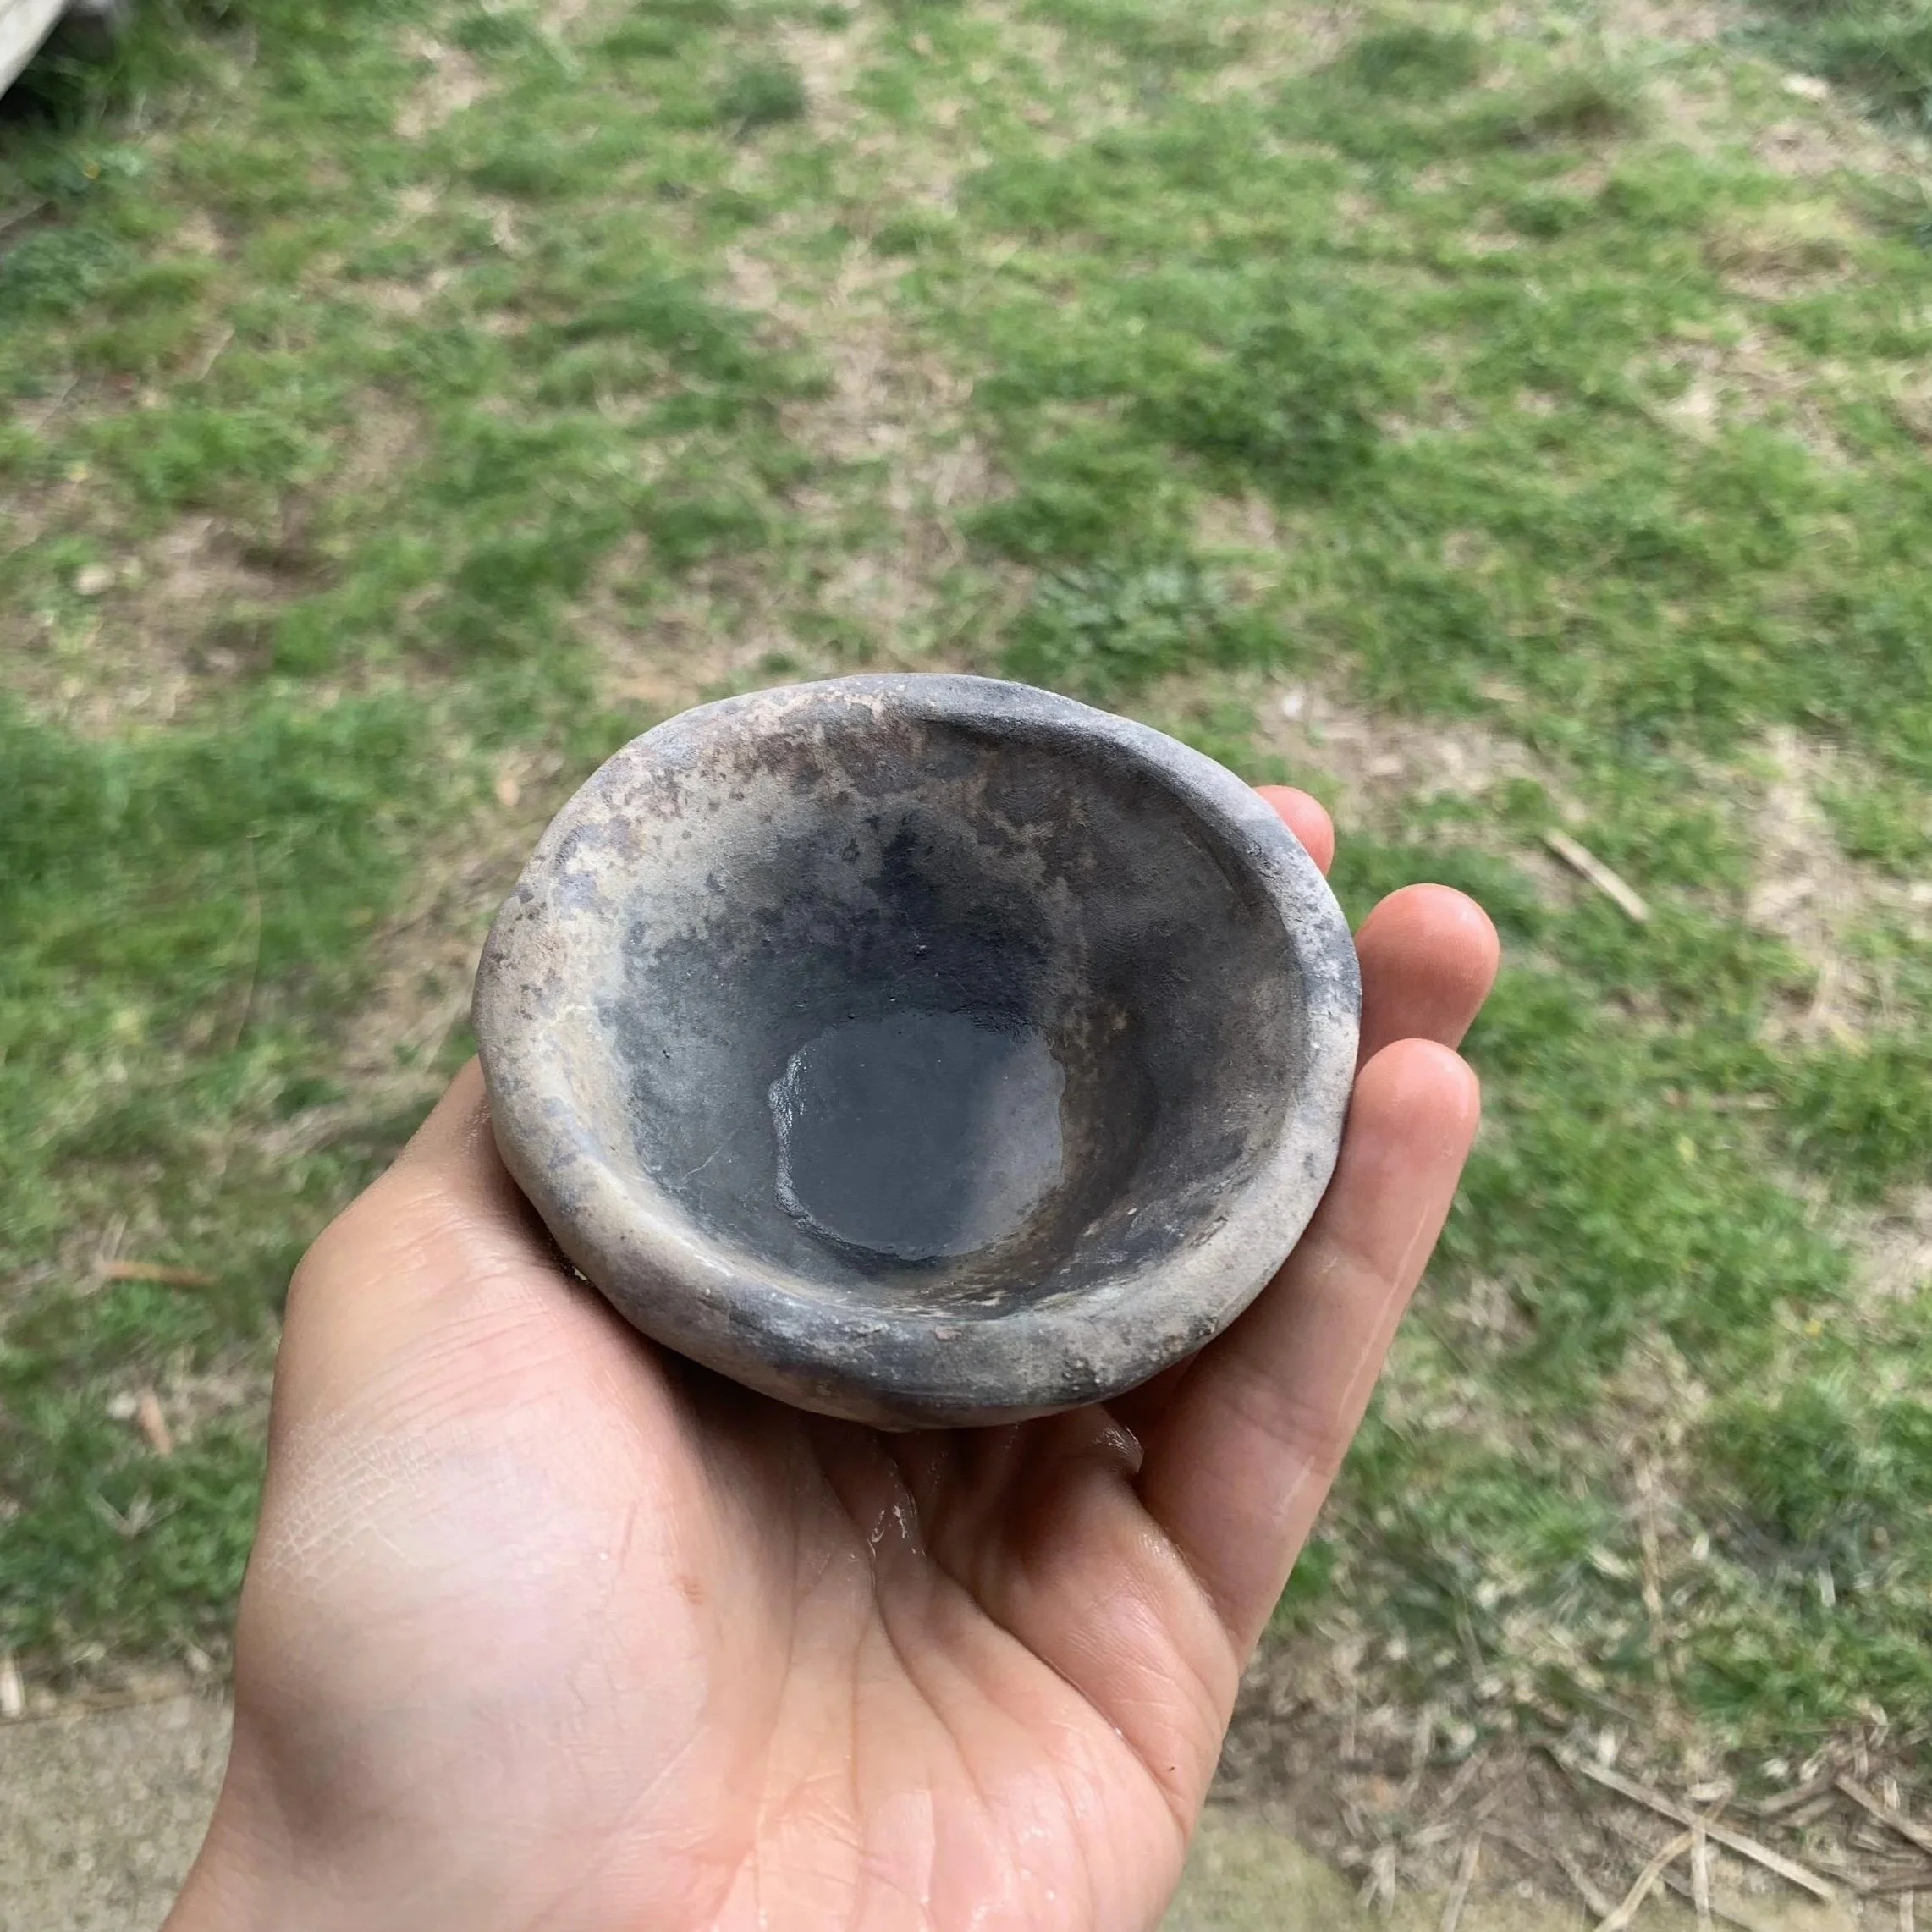
After cooling overnight, I pulled what survived from the ashes. It was brittle, porous, and just barely reached a bisque temperature of around 1700 F, but two out of three had survived.
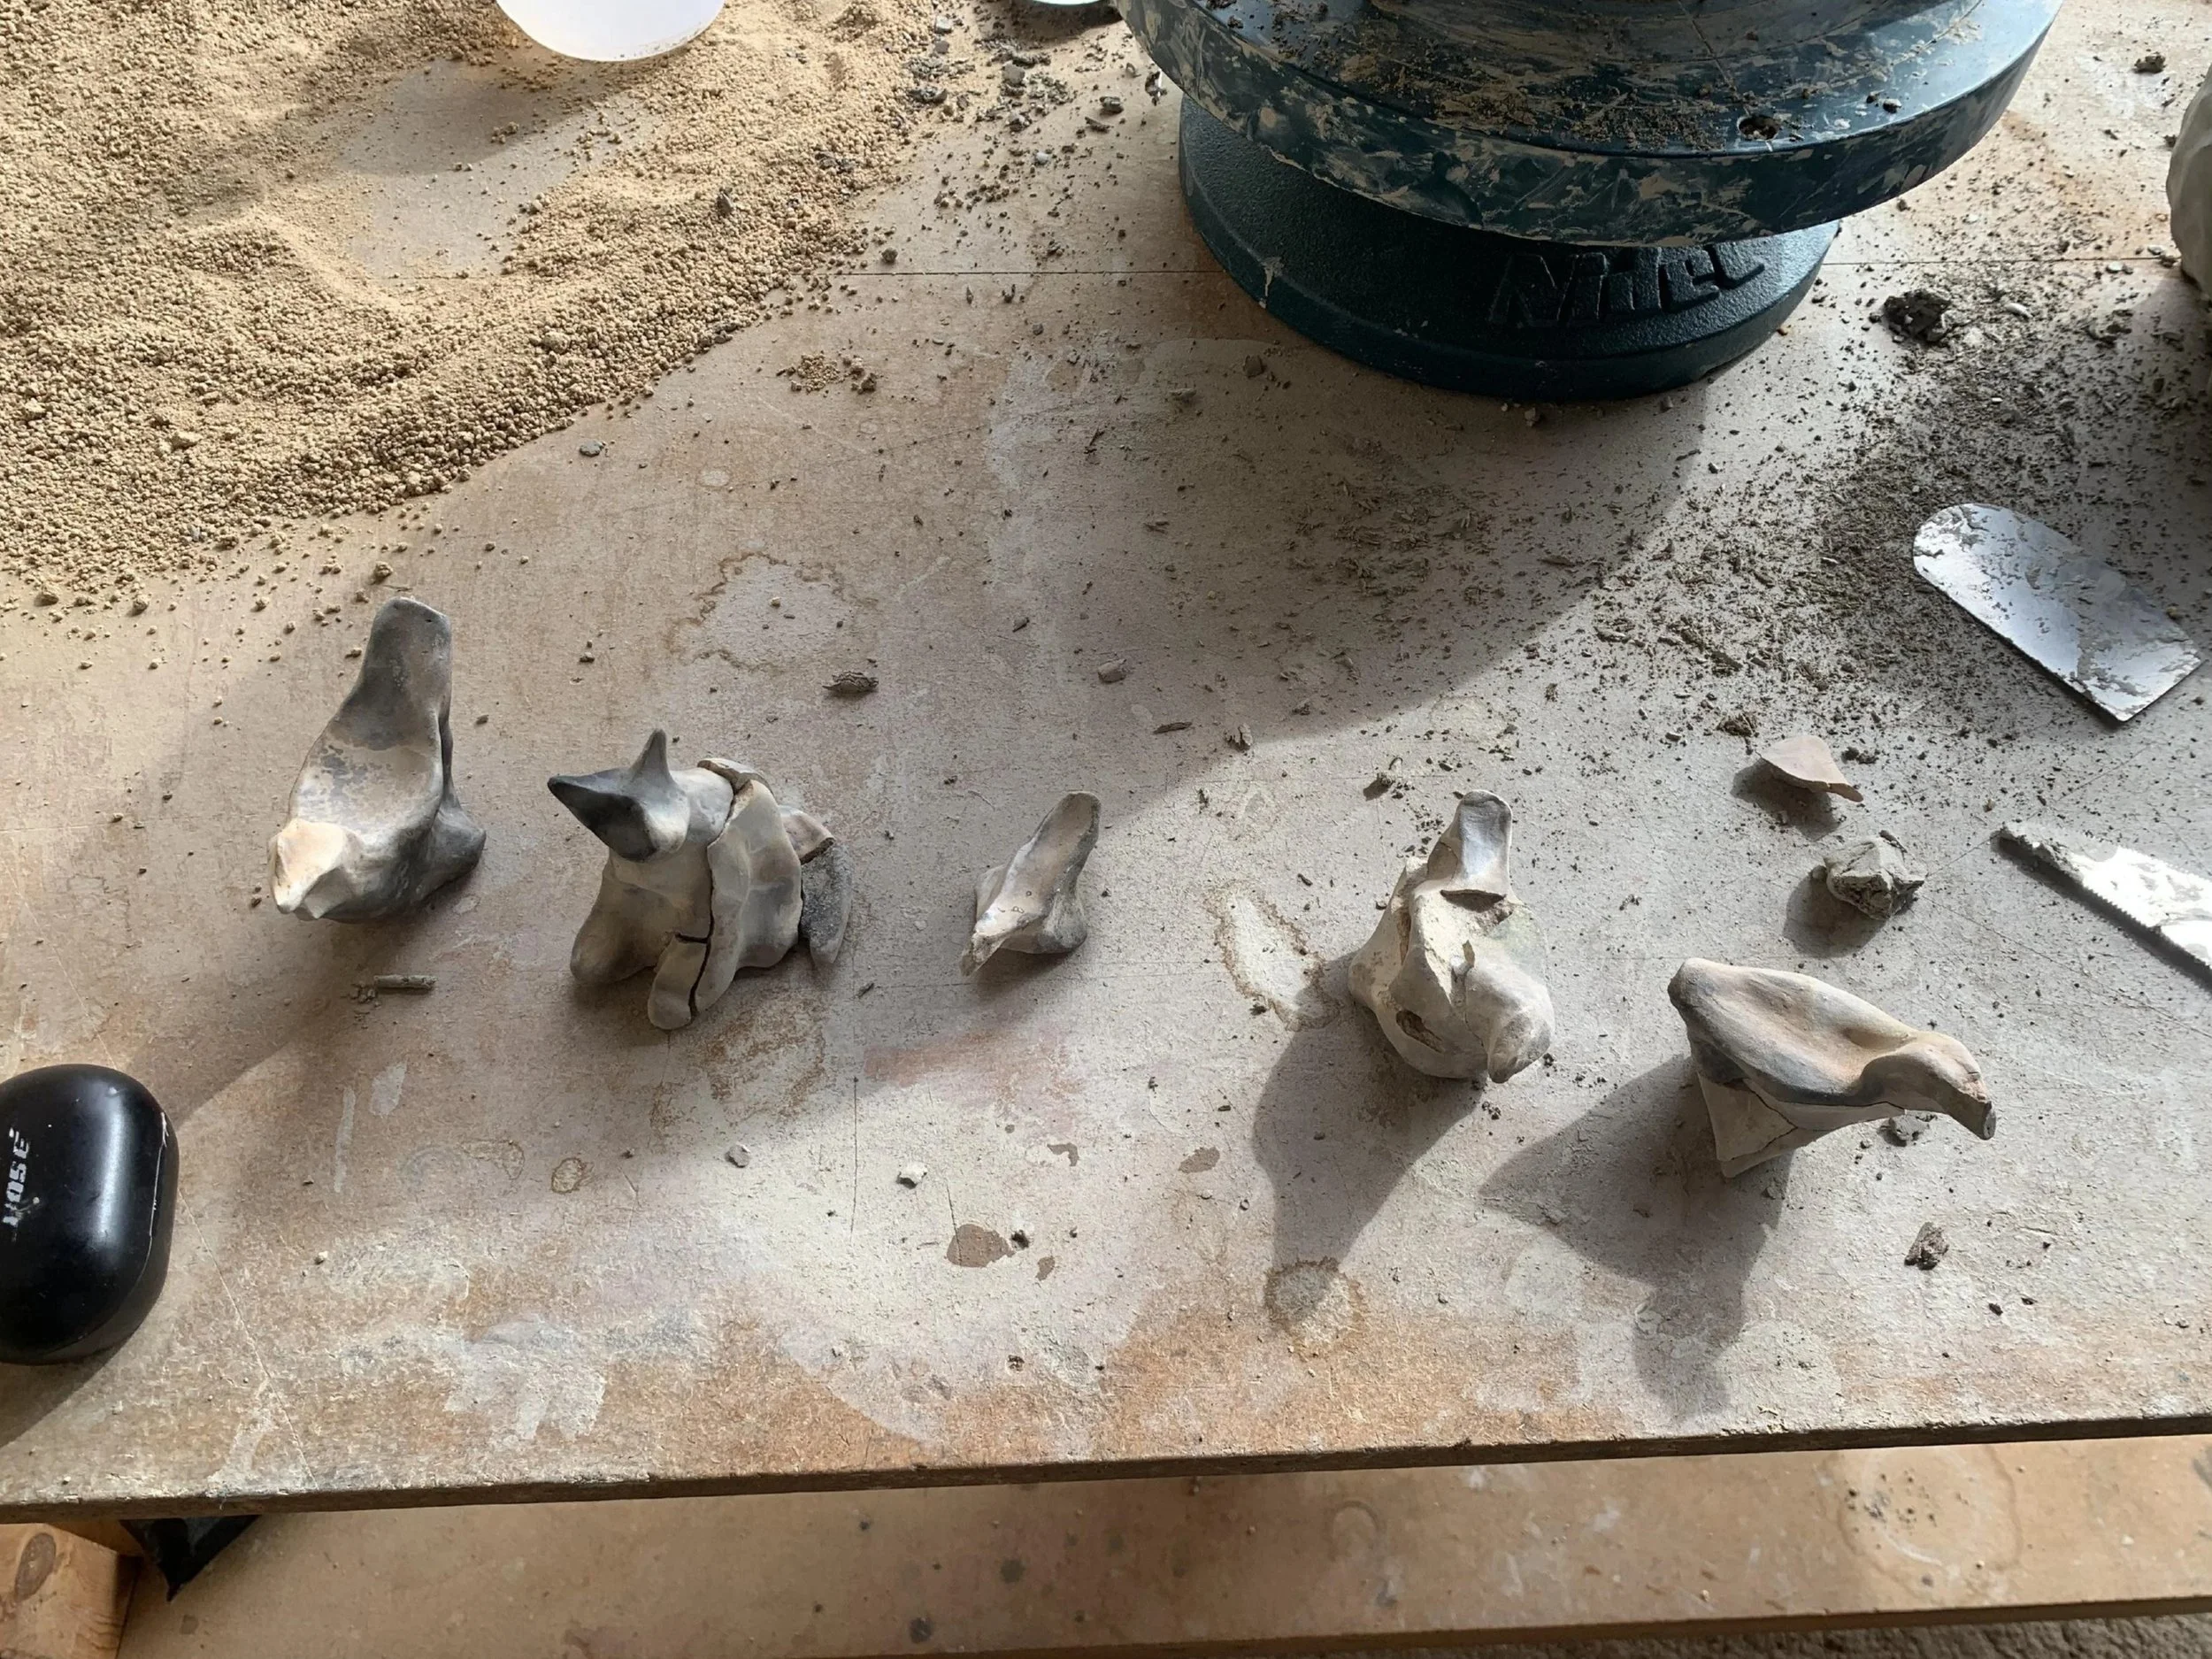
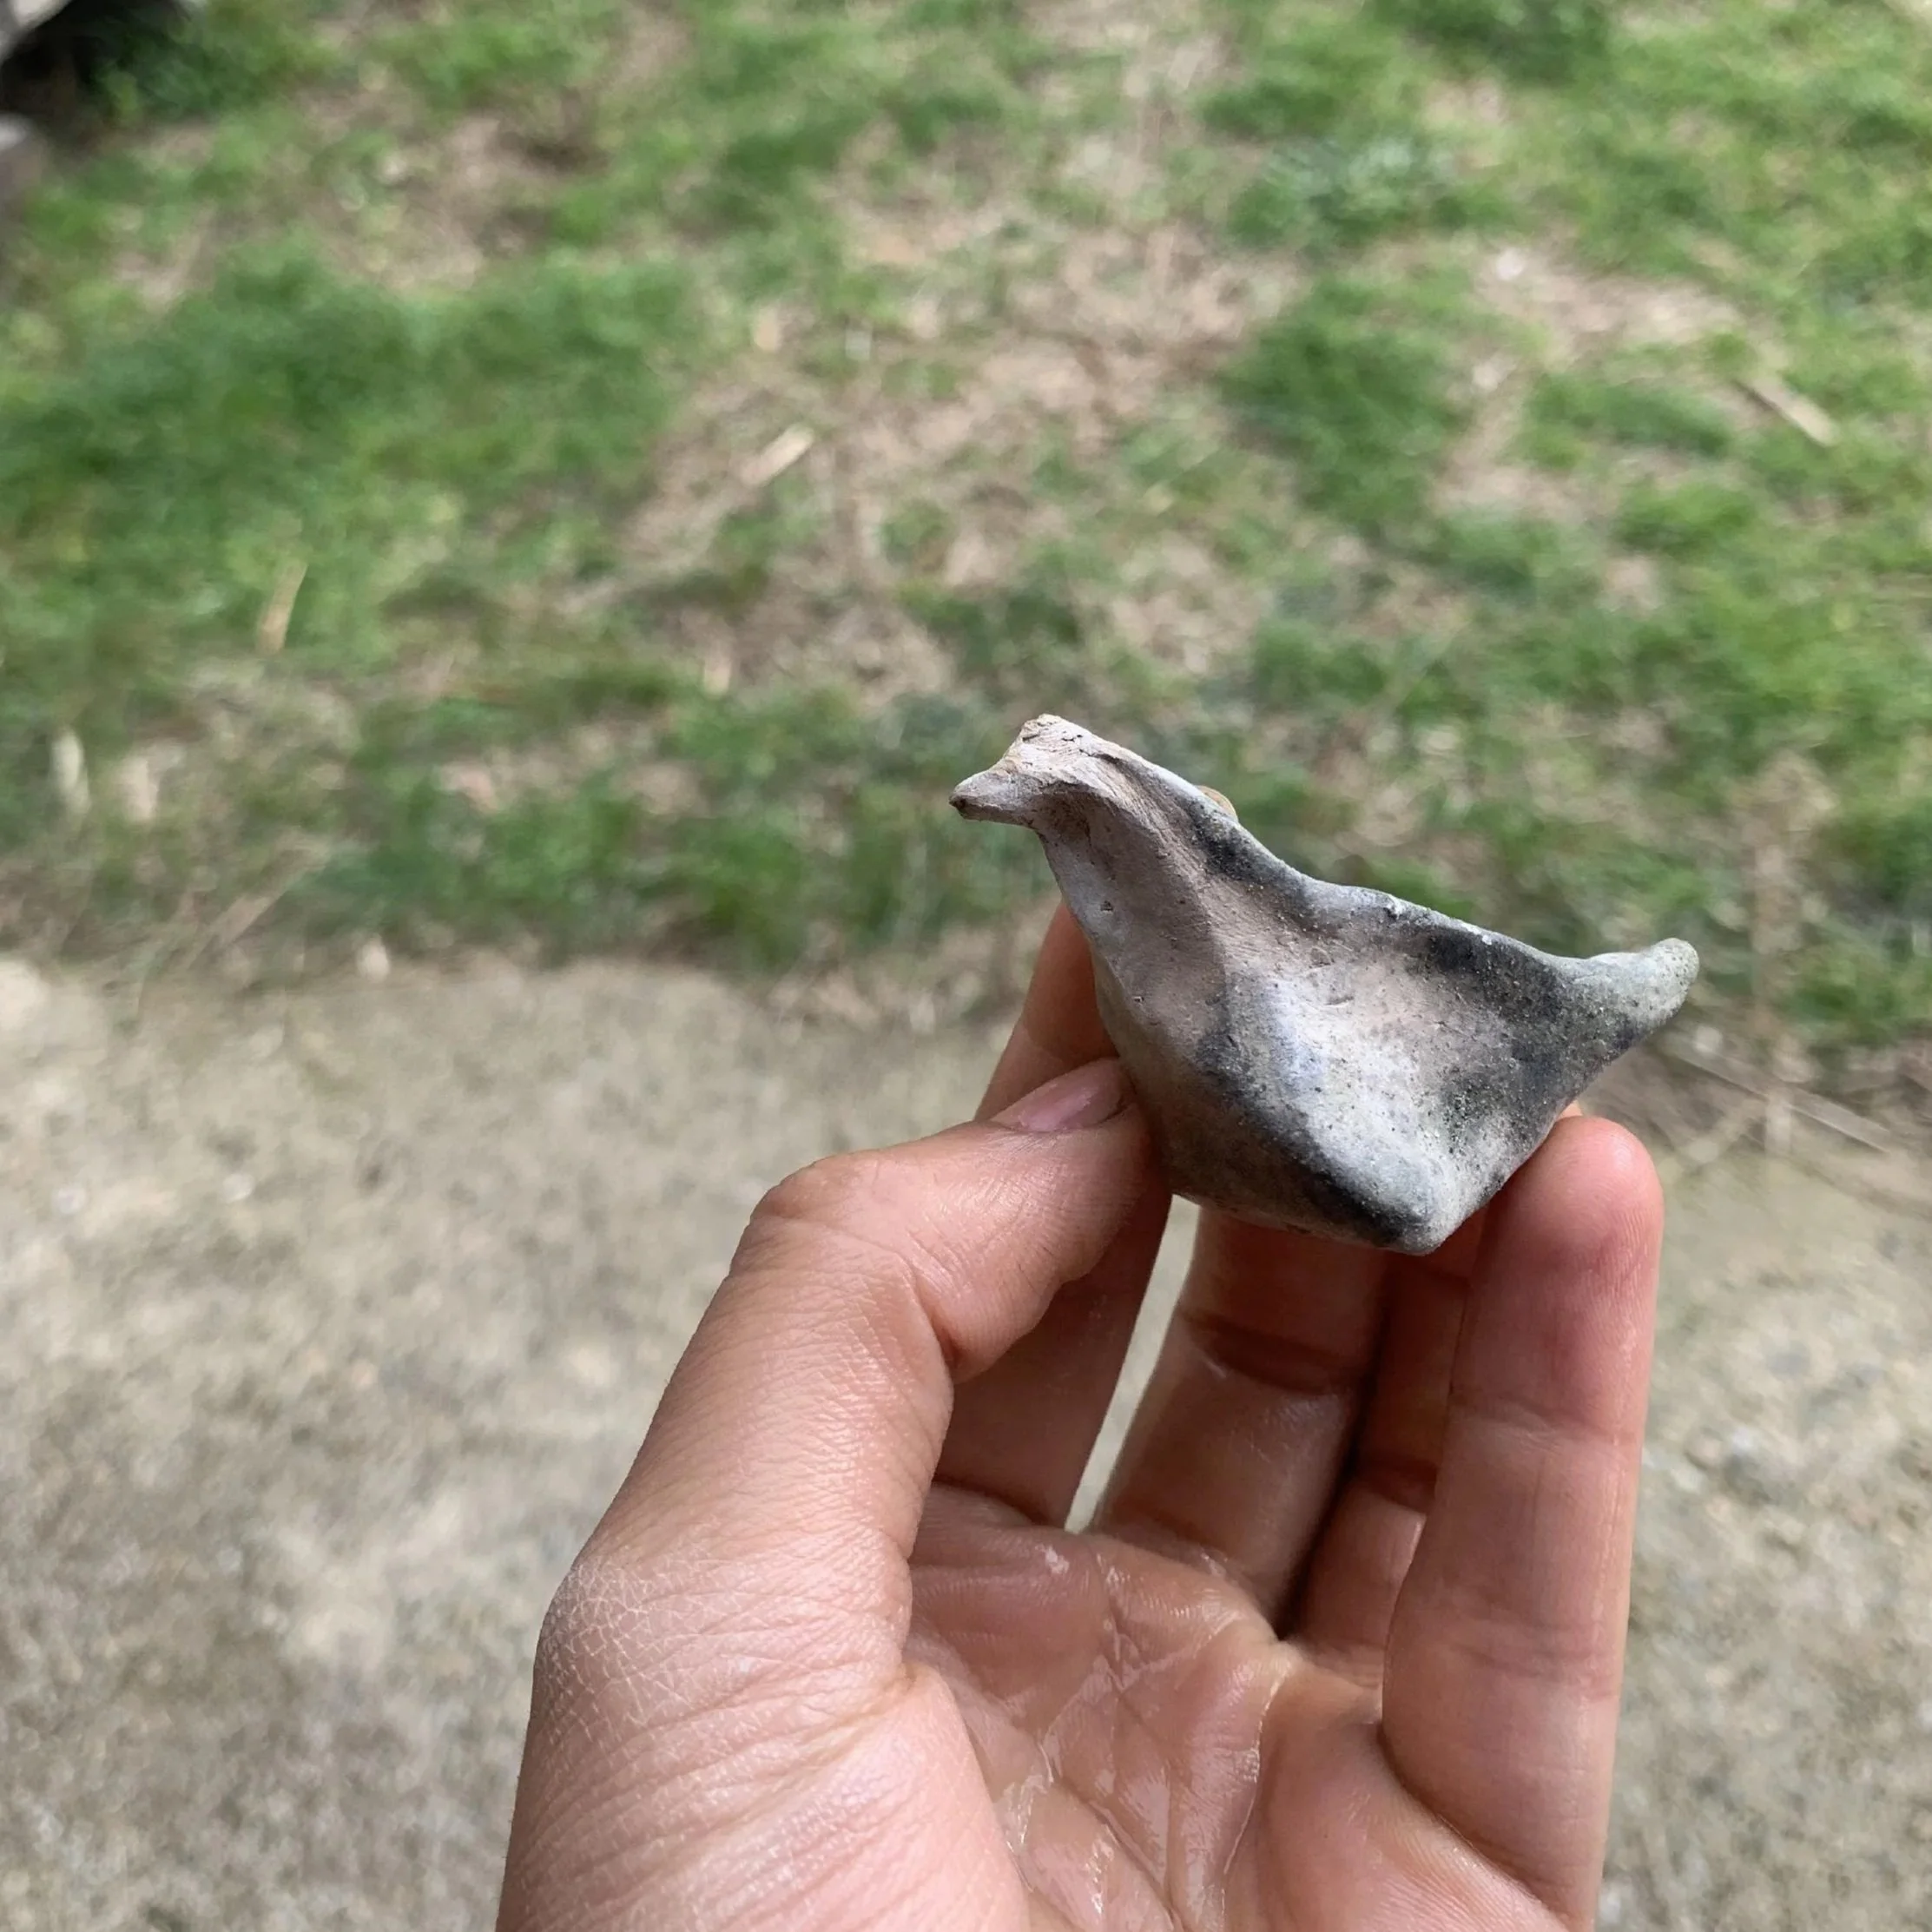
What survived was black, gray, and brown from the firing itself, with flashes of green from some chrome I had thrown on the pieces prior to firing.
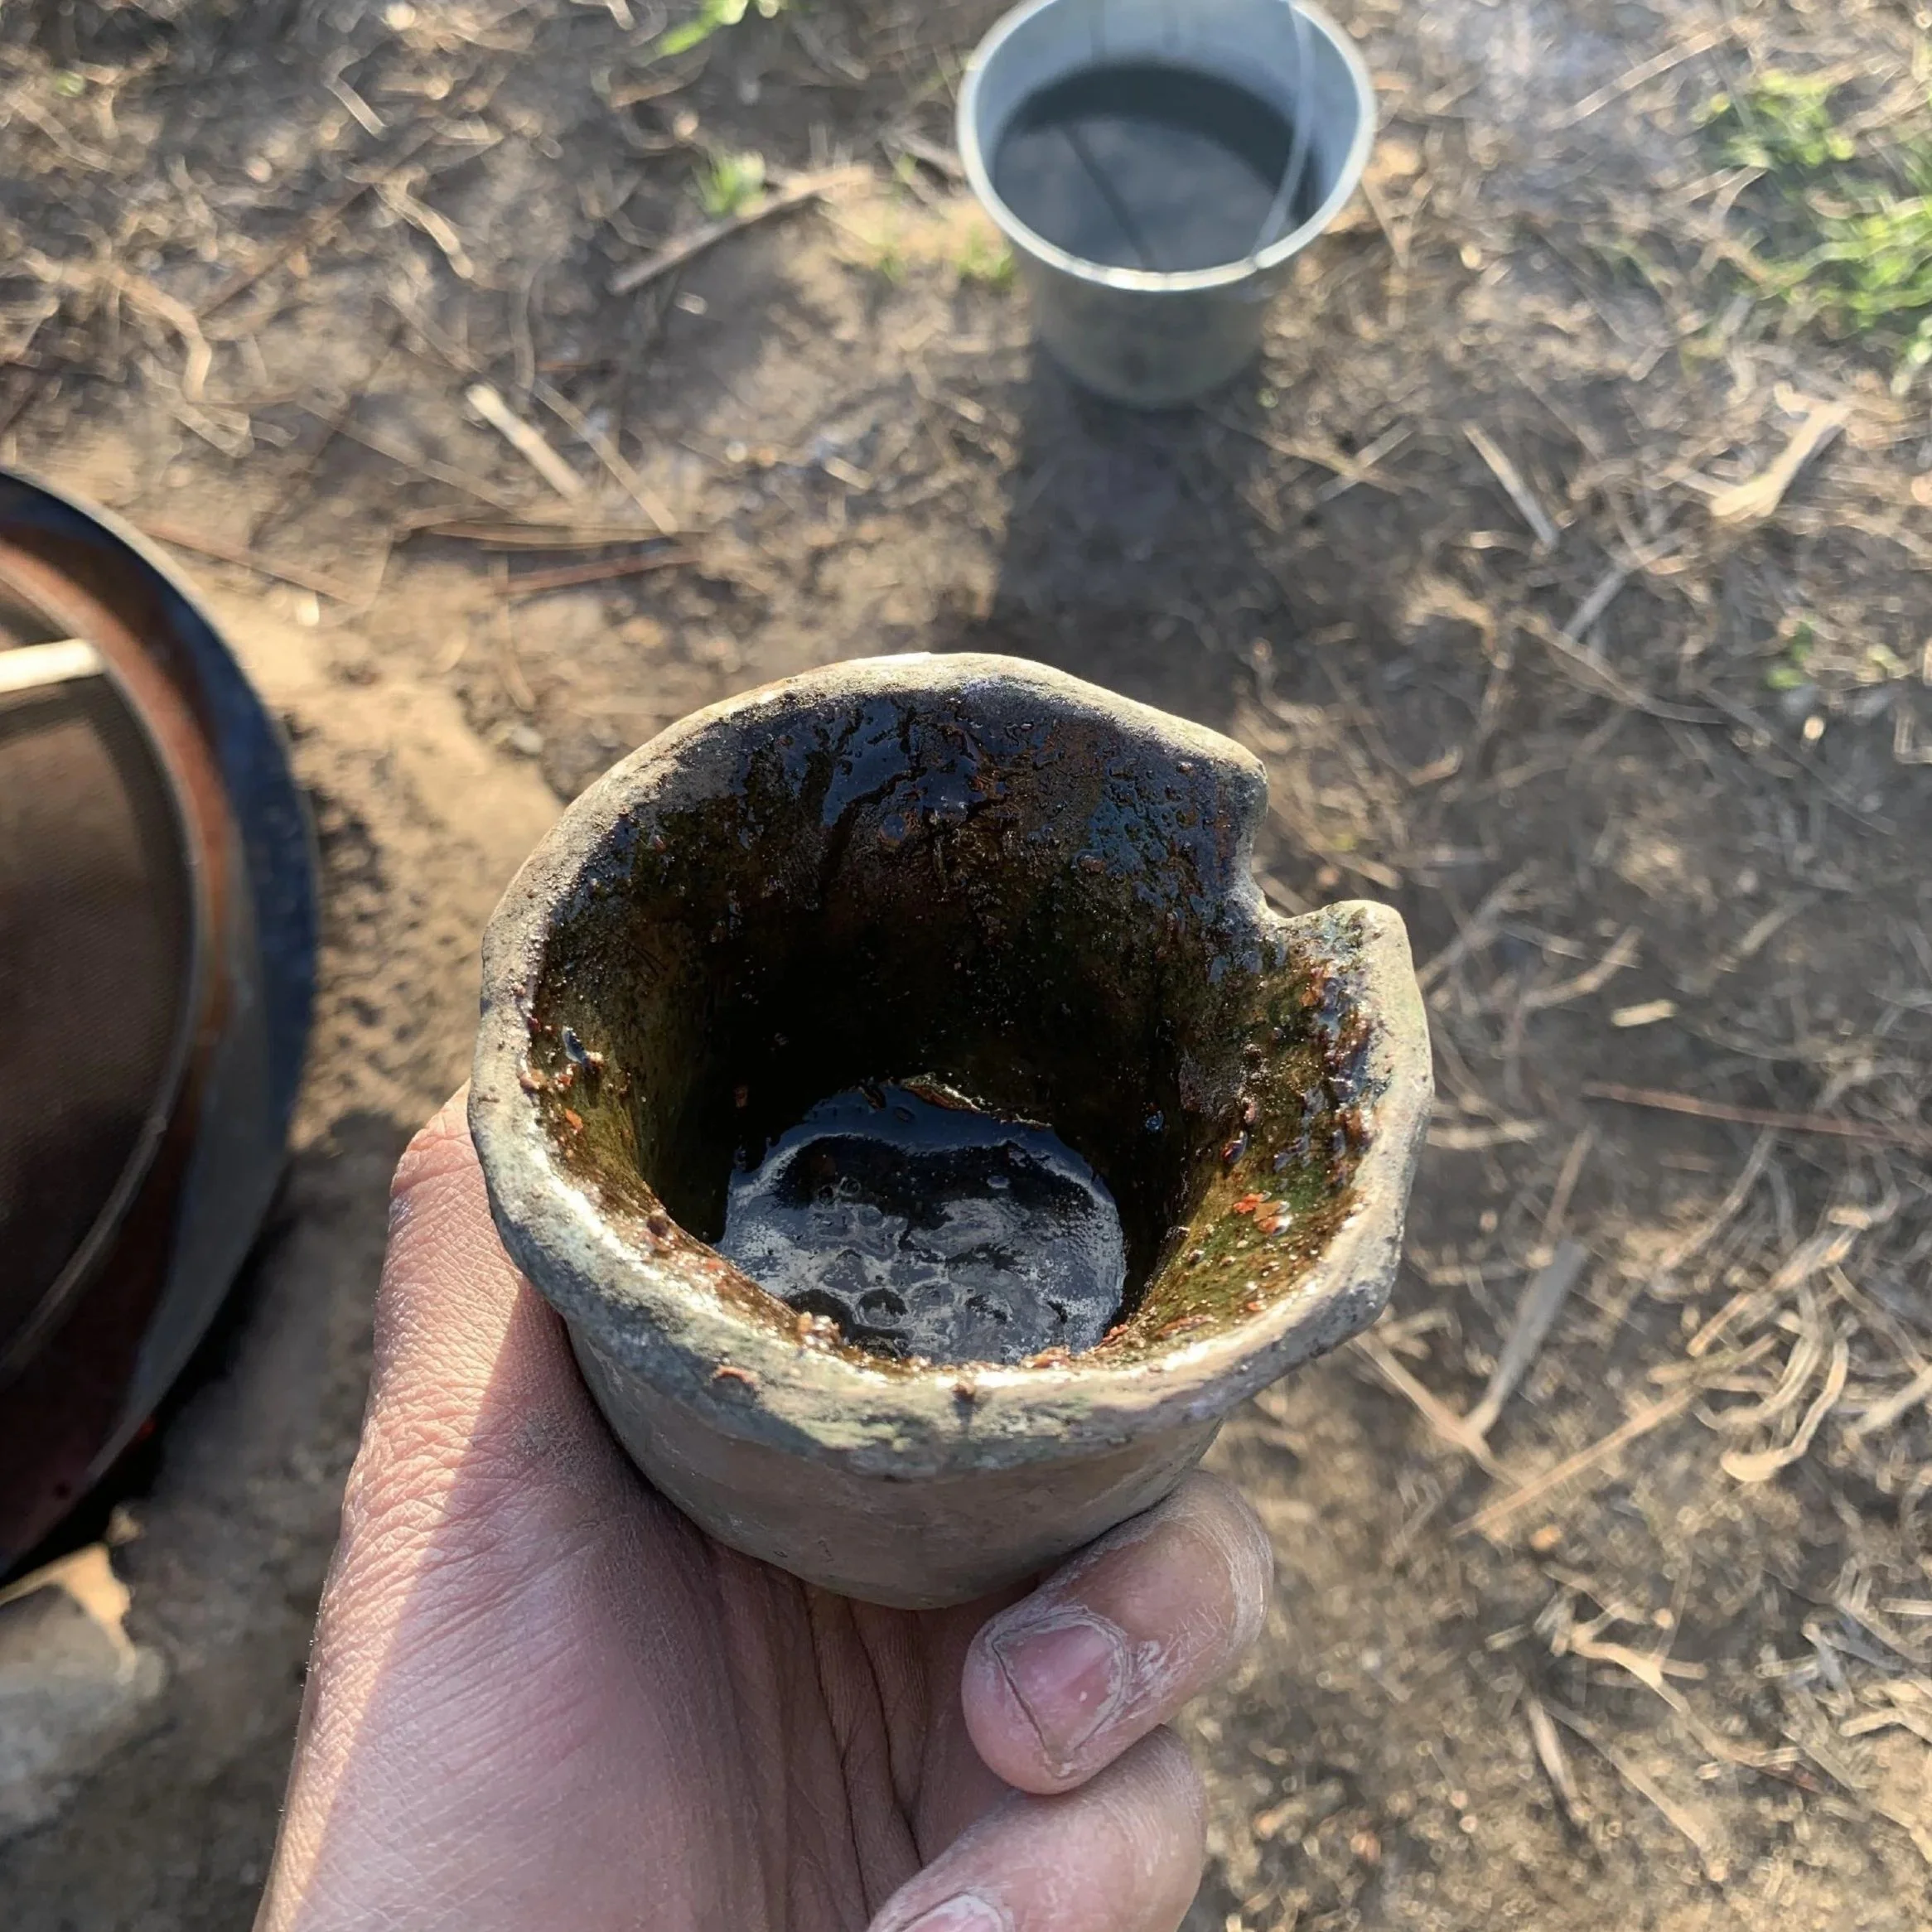
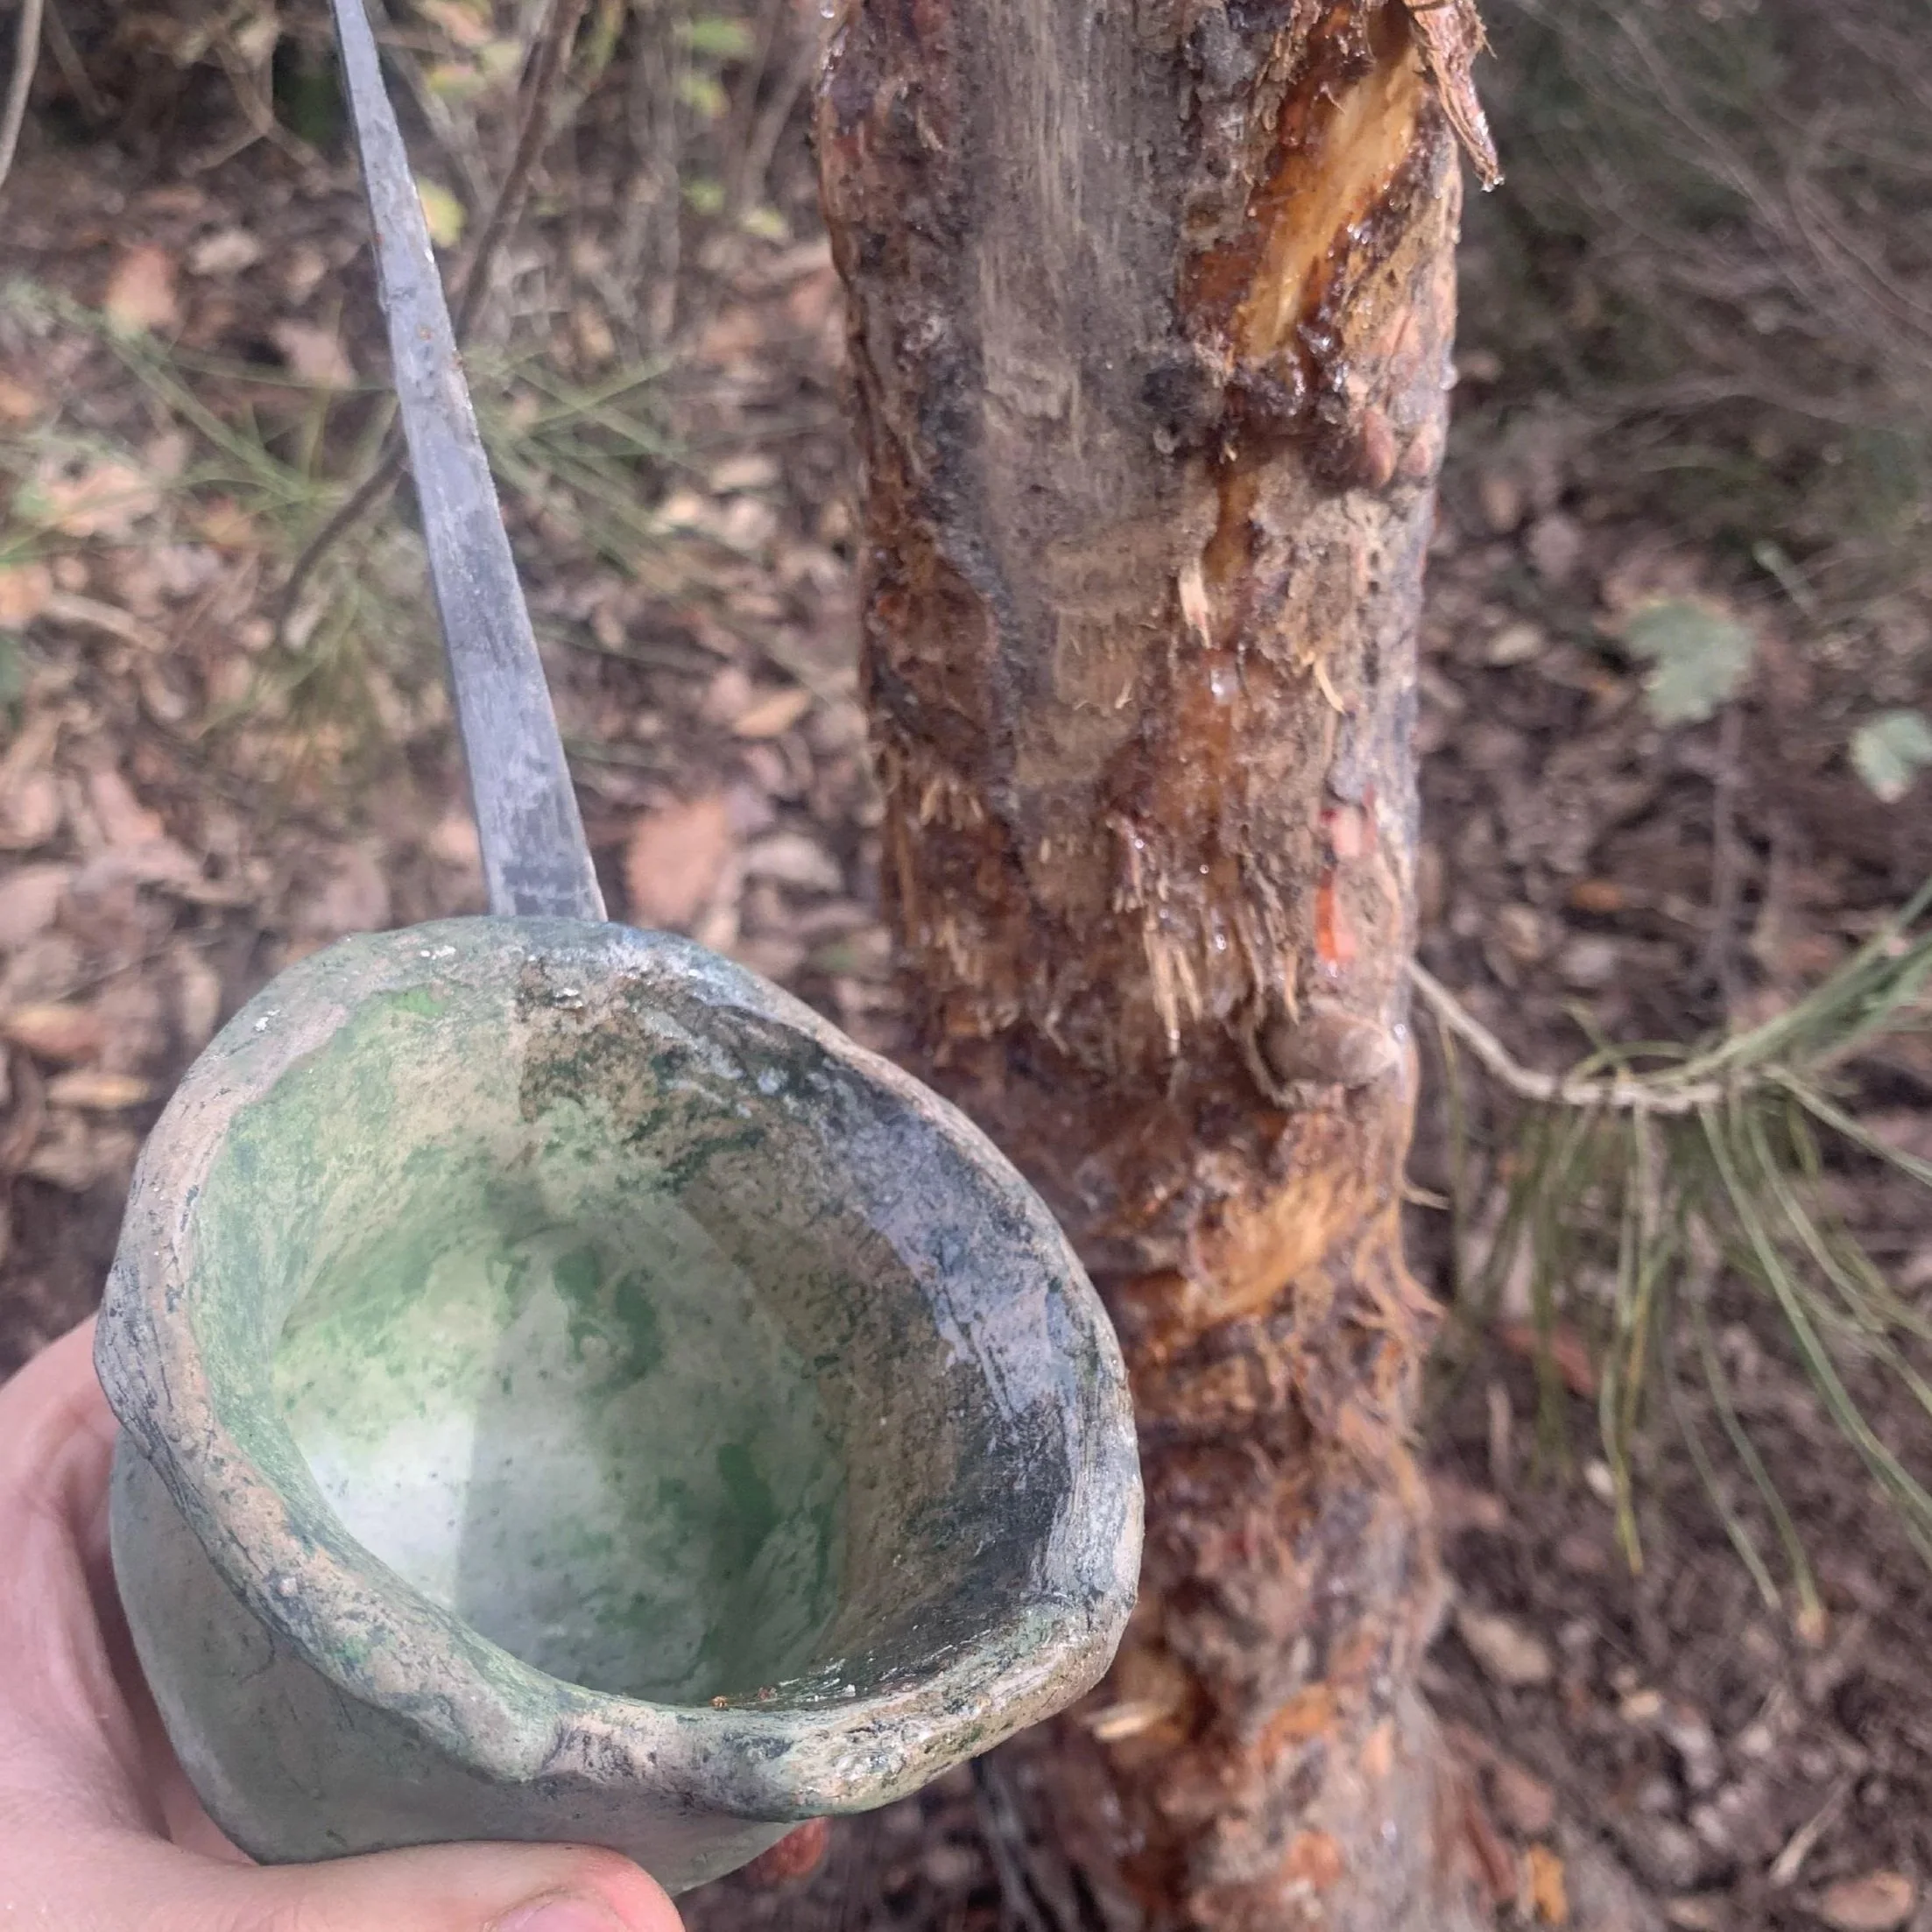
Historically, low-fired pottery was sealed with any number of available sealants before glazes became available due to their high heat requirements. One such sealant was pine resin. Popular amongst storage and transportation vessels of antiquity in the Mediterranean, these allowed for porous ceramic vessels to hold liquids both in and out, and could impart a unique flavor, like that of retsina!
After the rudimentary gathering of chunks of pine resin harvested off wounded pine trees I heated the impure mixture of bark, dirt, and resin for a more even coating.
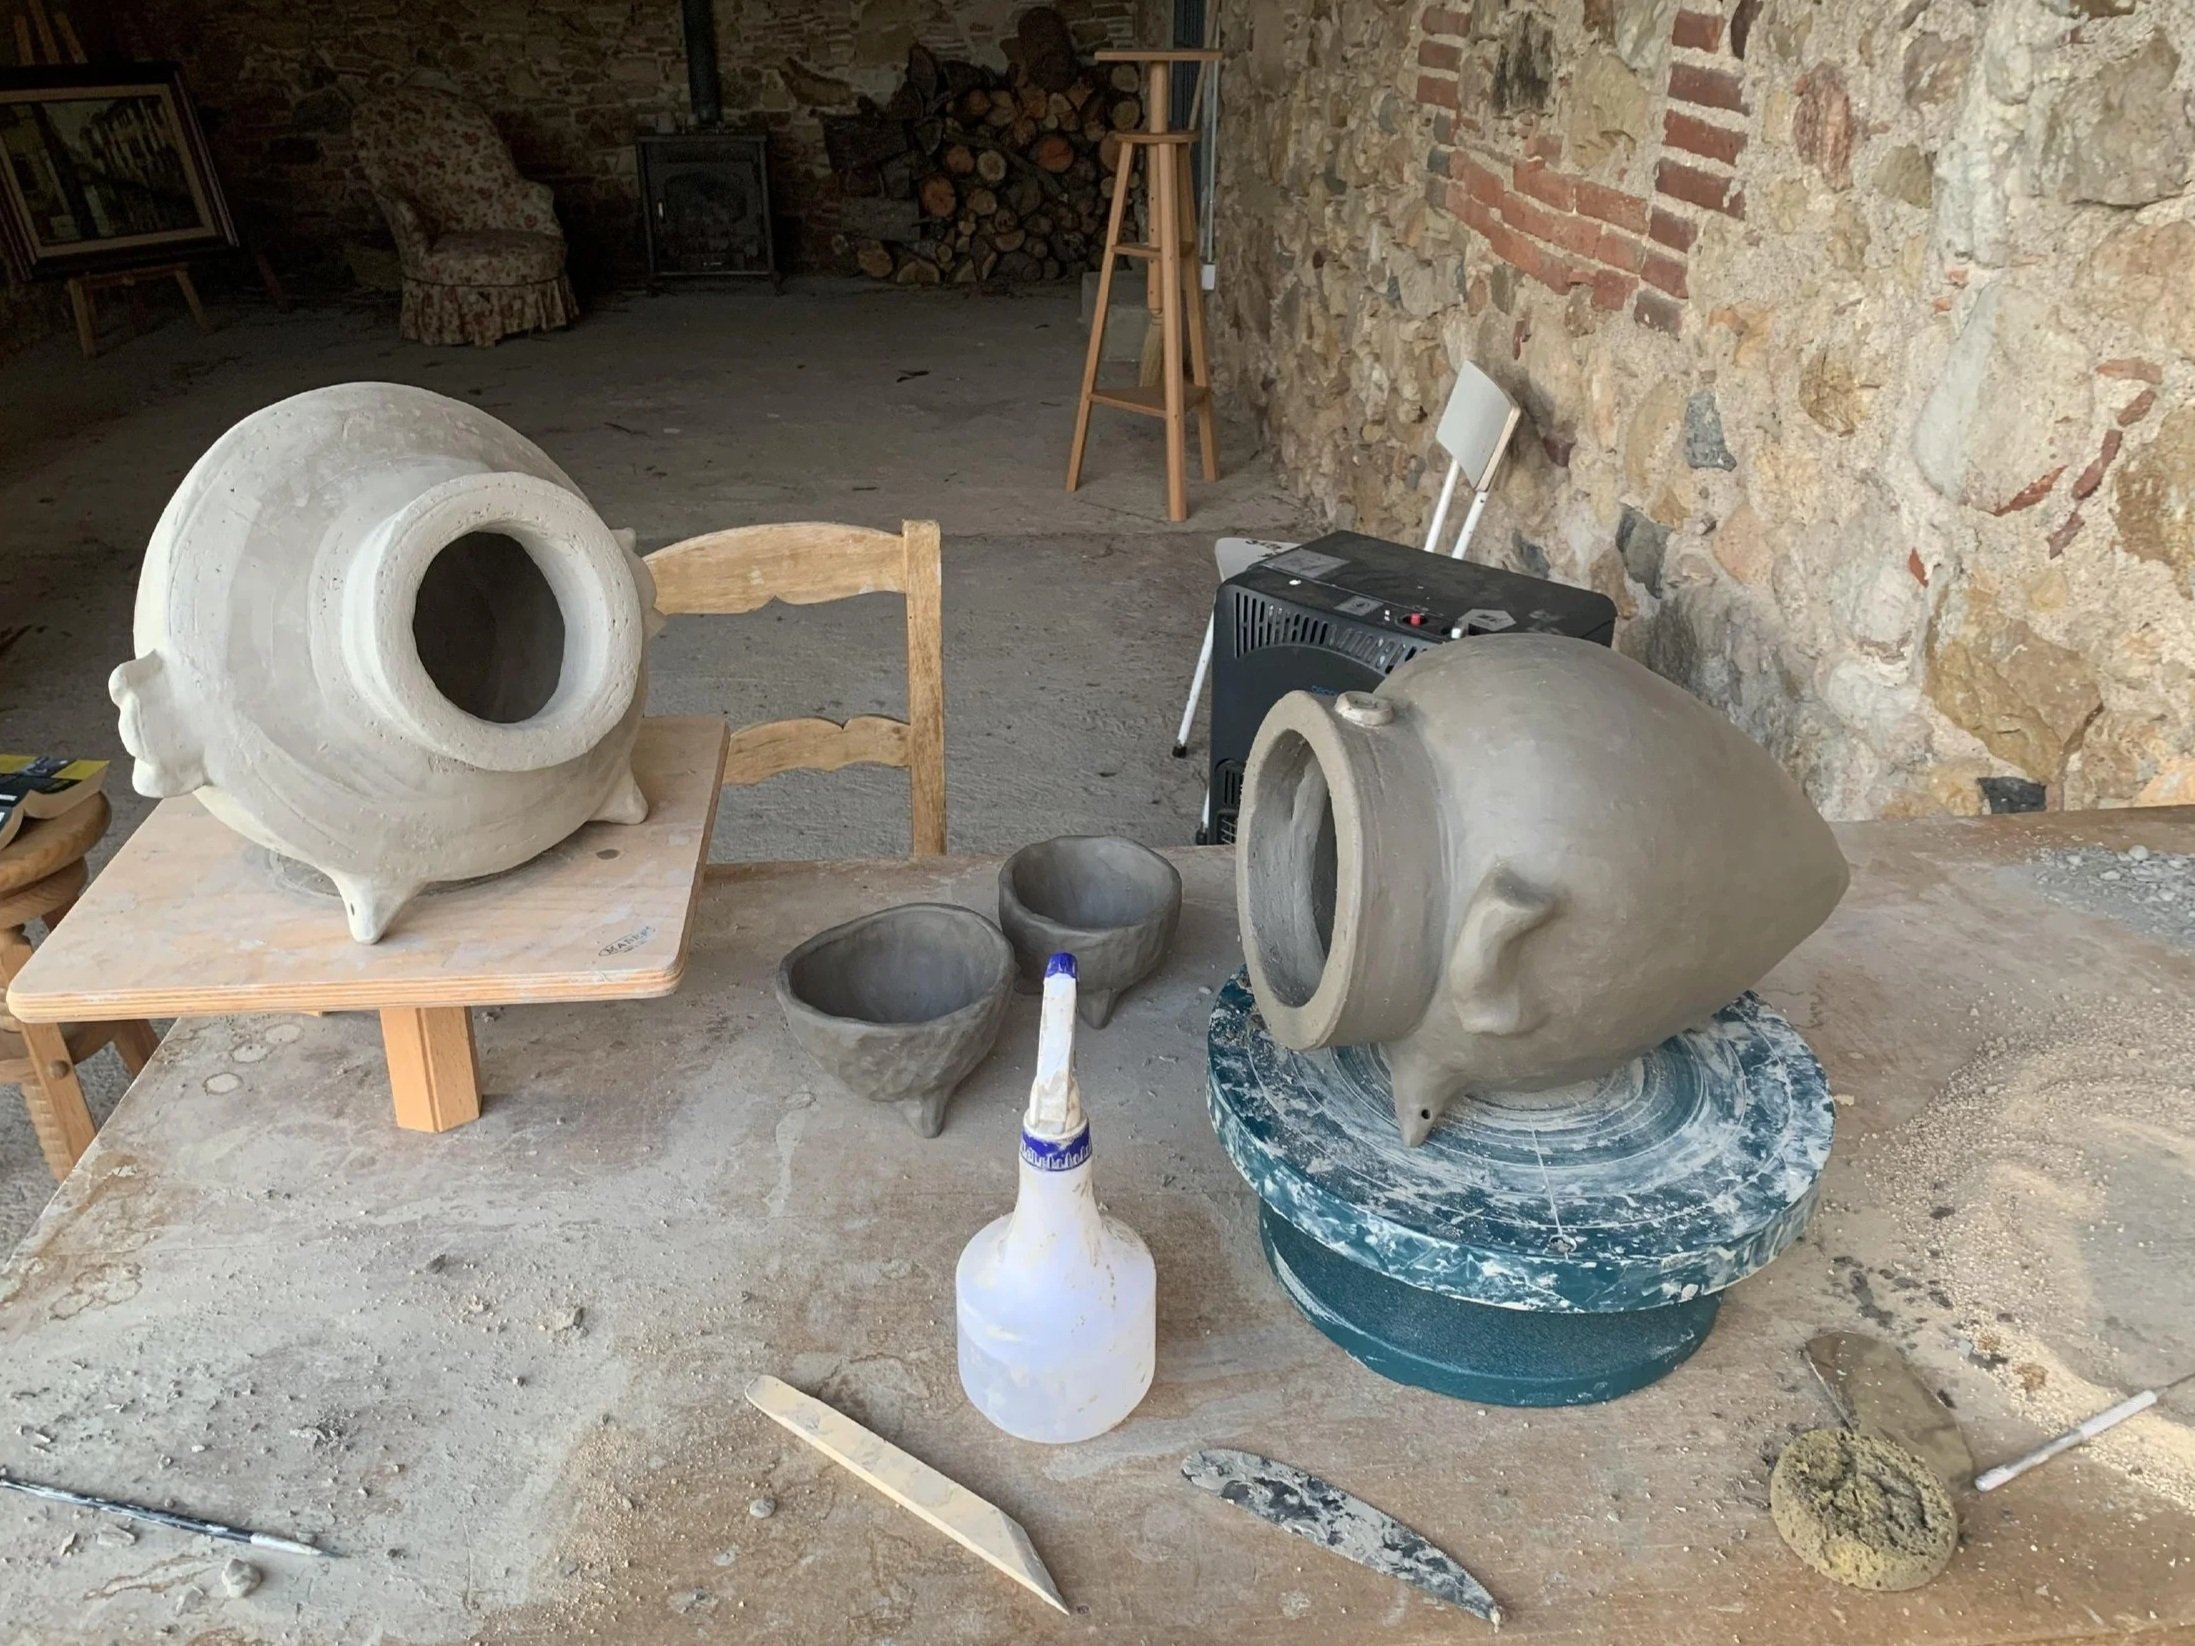
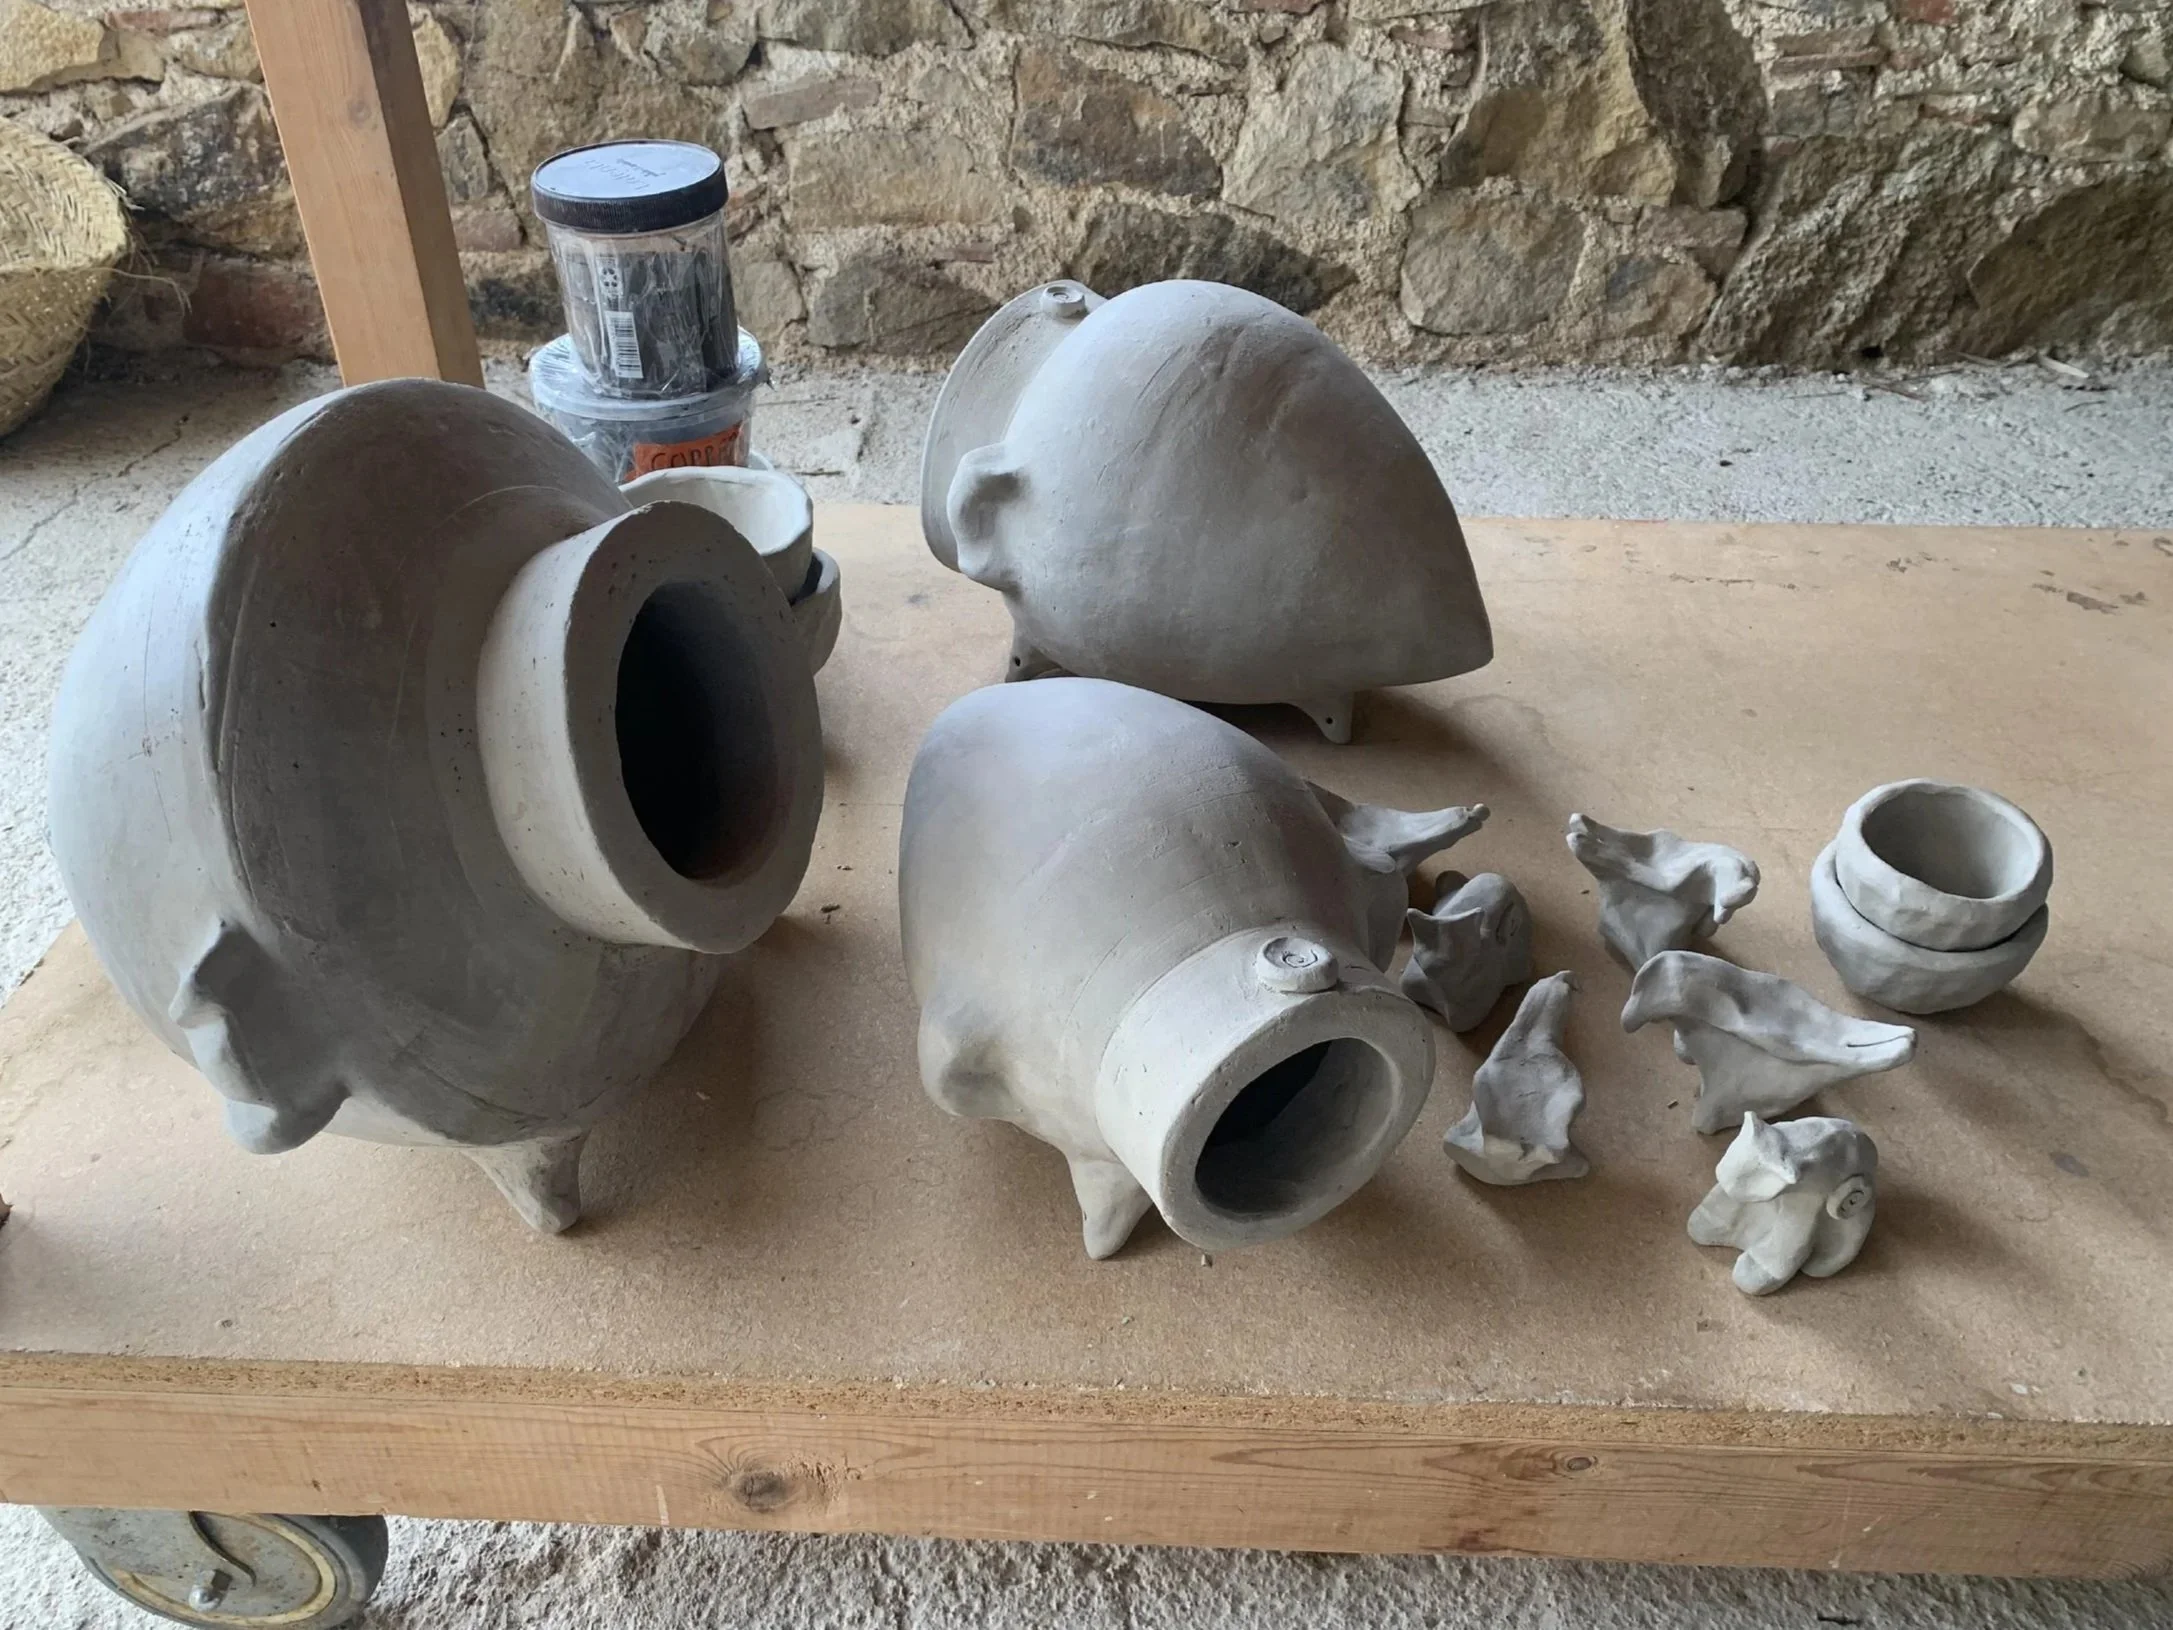
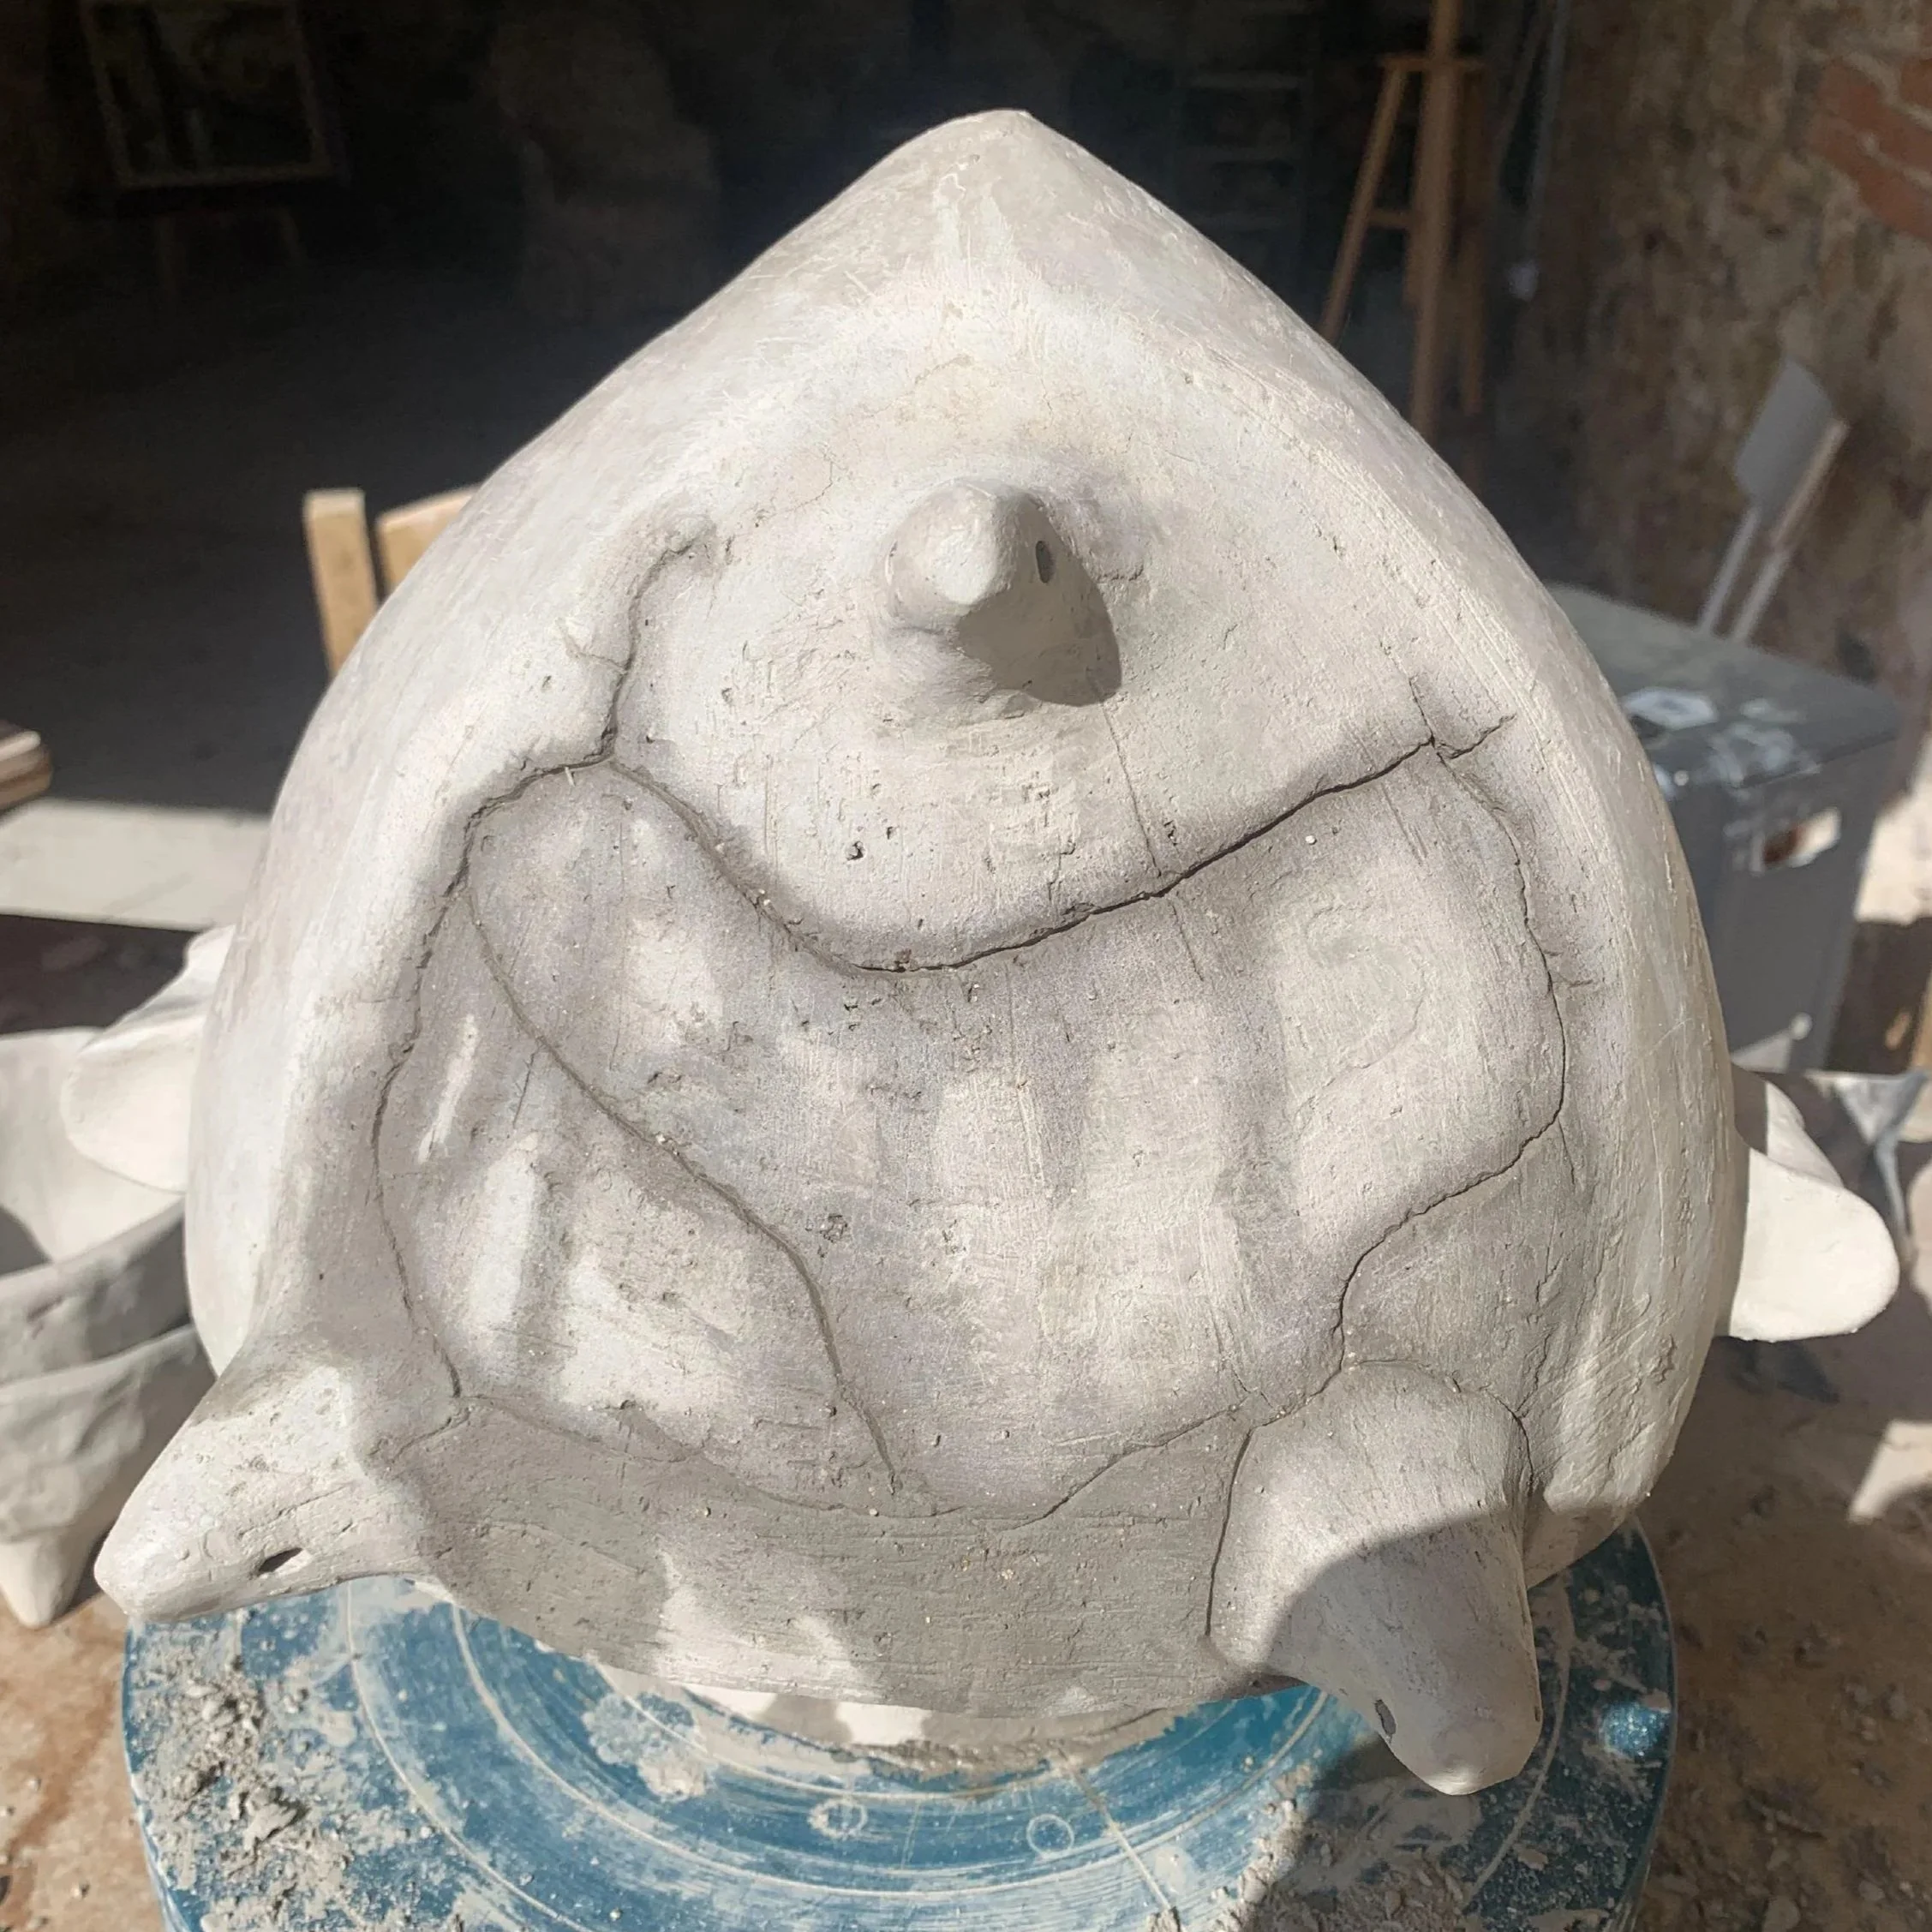
After a mostly happy result to the pit-firing I began work on a number of larger amphorae, ceramic storage vessels from antiquity known for their pointed bottoms. These points allowed for easier storage in sloped ship hulls and could be sunk into soft ground to stand straight.
With my remaining time and clay, I made a handful of smaller knick-knacks. Some chickens and cats primarily as a call back to their interest in the digging of the kiln.
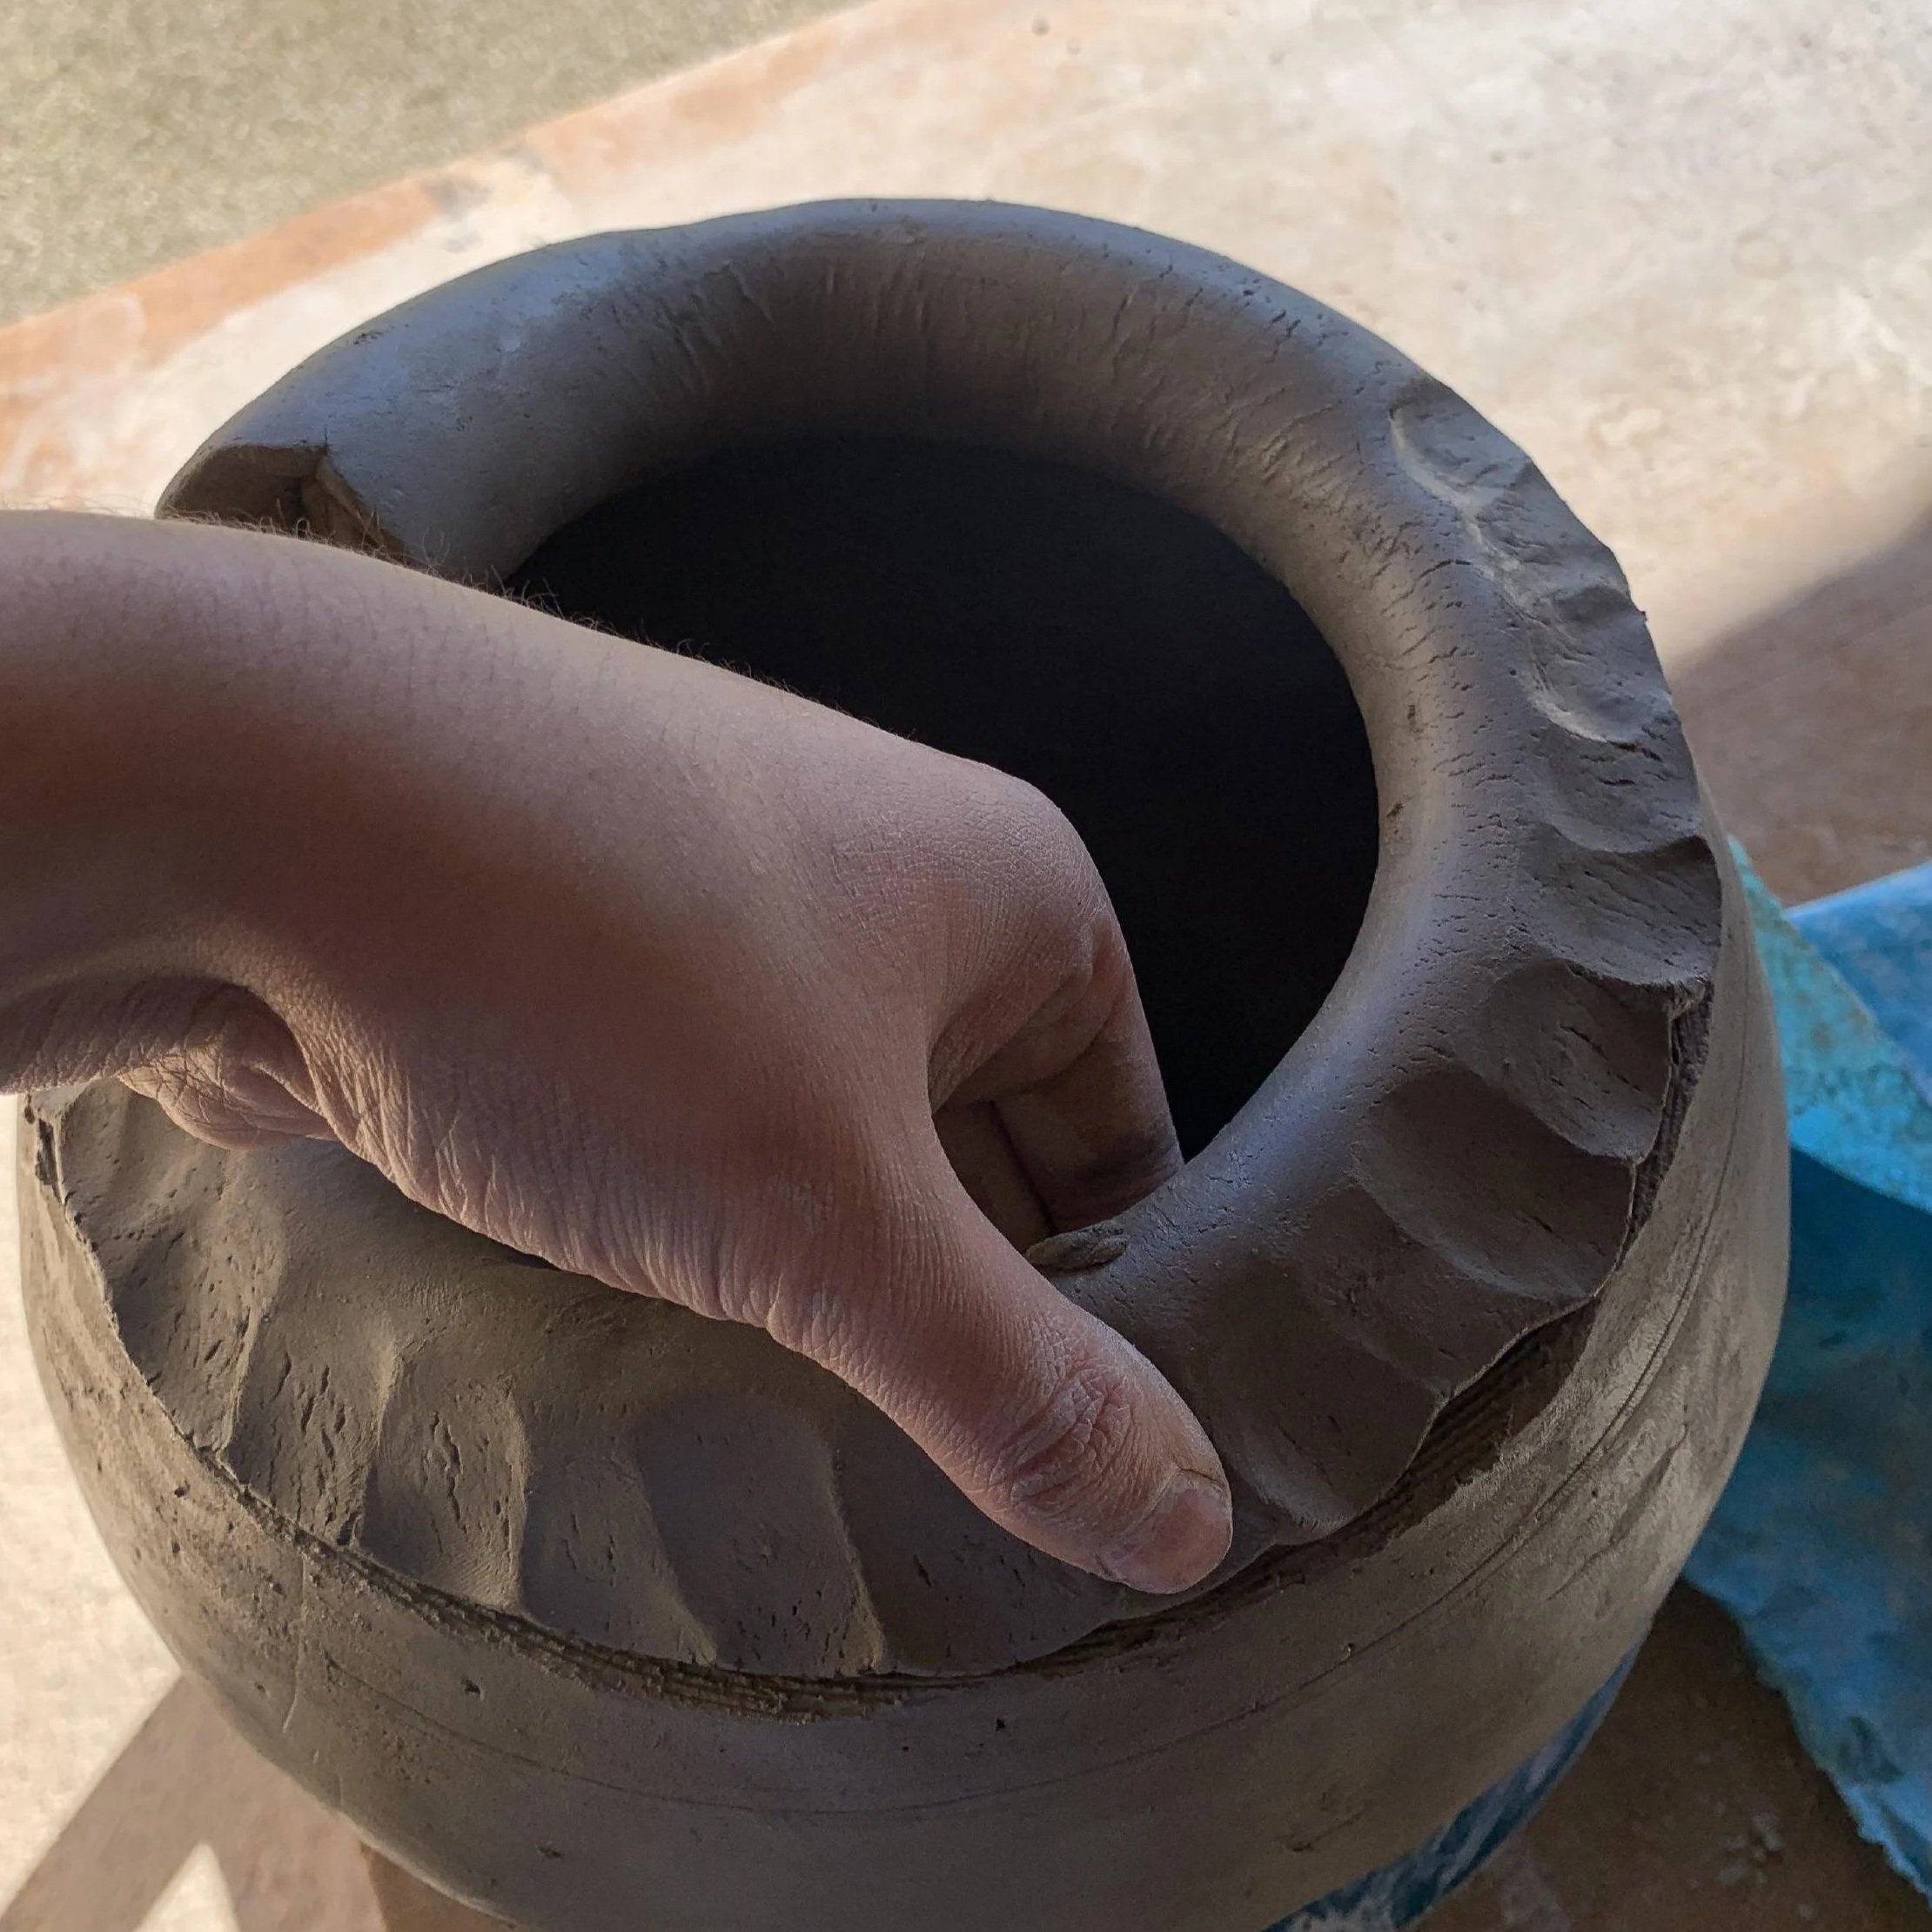
I utilized the coils I had prepared earlier and built a total of three amphorae. The first being quite stout, while the second two being slightly slimmer. All three had three legs with holes poked through to allow standing for display without a stand on a hard surface and could be hung.
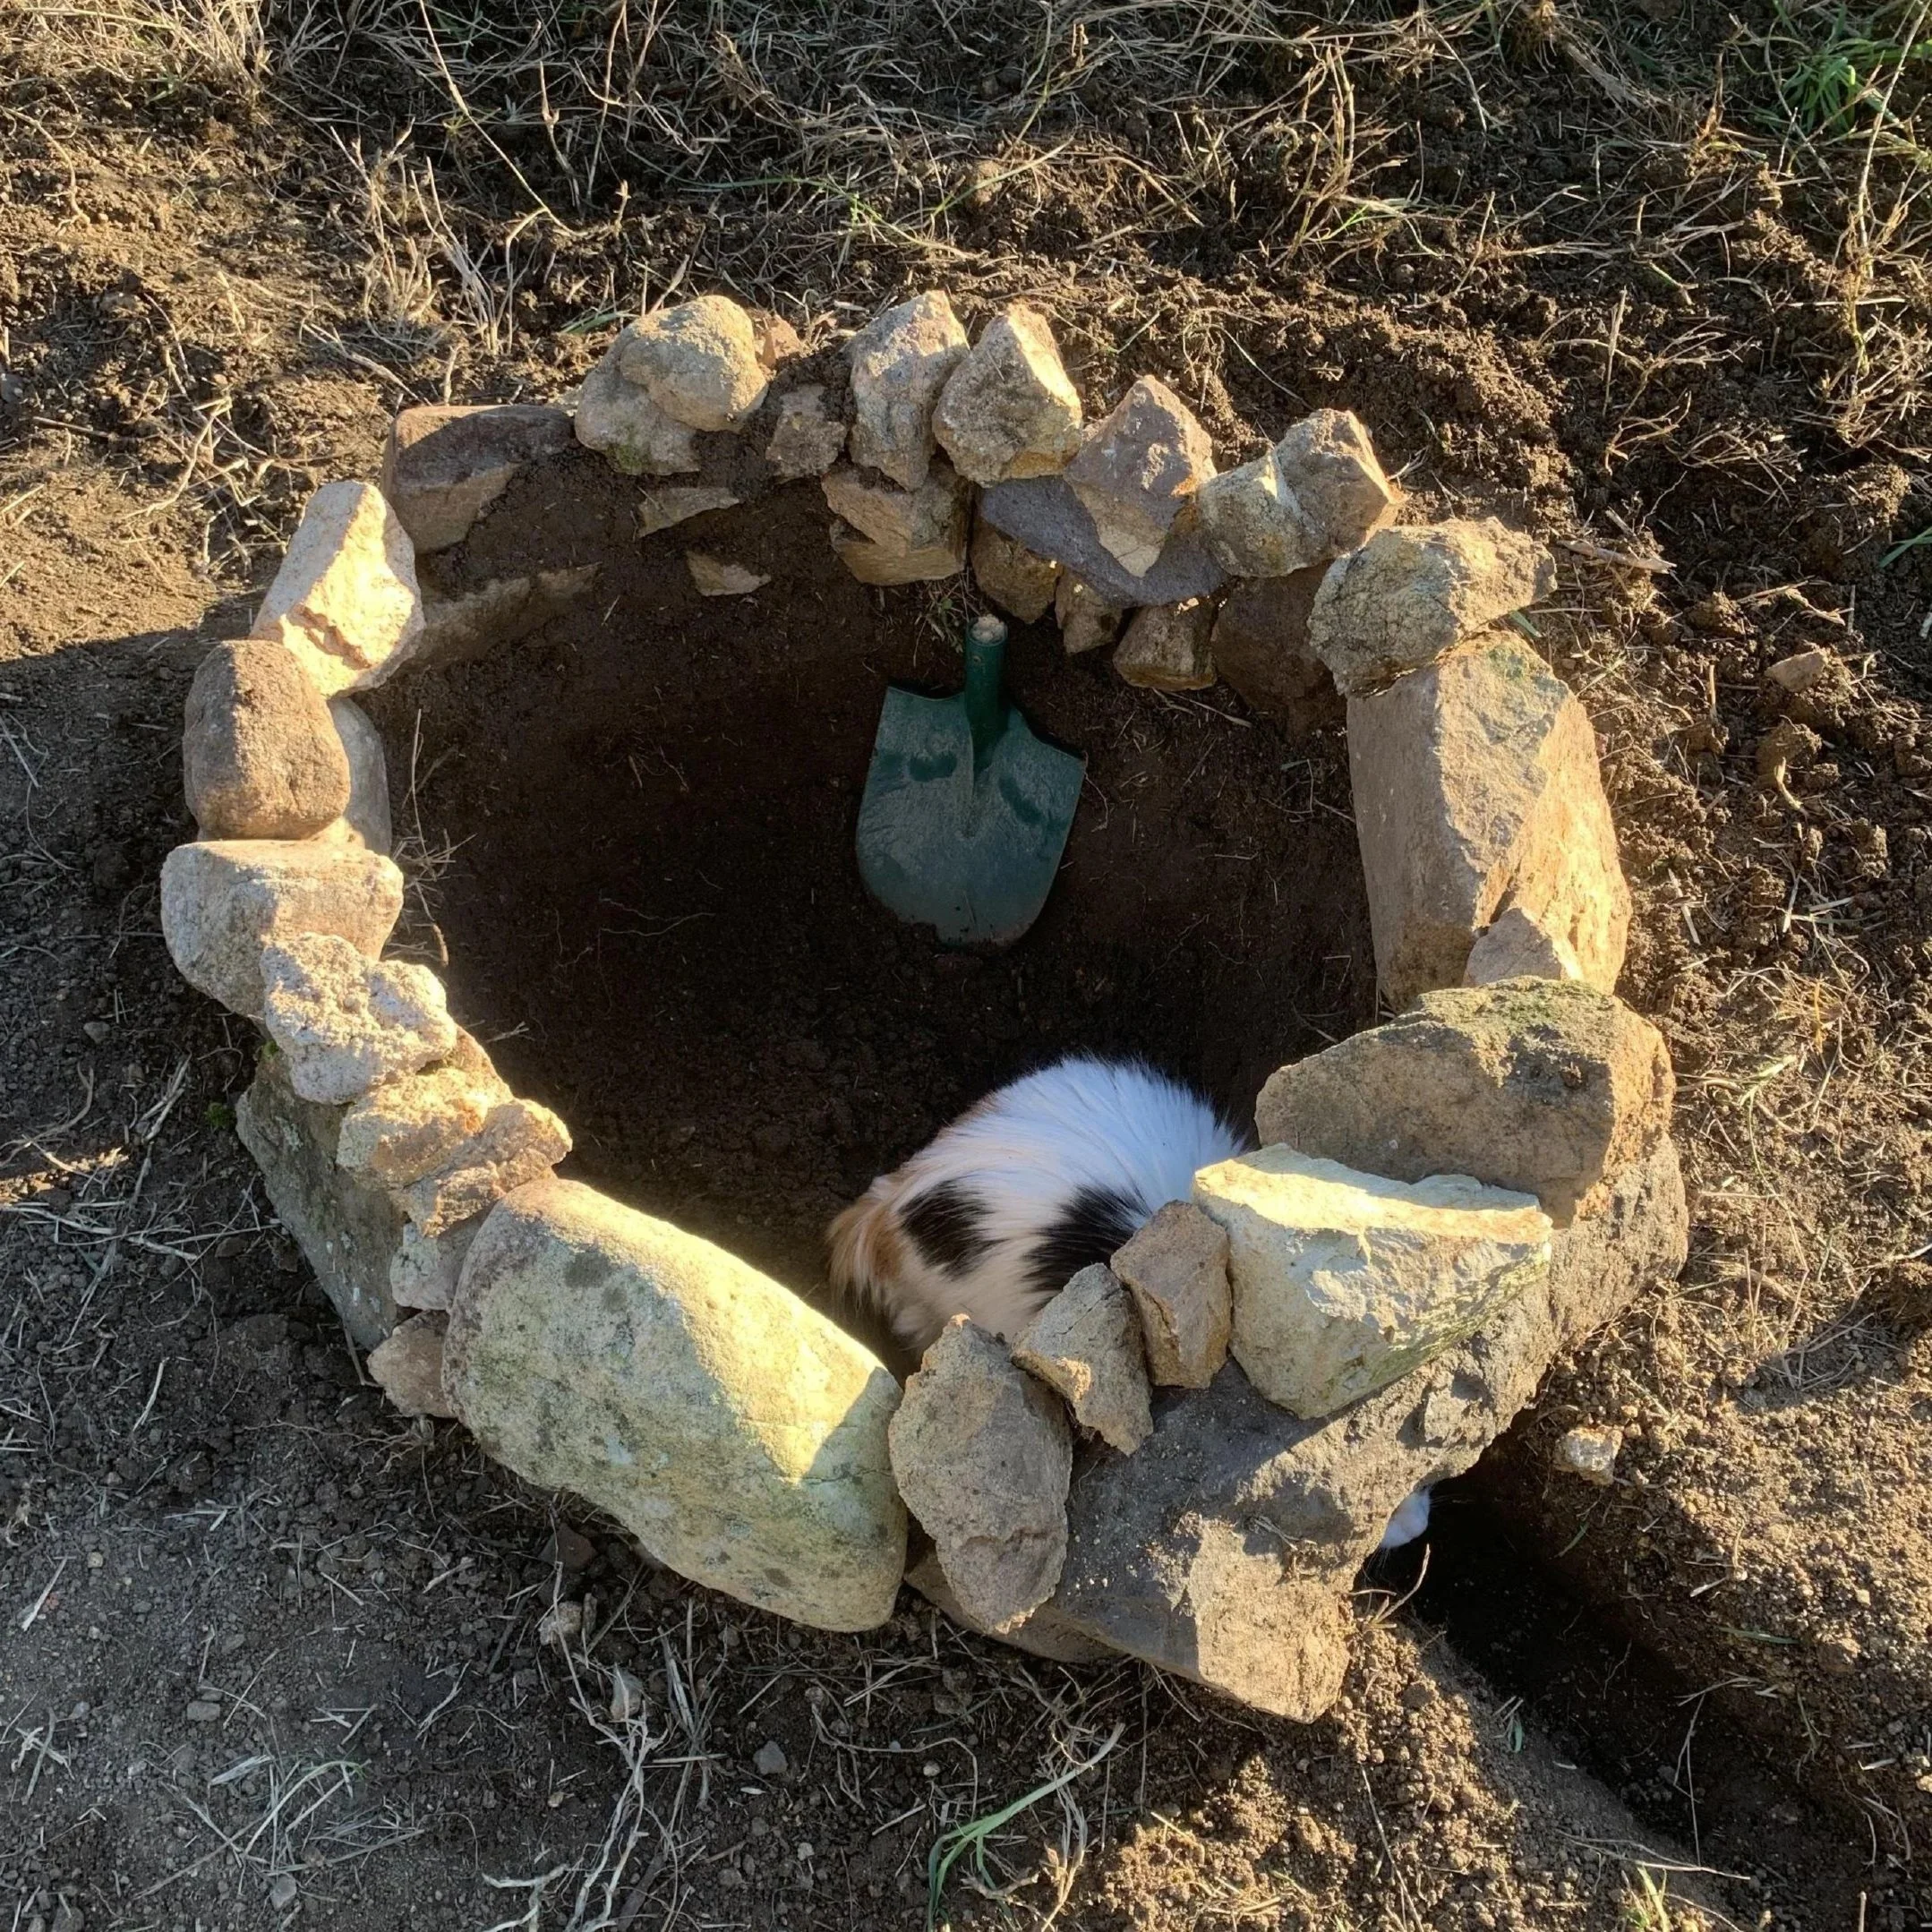
I finished excavating the pit that would be the kiln, then stacked fieldstones along the edge to extend the depth as there was a large stone at the bottom. This large stone would hold heat much better than just the dirt along the sides.
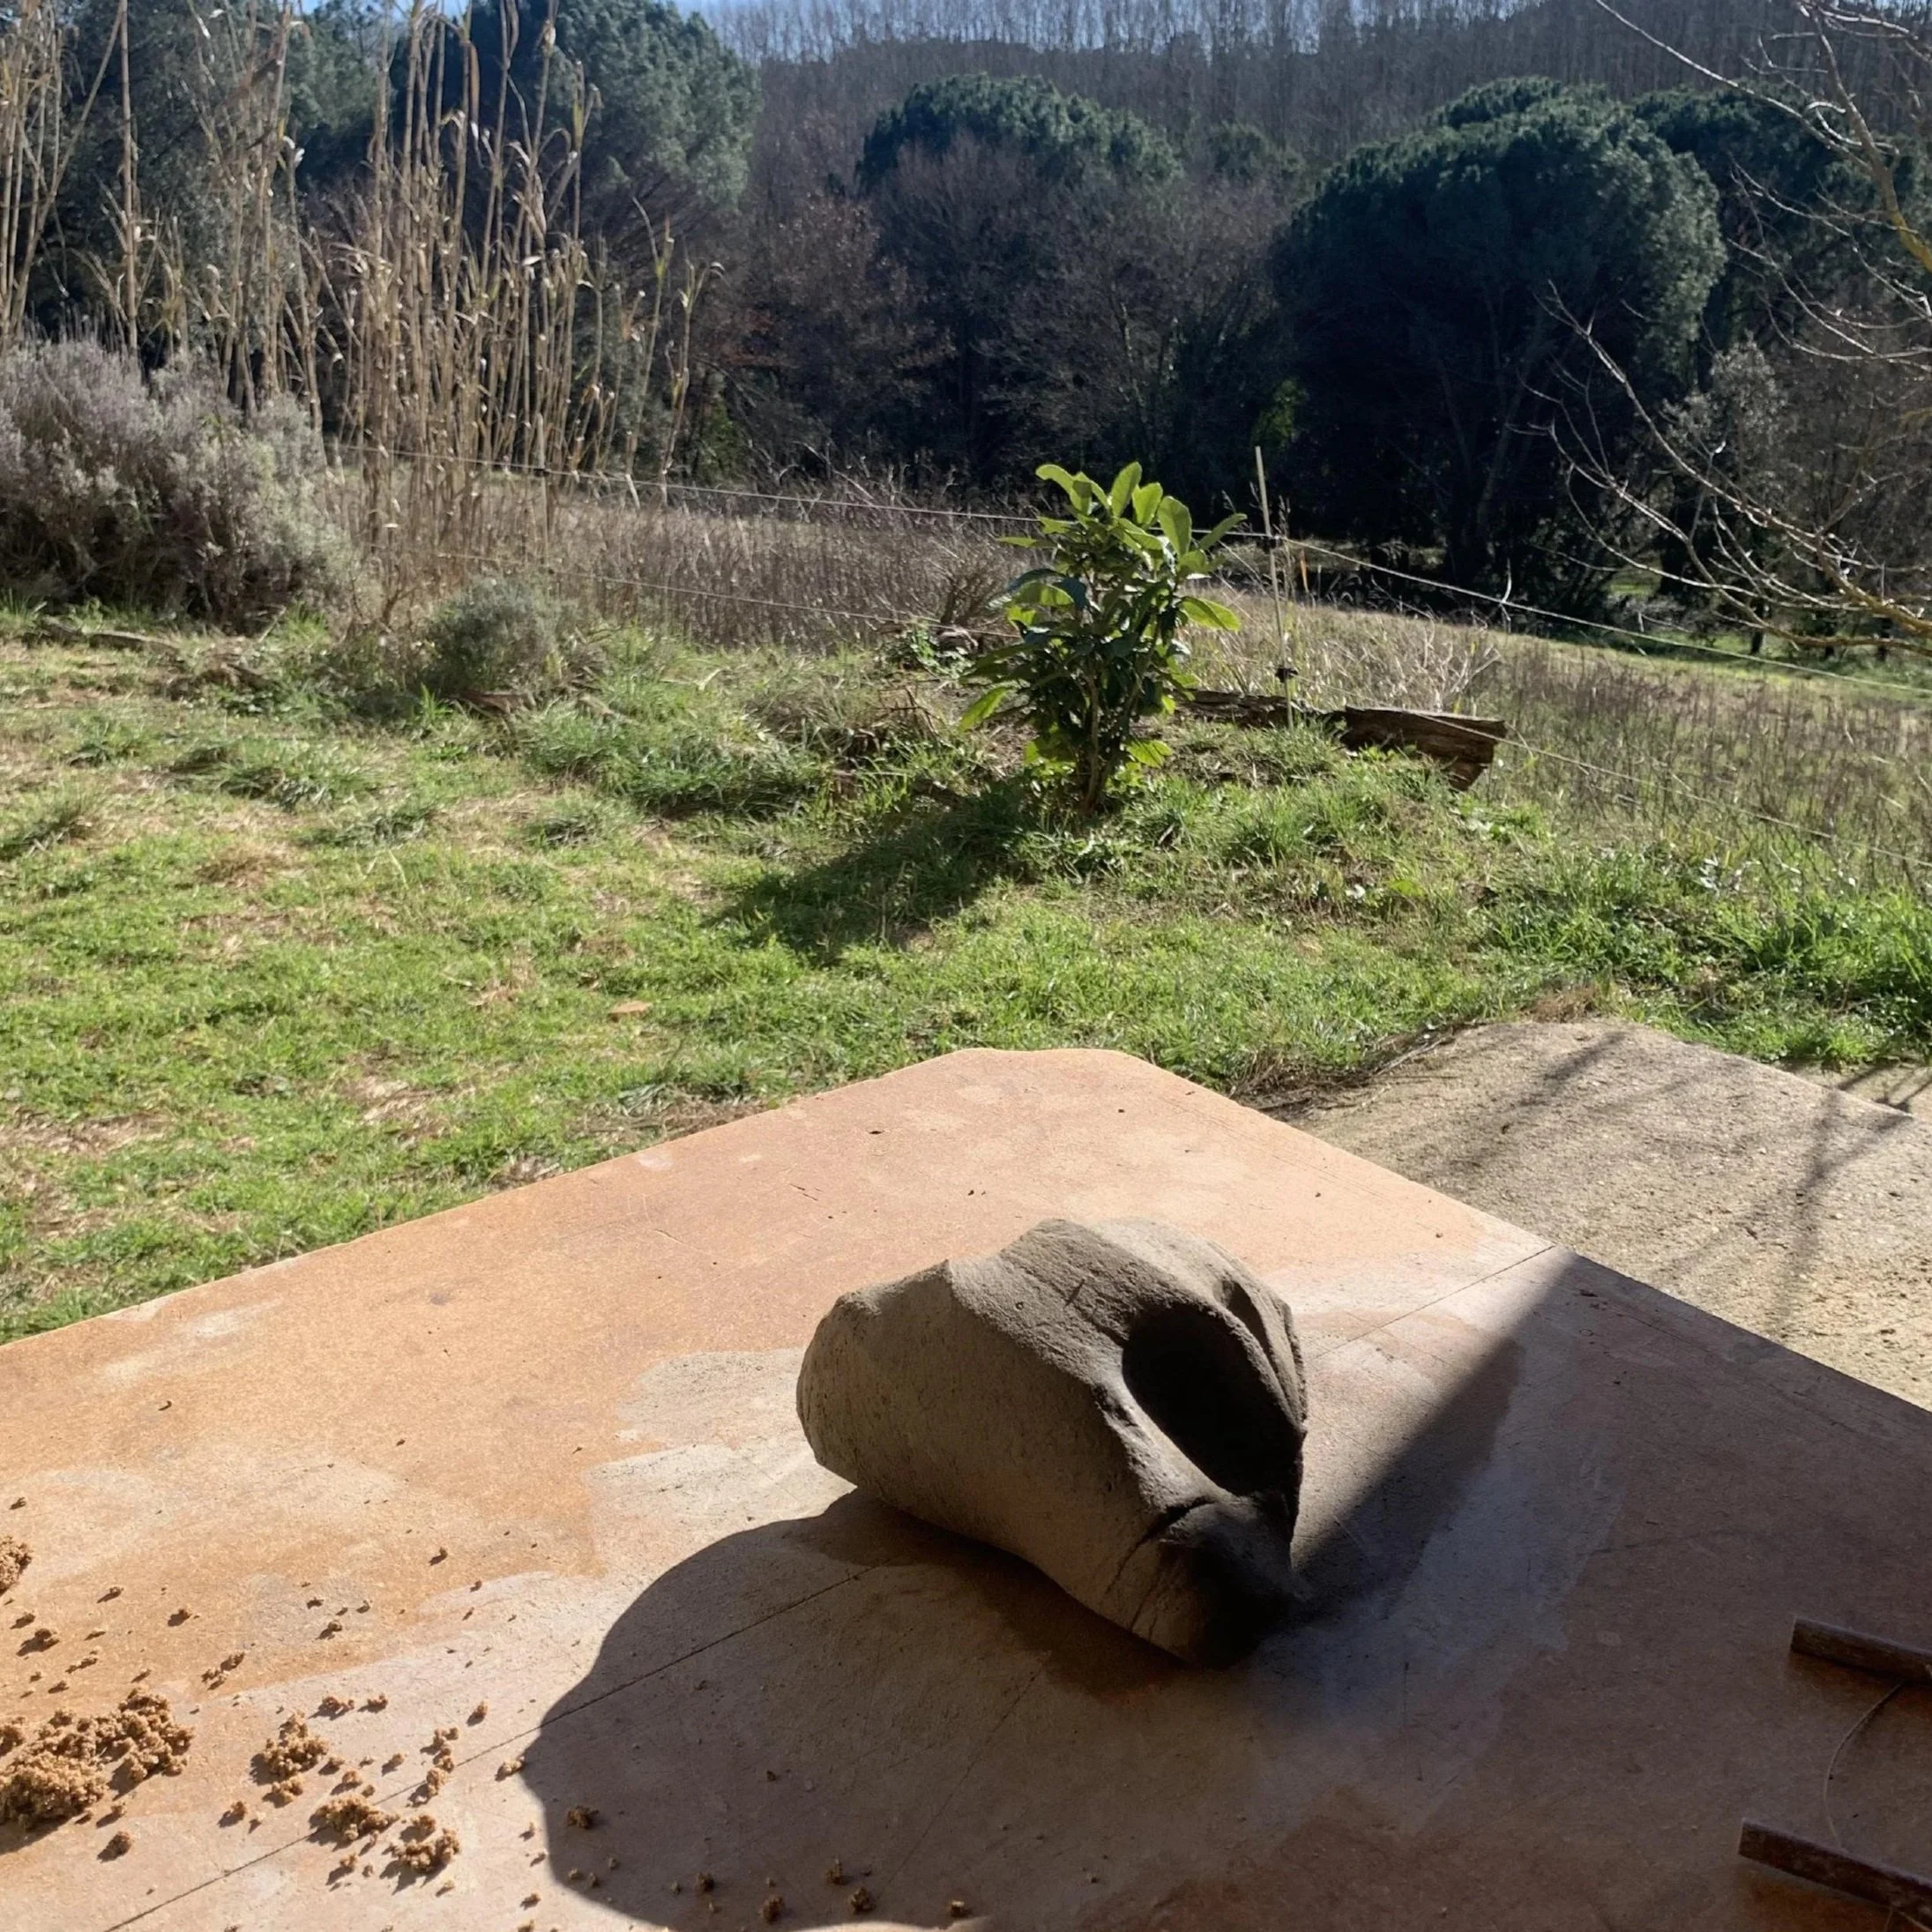
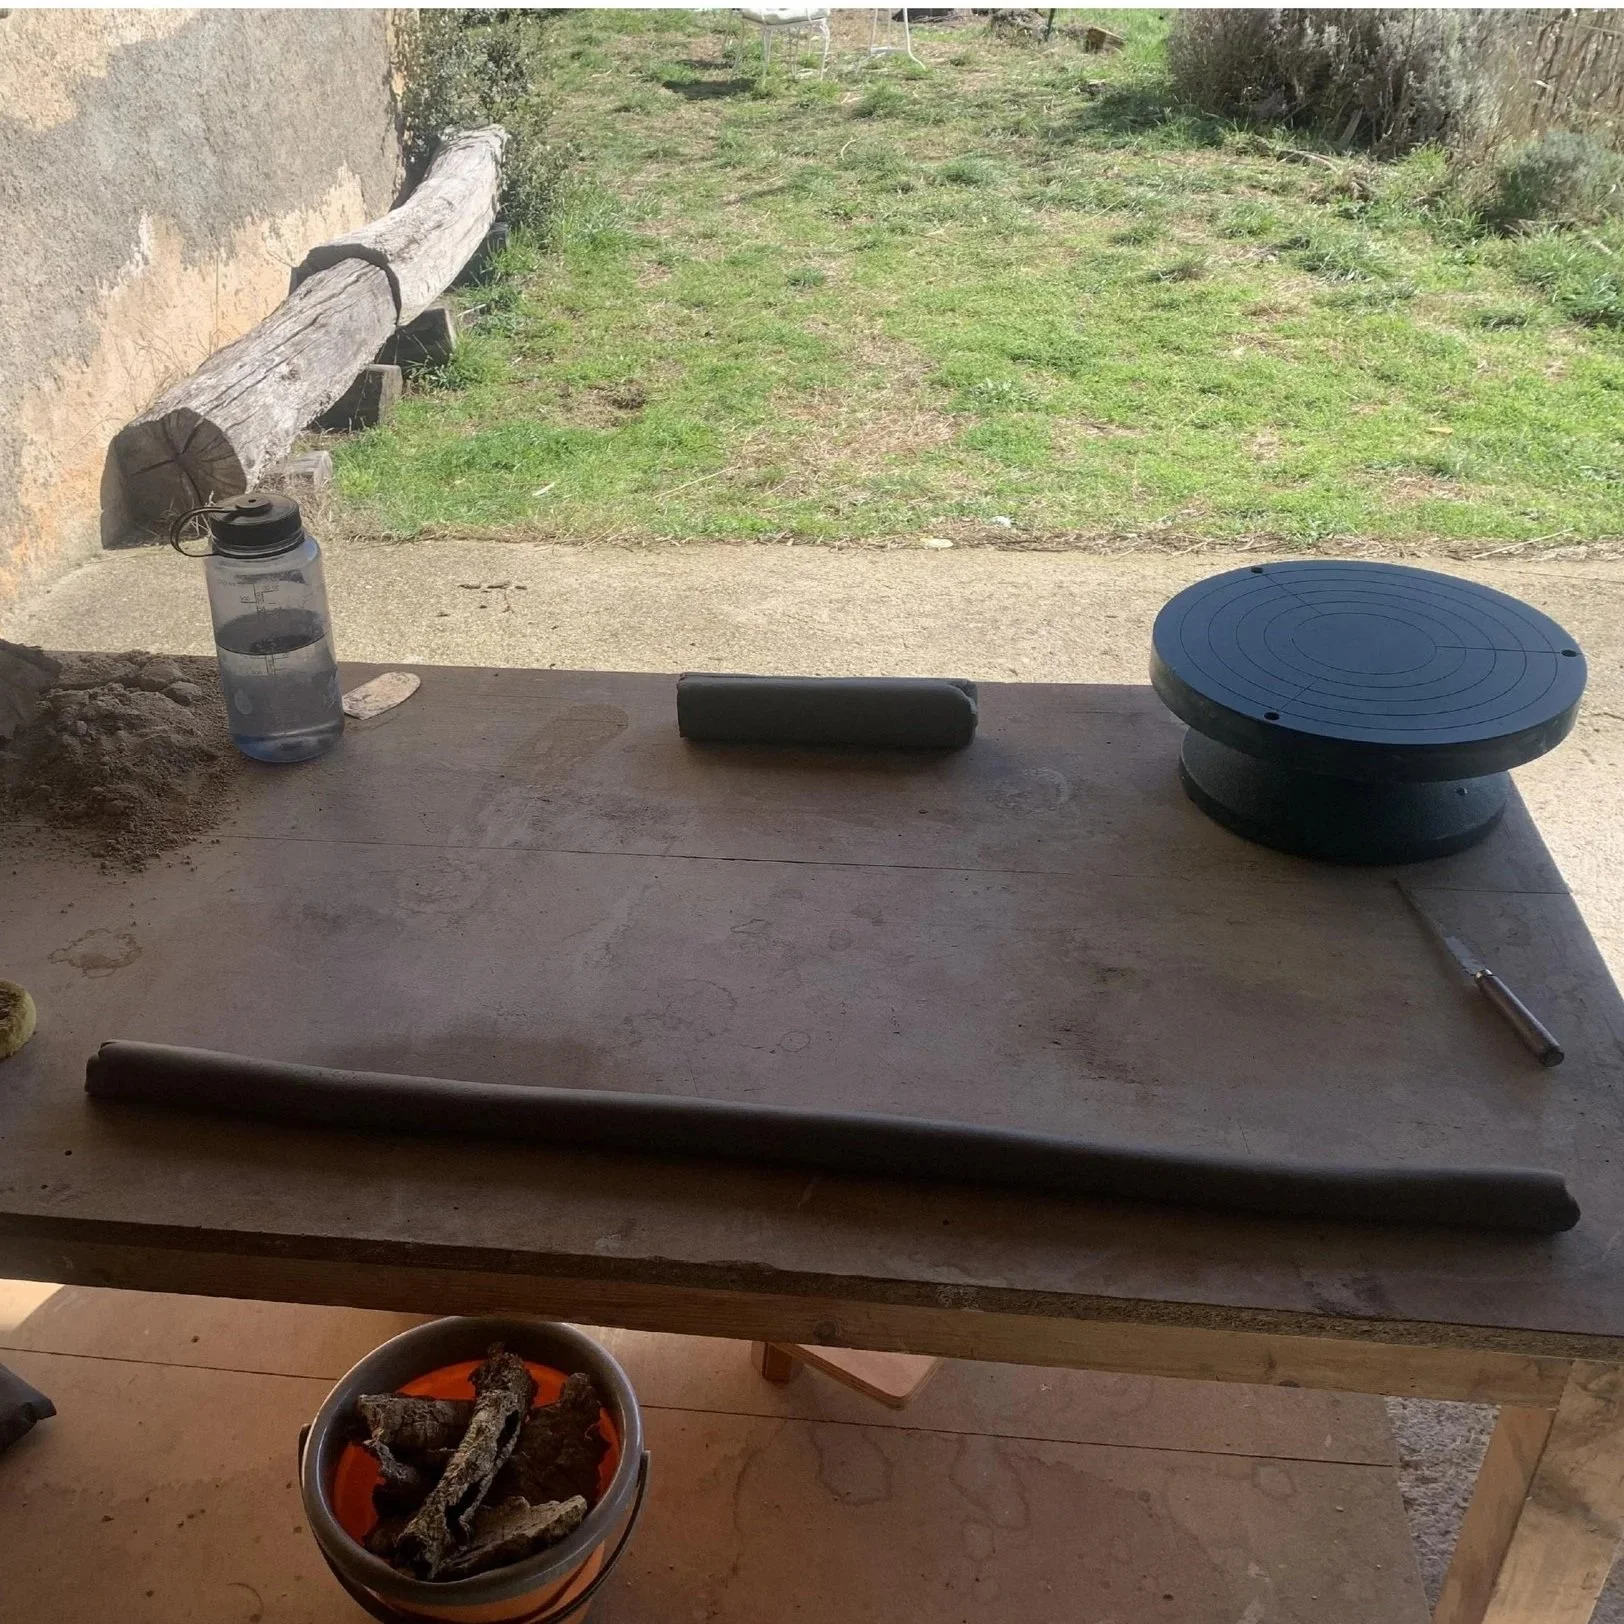
After initially wedging my clay, I began to portion it into coils and blocks for later use. My intent was to have enough coils to build a number of larger pots, while having enough chunks to create test pieces, bowls, and small sculptures.
After centering the pottery in the pit, I began to rebuild the fire around it. Aiming to bury to pieces in glowing coals. I needed the fire to get as hot as possible, hopefully around 1600 F (900 C) as that is when sintering occurs and the ceramic will no longer melt in water.
Riding high of my previous success I decided to toss one of my larger pots into the pit. Attempting to preheat the large thermal mass in preparation for a full firing.
Either the clay was too thick, there was trapped moisture, or I was too expeditious in my application of heat, as the entire side of the pot blew off. Initially chips and chunks I hoped to muscle through, but eventually I pulled it from the flame after a hole popped clean through. Fortunately, I repaired it, a talent of mine that my undergraduate professor would often point out.
While I was too nervous to attempt to fire another larger piece, I did have a number of smaller bowls and sculptural pieces.
While ~50% of the pieces included in the final firing failed (IE exploded), some are repairable, and others are mostly fine. They exhibit green, black, brown, and gray in a mottled pattern. The build-up of ash leaving a stunning speckle.